1. Introduction
This manual provides essential instructions for the safe and effective use of your SecuX W10 Crypto-Asset Hardware Wallet. The SecuX W10 is designed to securely store your digital assets, offering robust protection against various threats. Please read this manual thoroughly before operating the device and retain it for future reference.

Image 1.1: SecuX W10 Crypto-Asset Hardware Wallet.
2. Safety Information
- Keep Private Keys Secure: Your private keys are stored on a military-grade, tamper-resistant secure element chip within the device. Never share your private keys or recovery phrase with anyone.
- Tamper-Proof Packaging: Inspect the device packaging for any signs of tampering before opening. If the packaging appears compromised, do not use the device and contact customer support immediately.
- Recovery Phrase: The 24-word recovery phrase is crucial for restoring your assets if the device is lost, stolen, or damaged. Store it in a secure, offline location, away from the device. Do not store it digitally.
- Firmware Updates: Only perform firmware updates through official SecuX channels to maintain device security and functionality.
- Physical Security: Keep the device in a safe place to prevent physical damage or unauthorized access.
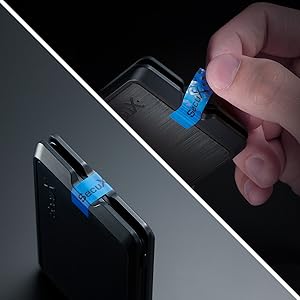
Image 2.1: Tamper-proof seal on device packaging. Always check for this seal upon receipt.
3. Package Contents
Verify that all items are present and in good condition upon opening the package:
- SecuX W10 Hardware Wallet
- USB Cable (for connection and charging)
- Recovery Seed Phrase Cards
- Quick Start Guide
4. Product Overview
The SecuX W10 is a compact and secure hardware wallet featuring a large touchscreen for intuitive interaction.
Key Features:
- Military-Grade Secure Element: Protects your private keys and PIN.
- 2.8" Color Touch Screen: For easy navigation and transaction verification.
- On-Screen Keyboard: Facilitates PIN entry and passphrase management.
- Cross-Platform Compatibility: Works with Windows, macOS, Chrome OS, and Linux computers.
- Extensive Cryptocurrency Support: Supports Bitcoin, Ethereum, Ripple, Litecoin, Bitcoin Cash, ERC-20 tokens, and many more.
- USB Connectivity: Connects via USB for power and data transfer.
Device Components:
- Touch Screen Display: Main interface for all operations.
- Power/Function Button: Located on the side, used to power on/off and confirm actions.
- Micro-USB Port: For connecting to a computer and charging.

Image 4.1: SecuX W10 privacy protection features.

Image 4.2: SecuX W10 connected to a laptop via USB cable.
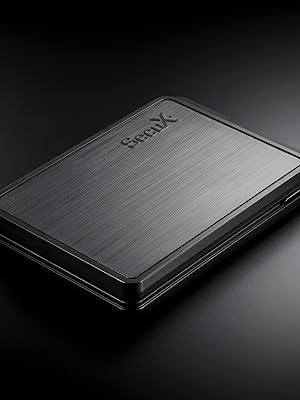
Image 4.3: Close-up view of the SecuX W10 device.
5. Setup
Follow these steps for initial device setup:
- Charge the Device: Connect the SecuX W10 to a power source using the provided USB cable. Ensure it is fully charged before proceeding.
- Power On: Press and hold the Power/Function button until the screen illuminates.
- Initial Configuration: Follow the on-screen prompts to select your language and set up a PIN. Use the touch screen keyboard for input.
- Generate Recovery Phrase: The device will guide you through generating a 24-word recovery phrase. Write this down accurately on the provided recovery cards and store them securely offline. Do not take photos or store it digitally.
- Verify Recovery Phrase: The device will ask you to verify a few words from your recovery phrase to ensure you have recorded it correctly.
- Connect to Computer: Connect the SecuX W10 to your computer via the USB cable.
- Install SecuX Wallet Application: Download and install the official SecuX Wallet application from the SecuX website onto your computer.
- Pair Device: Follow the instructions in the SecuX Wallet application to pair your W10 device.
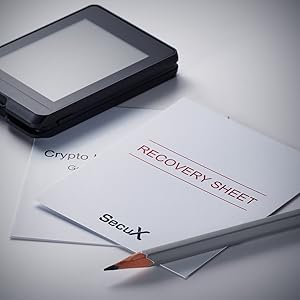
Image 5.1: Example of recovery phrase cards. Store these securely.
6. Operating Instructions
This section covers common operations with your SecuX W10 wallet.
6.1. Managing Cryptocurrencies
- Adding Accounts: In the SecuX Wallet application, select the cryptocurrency you wish to add and follow the prompts to create a new account.
- Receiving Assets: To receive cryptocurrency, select the desired account in the SecuX Wallet application. The application will display your public address. Verify this address on your W10 device's screen before sharing it.
- Sending Assets:
- In the SecuX Wallet application, select the account from which you want to send assets.
- Enter the recipient's address and the amount.
- Review the transaction details on both the computer screen and your W10 device.
- Confirm the transaction on your W10 device using the touch screen.

Image 6.1: SecuX W10 displaying an account portfolio with various cryptocurrencies.

Image 6.2: Visual representation of supported coins and tokens.
6.2. Security Features
- PIN Protection: Your device is protected by a PIN. Ensure you choose a strong, unique PIN and keep it confidential.
- On-Screen Verification: All transaction details are displayed on the device's screen for verification, protecting against malware that might attempt to alter transaction details on your computer.
- Hidden Wallet (Optional): The SecuX W10 supports a hidden wallet feature using a passphrase. This adds an extra layer of plausible deniability. Refer to the advanced settings in the SecuX Wallet application for setup.
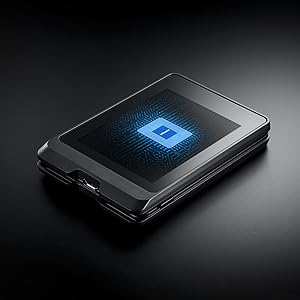
Image 6.3: The Infineon Security Chip, a military-grade secure element, embedded in the SecuX W10.
7. Maintenance
- Cleaning: Use a soft, dry cloth to clean the device. Avoid abrasive materials or harsh chemicals.
- Storage: Store the device in a cool, dry place, away from direct sunlight and extreme temperatures.
- Firmware Updates: Regularly check for and install official firmware updates to ensure optimal security and access to new features. The update process is designed to be streamlined.
8. Troubleshooting
| Issue | Possible Cause | Solution |
|---|---|---|
| Device not powering on. | Low battery or faulty cable. | Charge the device using the provided USB cable. Try a different USB port or cable. |
| Cannot connect to computer. | Driver issue, cable problem, or software not running. | Ensure the SecuX Wallet application is running. Try a different USB port or cable. Reinstall device drivers if necessary. |
| Transaction not confirming. | Insufficient network fees, network congestion, or incorrect details. | Verify transaction details on the device. Check network status and adjust fees if needed. Ensure sufficient funds. |
| Forgotten PIN. | PIN lost or forgotten. | If you forget your PIN, you will need to reset the device and recover your assets using your 24-word recovery phrase. |
For further assistance, refer to the Support section.
9. Specifications
| Feature | Detail |
|---|---|
| Model Name | W10 |
| Brand | SecuX |
| Memory Storage Capacity | 64 GB |
| Hardware Interface | USB |
| Special Feature | Touch Screen |
| Connectivity Technology | USB |
| Flash Memory Type | USB_Micro-B |
| Compatible Devices | Laptop |
| Color | Black |
| Item Dimensions (D x W x H) | 0.51"D x 3.5"W x 0.51"H |
| Item Weight | 1.7 Ounces |
10. Warranty
The SecuX W10 Hardware Wallet comes with a 1 Year Manufacturer Warranty. This warranty covers defects in materials and workmanship under normal use. For warranty claims or detailed terms and conditions, please contact SecuX customer support.
11. Support
For technical assistance, product inquiries, or support, please use the following resources:
- Official Website: Visit the SecuX official website for FAQs, firmware updates, and detailed product information.
- Email Support: Contact SecuX support via email at support@secuxtech.com.
- Online Resources: The SecuX website provides a comprehensive list of supported coins and tokens, along with guides for various operations.

Image 11.1: SecuX Official Logo.