
1. Safety Information
Please read and understand this entire manual before attempting to assemble, operate, or install the product. Failure to follow these instructions could result in electric shock, fire, or serious personal injury.
- Electrical Safety: All electrical wiring must be in accordance with national and local electrical codes. If you are unfamiliar with wiring, consult a qualified electrician.
- Power Disconnection: Before beginning installation or performing any maintenance, disconnect power by turning off the circuit breakers to the fan's electrical box.
- Mounting Support: The outlet box and support structure must be securely mounted and capable of reliably supporting a minimum of 35 lbs (15.9 kg). Use only UL/CUL listed outlet boxes marked "Acceptable for Fan Support."
- Blade Clearance: Ensure there is adequate clearance from the floor to the blade trailing edge (at least 7 feet / 2.1 meters) and from the blades to any walls or obstructions.
- Blade Attachment: Do not bend the blade holders during installation or cleaning. Insert objects into the path of the fan blades.
- Integrated LED: The LED light kit is integrated and not user-serviceable. Do not attempt to replace individual LED components.
2. Product Overview
The Monte Carlo Discus Classic II is a 44-inch ceiling fan featuring a polished nickel finish, five silver/American walnut reversible blades, and an integrated LED light. It is designed for indoor use and controlled by a 3-speed pull chain.
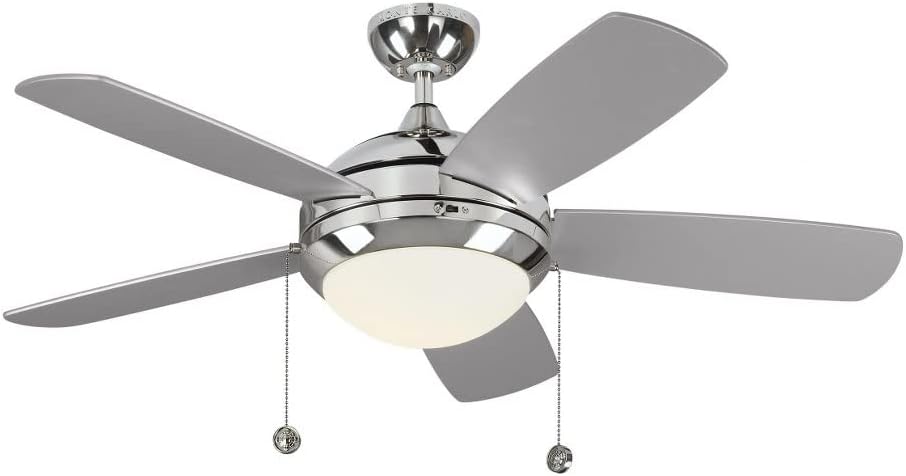
Figure 2.1: Monte Carlo Discus Classic II 44-inch ceiling fan, polished nickel finish.
3. Setup and Installation
3.1 Pre-Installation
- Unpack the fan and check for any damage or missing parts. Refer to the parts list in your packaging.
- Ensure the installation location has a suitable electrical junction box capable of supporting the fan's weight.
- Turn off power at the circuit breaker before starting any electrical work.
3.2 Mounting Options
This fan can be installed on a flat ceiling with the included hardware or on sloped ceilings up to 30 degrees using the provided vaulted canopy.

Figure 3.1: Detail of the fan's motor housing and integrated LED light.
3.3 Electrical Connections
Connect the fan's electrical wires to the household wiring according to the wiring diagram provided in your separate installation guide. It is highly recommended to have this step performed by a qualified electrician to ensure safety and compliance with electrical codes.
3.4 Blade Attachment
Attach the five fan blades to the motor housing using the provided screws. Ensure all screws are tightened securely. The blades are reversible, offering a choice between silver and American walnut finishes.
4. Operation
The Discus Classic II fan is operated using two pull chains located on the fan's motor housing.
- Fan Speed Control: One pull chain controls the fan's three speeds (High, Medium, Low) and turns the fan off. Pull the chain repeatedly to cycle through the speeds.
- Light Control: The second pull chain controls the integrated LED light, turning it on or off.
- Optional Remote Control: A handheld or wall-mount remote control is compatible with this fan but is sold separately. Refer to the remote control's instructions for pairing and operation.
5. Maintenance
Regular maintenance helps ensure the longevity and optimal performance of your ceiling fan.
- Cleaning: Periodically clean the fan blades and motor housing with a soft, damp cloth. Do not use abrasive cleaners or solvents, as these can damage the finish.
- Hardware Check: Annually, check all screws on the motor housing and blade attachments to ensure they are secure. Tighten any loose screws.
- Lubrication: The fan motor features permanently lubricated bearings and does not require additional oiling.
6. Troubleshooting
Before attempting any repairs, ensure the power to the fan is disconnected at the circuit breaker.
| Problem | Possible Cause | Solution |
|---|---|---|
| Fan does not start | No power to the fan; Loose wire connections; Pull chain not activated. | Check circuit breaker; Verify all wire connections are secure; Pull the fan speed chain to ensure it is not in the "off" position. |
| Fan wobbles | Loose blade screws; Unbalanced blades; Loose mounting hardware. | Tighten all blade screws; Use a blade balancing kit (sold separately) if needed; Ensure mounting bracket and downrod are securely fastened. |
| Light does not work | Loose wire connections; Pull chain not activated. | Check light kit wire connections; Pull the light chain to ensure it is in the "on" position. |
| Noisy operation | Loose screws; Motor hum (normal); Blades hitting an obstruction. | Tighten all screws; Ensure no objects are in the fan's path. If motor hum is excessive, consult customer support. |
7. Specifications
| Feature | Detail |
|---|---|
| Model Number | 5DIC44PND-V1 |
| Brand | Monte Carlo |
| Fan Diameter | 44 inches |
| Height (Ceiling to Light) | 15.1 inches (with 4.5" downrod) |
| Blades | 5 Reversible Blades (Silver / American Walnut) |
| Blade Pitch | 12 degrees |
| Motor | 153 x 18 mm Torque-Induction Motor |
| Airflow (CFM) | 2854 (Downrod Mount) |
| Light Kit | Integrated 20W LED (3000K, 1060 Lumens, 90 CRI) |
| Control Method | 3-Speed Pull Chain (Remote compatible, sold separately) |
| Finish | Polished Nickel |
| Voltage | 120 Volts |
| Indoor/Outdoor Usage | Indoor |
| Certifications | CUL Approved |
| Item Weight | 17.42 pounds |
7.1 Energy Information
Energy consumption details for different mounting configurations are provided below.

Figure 7.1: Energy Guide for Downrod Mount.

Figure 7.2: Energy Guide for Flush Mount.
8. Warranty Information
No specific warranty information is provided in the product details. For warranty inquiries, please contact Monte Carlo customer support directly.
9. Customer Support
For further assistance, technical support, or to inquire about replacement parts, please contact Monte Carlo customer service.
- Manufacturer: Monte Carlo
- Online Store: Visit the Monte Carlo Store on Amazon

