
1. Introduction
This manual provides detailed instructions for the safe and effective use of the Resin Pro Transparent Epoxy Resin 3.2KG Kit and the accompanying Shiny Shield Release Film. This system is designed for various DIY projects, including the creation of wood and resin river tables, coating surfaces, and other craft applications. Please read all instructions carefully before beginning your project.
The kit includes:
- Resin Pro Transparent Epoxy Resin (Component A and Component B, total 3.2 kg)
- Shiny Shield Release Film (3m x 96cm)

Image 1: An example of a finished wood river table, showcasing the clear, blue-tinted epoxy resin filling the natural gaps in the wood.
2. Safety Information
Working with epoxy resin requires adherence to safety precautions to prevent injury and ensure proper application. Always prioritize safety.
- Ventilation: Work in a well-ventilated area. If adequate ventilation is not possible, use a respirator with organic vapor cartridges.
- Personal Protective Equipment (PPE): Wear appropriate PPE, including chemical-resistant gloves (nitrile is recommended), safety glasses or goggles, and long-sleeved clothing to protect skin.
- Skin Contact: Avoid direct skin contact. If contact occurs, wash immediately with soap and water. Do not use solvents to clean skin.
- Eye Contact: In case of eye contact, flush immediately with plenty of water for at least 15 minutes and seek medical attention.
- Ingestion: Do not ingest. If swallowed, do not induce vomiting. Seek immediate medical attention.
- Storage: Store resin components in their original sealed containers in a cool, dry place, away from direct sunlight and out of reach of children and pets.
- Disposal: Dispose of unused resin and mixed waste according to local regulations. Do not pour down drains.
3. Setup and Preparation
Proper preparation is crucial for successful resin casting. Ensure your workspace and materials are ready before mixing.
- Prepare Your Workspace: Select a clean, level, and dust-free area. Cover your work surface with plastic sheeting or a drop cloth to protect it from spills. Maintain a consistent room temperature, ideally between 20-25°C (68-77°F), as temperature affects resin cure time and viscosity.
- Gather Materials: Ensure you have all necessary tools: mixing containers, stirring sticks, measuring cups, safety gear, and the wood pieces for your project.
- Prepare the Mold/Formwork: If creating a river table or similar casting, construct a sturdy formwork for your wood pieces. The formwork must be watertight.
- Position the Wood: Place the main wood pieces that will form the base of your project onto the prepared work surface or within your formwork. Ensure they are stable and correctly aligned.
- Apply Shiny Shield Release Film: The Shiny Shield Release Film is designed to prevent the resin from adhering to your formwork, allowing for easy demolding and a smooth, glossy finish.
- Unroll the Shiny Shield Release Film.
- Carefully apply the adhesive side of the film to the interior surfaces of your formwork. Ensure the film is smooth, without wrinkles, bubbles, or holes, to create a planar, glossy surface for the resin.
- For external joints of the formwork, consider applying silicone paste to create rounded edges and prevent sharp corners on the finished piece. This also helps seal any potential leaks.
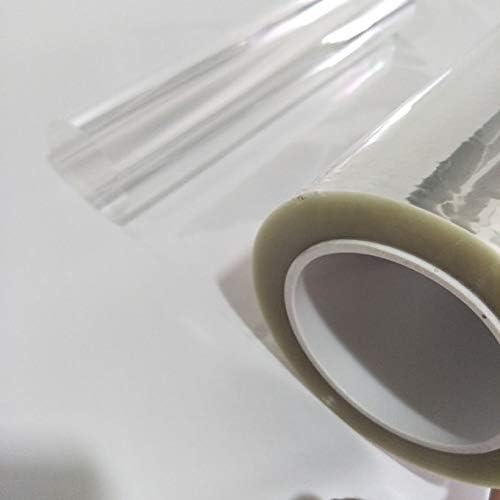
Image 3: A roll of transparent Shiny Shield release film, ready for application to a formwork.

Image 2: Example of a wood river table project set up within a formwork, secured with clamps. The wood pieces are positioned, ready for resin pouring.
4. Operating Instructions
Follow these steps for mixing and applying the Resin Pro Transparent Epoxy Resin.
- Measure Components: The Resin Pro Transparent Epoxy Resin is a two-component system (Component A and Component B). It is crucial to measure both components accurately by weight according to the specified mixing ratio. For this 3.2 kg kit, it is a 1:1 ratio by weight (1.6 kg of Component A + 1.6 kg of Component B).
- Mix Thoroughly: Pour Component A into a clean mixing container, then add Component B. Mix the two components thoroughly for at least 3-5 minutes using a clean stirring stick. Scrape the sides and bottom of the container to ensure all resin is fully incorporated. Incomplete mixing will result in soft or tacky spots in the cured resin.
- Pour the Resin: Carefully pour the mixed resin into your prepared formwork or onto your surface. Pour slowly to minimize air bubbles. For deep pours, it may be necessary to pour in layers, allowing each layer to partially cure before adding the next. Refer to the product's technical data sheet for maximum pour depths per layer.
- Remove Bubbles: After pouring, air bubbles may rise to the surface. These can be removed using a heat gun or a small torch (briefly waving it over the surface) to release trapped air. Do not overheat the resin.
- Curing: Allow the resin to cure in a dust-free environment at the recommended temperature. The resin will typically be tack-free within 24-48 hours, with a full cure achieved in 7 days, depending on temperature and humidity. Avoid disturbing the project during the curing process.

Image 4: The Resin Pro Transparent Epoxy Resin kit, showing Component A and Component B containers.
5. Maintenance
Once cured, Resin Pro Transparent Epoxy Resin creates a durable and easy-to-maintain surface.
- Cleaning: Clean cured resin surfaces with a soft cloth and mild soap and water. Avoid abrasive cleaners or harsh chemicals, which can dull or damage the finish.
- Protection: While the resin offers high resistance to UV rays and mechanical stress, prolonged exposure to direct sunlight or extreme temperatures should be avoided to maintain its clarity and integrity over time.
- Storage of Unused Components: Ensure lids are tightly sealed on both Component A and Component B containers after use. Store in a cool, dry, dark place to maximize shelf life.
6. Troubleshooting Common Issues
Here are solutions to common problems encountered when working with epoxy resin:
- Tacky or Soft Spots: This is almost always due to improper mixing. Ensure components A and B are measured accurately by weight and mixed thoroughly for the recommended time, scraping the sides and bottom of the container.
- Excessive Bubbles:
- Cause: Mixing too vigorously, pouring too quickly, or working in a cold environment.
- Solution: Mix slowly, pour slowly, and ensure your workspace is at the recommended temperature. Use a heat gun or torch after pouring to release surface bubbles.
- Uneven Curing/Warping:
- Cause: Inconsistent temperature during curing, or uneven application.
- Solution: Maintain a stable temperature throughout the curing process. Ensure the surface is level before pouring.
- Resin Not Curing:
- Cause: Incorrect mixing ratio, low temperature, or expired product.
- Solution: Double-check your measurements. Ensure the ambient temperature is within the recommended range. Check the product's shelf life.
7. Product Specifications
| Feature | Detail |
|---|---|
| Product Name | Resin Pro Transparent Epoxy Resin |
| Total Weight | 3.2 kg (1.6 kg Component A + 1.6 kg Component B) |
| Mixing Ratio | 1:1 by weight (Component A : Component B) |
| Color (Cured) | Transparent |
| Special Features | High UV resistance, high transparency, excellent mechanical resistance, good chemical resistance, self-leveling, glossy surface. |
| Release Film | Shiny Shield (3m x 96cm), transparent, adhesive, easily removable, leaves no residue. |
| Recommended Application Temperature | 20-25°C (68-77°F) |
| ASIN | B07NDJR2KZ |
| Manufacturer | Resin Pro |
8. Warranty and Support
Resin Pro is committed to customer satisfaction. For any questions regarding product application, special coloring, or specific project recommendations, please contact Resin Pro customer support. Information regarding returns and replacements can be found on the purchase platform.
This product is manufactured in Italy, adhering to high-quality standards.


