1. Introduction
Thank you for choosing the Vocal-Star WM-880 Dual Wireless Microphone System. This manual provides essential information for the proper setup, operation, and maintenance of your new wireless microphone system. Please read this manual thoroughly before use to ensure optimal performance and to prevent damage.
2. Safety Information
- Do not expose the unit to rain or moisture to avoid fire or electric shock.
- Do not open the casing. There are no user-serviceable parts inside. Refer all servicing to qualified service personnel.
- Ensure proper ventilation around the receiver unit.
- Use only the specified power adapter for the receiver.
- Dispose of batteries responsibly according to local regulations.
- Keep the system away from strong electromagnetic fields.
3. Package Contents
Please check that all items are present and in good condition:
- 1 x Vocal-Star WM-880 Wireless Receiver
- 2 x Vocal-Star Wireless Microphones
- 1 x Power Adapter for Receiver
- 1 x Audio Connection Cable (3.5mm Jack)
- 1 x User Manual
4. Product Overview
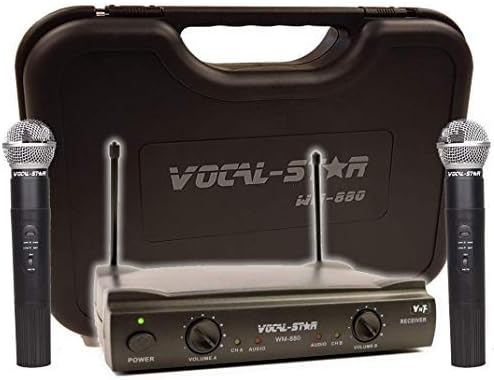
Image: The Vocal-Star WM-880 Dual Wireless Microphone System includes a black receiver unit with two antennas, two black handheld wireless microphones, and a black hard-shell carrying case. The receiver features power and volume controls for each microphone channel.
Receiver Unit
- Power Button: Turns the receiver on/off.
- Volume Controls (Volume A, Volume B): Adjusts the output level for each microphone channel independently.
- Antennas: For receiving wireless signals from the microphones.
- Audio Output: Connects to your amplifier, mixer, or speaker system.
Wireless Microphones
- Power Switch: Turns the microphone on/off.
- Battery Compartment: Houses the batteries (typically AA, not included).
- Microphone Grille: Protects the microphone capsule.
5. Setup
- Position the Receiver: Place the receiver unit on a stable surface, away from other electronic devices that may cause interference. Extend the antennas vertically for optimal signal reception.
- Connect Power: Connect the provided power adapter to the DC IN port on the receiver and plug it into a power outlet.
- Connect Audio Output: Use the audio connection cable to connect the receiver's audio output to the input of your amplifier, mixer, or powered speaker. Ensure the volume on your audio system is initially set to a low level.
- Install Microphone Batteries: Unscrew the bottom part of each microphone to access the battery compartment. Insert the required batteries (e.g., 2x AA per microphone, not included) ensuring correct polarity (+/-). Screw the bottom part back on securely.
- Power On: Press the power button on the receiver. The power indicator light should illuminate. Turn on each microphone using its power switch.
6. Operating Instructions
- Volume Adjustment: Slowly increase the volume on your amplifier/mixer and then adjust the individual Volume A and Volume B controls on the receiver to achieve the desired sound level for each microphone.
- Microphone Usage: Hold the microphone approximately 2-6 inches (5-15 cm) from your mouth for optimal sound pickup. Avoid covering the microphone grille with your hand.
- Range: The effective operating range of the wireless system can vary depending on environmental conditions, obstacles, and interference. Maintain a clear line of sight between the microphones and the receiver whenever possible.
- Turning Off: When finished, turn off the microphones first, then power off the receiver. This helps prevent unexpected noises through your sound system.
7. Maintenance
- Cleaning: Use a soft, dry cloth to clean the receiver and microphones. Do not use liquid cleaners or abrasive materials.
- Battery Replacement: Replace microphone batteries when the low battery indicator (if present) illuminates or when sound quality degrades. Always replace both batteries in a microphone at the same time.
- Storage: When not in use for extended periods, remove batteries from the microphones and store the system in a cool, dry place, preferably in its original packaging or a protective case.
8. Troubleshooting
| Problem | Possible Cause | Solution |
|---|---|---|
| No sound from microphones | Microphones or receiver not powered on; low batteries; incorrect audio connection; receiver volume too low. | Ensure all units are powered on. Replace batteries. Check audio cable connections. Increase receiver volume. |
| Interference or static | Other wireless devices nearby; receiver too far from microphones; obstacles blocking signal. | Move receiver away from other electronics. Reduce distance between microphones and receiver. Ensure clear line of sight. |
| Low volume | Receiver volume too low; microphone batteries low; microphone held too far away. | Increase receiver volume. Replace microphone batteries. Hold microphone closer to mouth. |
9. Specifications
- Model Number: WM-880 / VS-UHF
- Brand: Vocal-Star
- Connectivity Technology: UHF
- Number of Channels: 2
- Power Source: Battery Powered (microphones), AC Adapter (receiver)
- Special Feature: Volume Control
- Connector Type: 3.5 mm Jack (audio output)
- Compatible Devices: Speaker, Amplifier, Mixer
- Polar Pattern: Unidirectional
- Audio Sensitivity: 100 Decibels
- Item Weight: 1 Kilogram (approximate total system weight)
- Recommended Uses: Karaoke
10. Warranty and Support
This product is covered by a manufacturer's warranty. Please refer to the warranty card included with your purchase or visit the official Vocal-Star website for detailed warranty terms and conditions. For technical support or service inquiries, please contact Vocal-Star customer service through their official channels.
Website: www.vocal-star.com (Example link, please verify actual manufacturer website)


