Ducane 20175401
Ducane Gas Grill LP Propane Gas Valve Replacement Manual
Model: 20175401
Introduction
This manual provides detailed instructions for the safe and proper installation, operation, and maintenance of the Ducane Gas Grill LP Propane Gas Valve Replacement, Model 20175401. This brass valve is designed for specific Ducane Aluminum Series gas grills. Please read this manual thoroughly before proceeding with any installation or maintenance to ensure safety and optimal performance.
Product Overview
The Ducane Gas Grill LP Propane Gas Valve (Model 20175401) is a replacement brass control valve for various Ducane Aluminum Series gas grills. It is crucial for regulating the flow of LP propane gas to the grill burners. This valve replaces original part numbers 20175401, G1827566, and 37800.
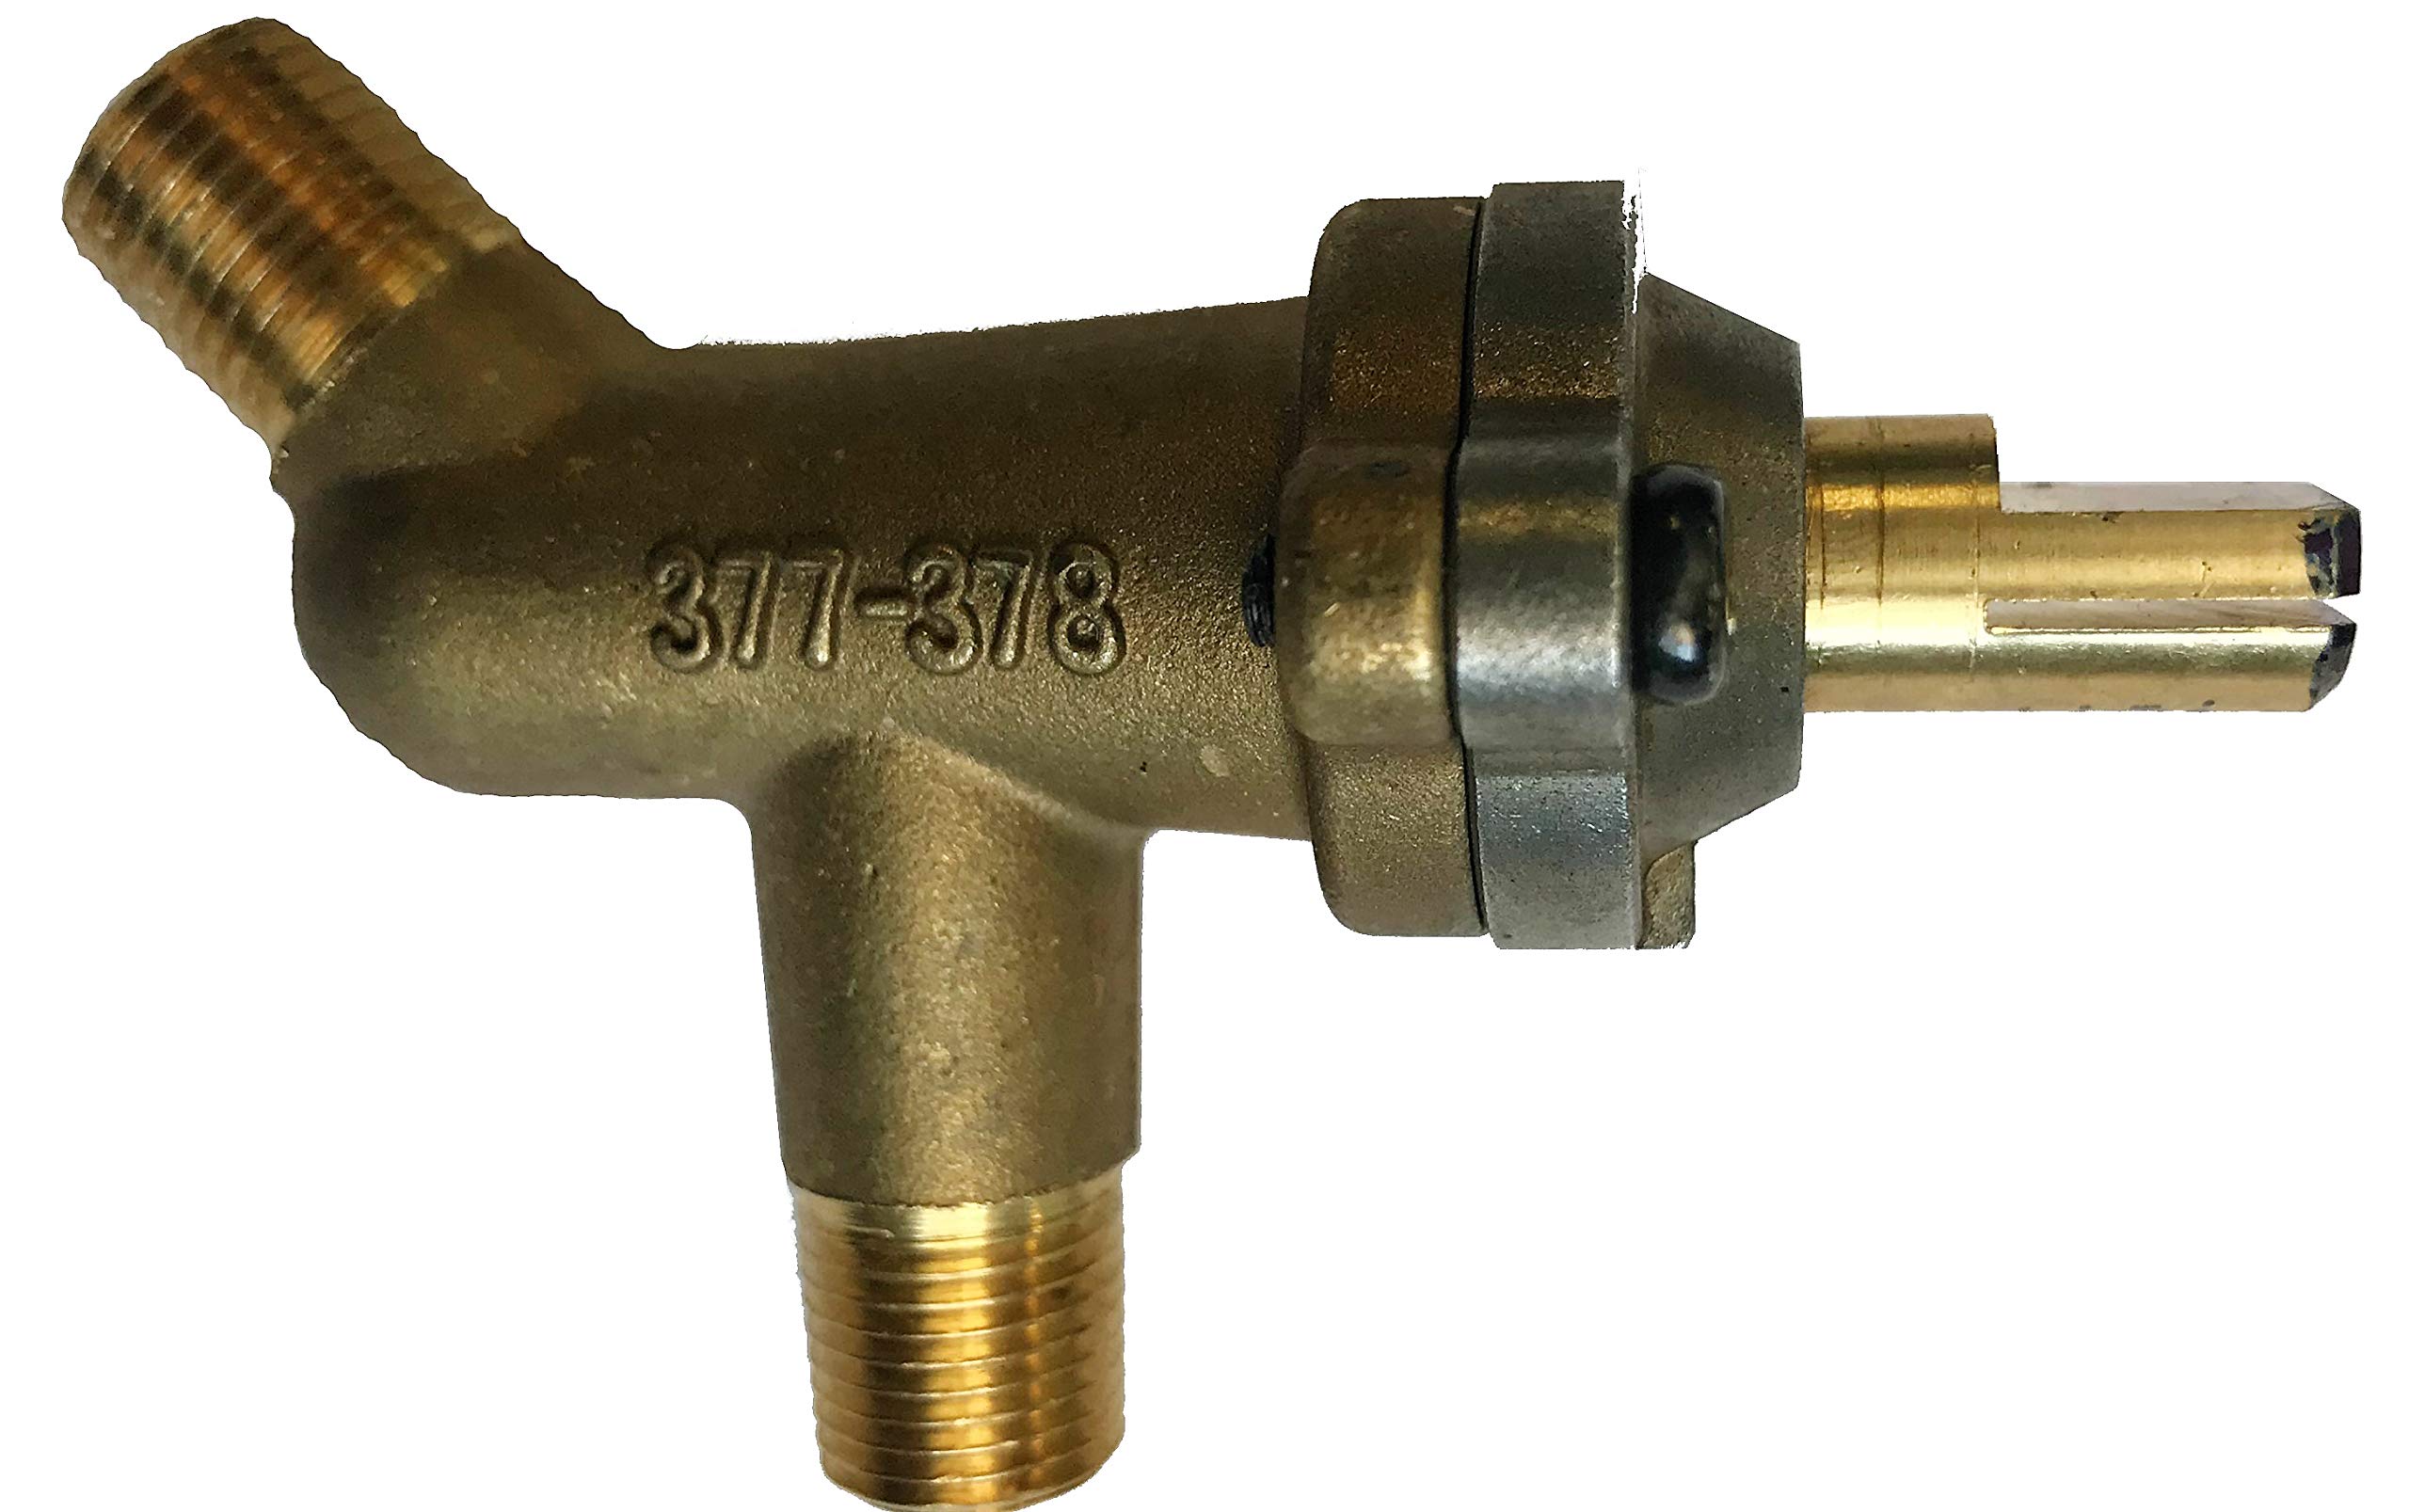
Image: Ducane Gas Grill LP Propane Gas Valve Replacement, Model 20175401. This image shows the brass gas valve with its stem and connection points.
Compatible Grill Models:
- 1000, 1005, 1005SHLPE
- 1200, 1200HLPE, 1202, 1202S, 1202SHLPE, 1204, 1204S, 1204SHLPE, 1205, 1205SHLPE
- 1305, 1305SHLPE
- 1500, 1502, 1502S, 1502SHLPE, 1504, 1504S, 1504SHLPE, 1505, 1505SHLPE
- 1600, 1600SHLPE, 1600SHNE, 1605, 1605SHLPE, 1605SHNE
- 2000, 2002, 2002HLPE
Note: Always compare the new valve with your old valve to ensure compatibility before installation.
Safety Information
WARNING: Improper installation, adjustment, alteration, service, or maintenance can cause injury or property damage. Read the installation, operating, and maintenance instructions thoroughly before installing or servicing this equipment.
- Always disconnect the gas supply (turn off the LP tank valve) before attempting any installation, maintenance, or repair.
- Ensure the grill is completely cool before working on it.
- Wear appropriate personal protective equipment, such as gloves and eye protection.
- Perform a leak test after any gas component replacement.
- If you smell gas, immediately turn off the gas supply, ventilate the area, and do not operate the grill or any electrical switches. Contact a qualified service technician.
- This valve is for LP Propane Gas only. Do not attempt to use it with natural gas unless explicitly stated as compatible.
Setup and Installation
This section outlines the steps for replacing your existing gas valve with the Ducane Model 20175401.
Tools Required:
- Adjustable wrench or appropriate size open-end wrench
- Screwdriver (Phillips or flathead, depending on grill model)
- Leak detection solution (soapy water)
- Gloves and eye protection
Installation Steps:
- Disconnect Gas Supply: Turn off the gas supply at the LP tank valve and disconnect the regulator from the tank.
- Cool Down: Ensure the grill is completely cool to the touch.
- Access Valve: Depending on your grill model, you may need to remove control knobs, the control panel, or other components to access the gas manifold and valves. Refer to your specific grill's owner's manual for detailed disassembly instructions.
- Remove Old Valve:
- Carefully disconnect the gas line from the old valve.
- Unscrew or unclip the old valve from the manifold.
- Important: The orifice is NOT included with the new valve. Carefully remove the orifice from the old valve. It is typically a small brass fitting at the end of the valve where the gas exits towards the burner.
- Install Orifice: Screw the removed orifice from your old valve into the new Ducane Model 20175401 replacement valve. Ensure it is securely tightened.
- Install New Valve:
- Attach the new valve to the gas manifold, ensuring a snug fit.
- Connect the gas line to the new valve. Hand-tighten first, then use a wrench to tighten securely, but do not overtighten.
- Reassemble Grill: Reattach any control panels, knobs, or other components that were removed.
- Reconnect Gas Supply: Reconnect the LP regulator to the gas tank.
- Perform Leak Test: Proceed to the "Operating" section for leak testing instructions.
Operating (Leak Test)
After installing the new gas valve, it is critical to perform a leak test before operating the grill.
- Prepare Solution: Mix a solution of equal parts liquid dish soap and water in a spray bottle or small container.
- Apply Solution: With the gas supply turned on at the LP tank, but the grill burners turned off, apply the soapy water solution to all gas connections, including the new valve connections, the regulator connection to the tank, and any other gas line connections.
- Check for Bubbles: Observe the connections for bubbles. The presence of bubbles indicates a gas leak.
- Address Leaks: If bubbles appear, immediately turn off the gas supply. Tighten the connection where the leak is detected. Repeat the leak test. If the leak persists, do not use the grill and contact a qualified service technician.
- No Bubbles: If no bubbles appear, the connections are secure, and the grill is ready for use. Wipe off any excess soapy solution.
Maintenance
Proper maintenance ensures the longevity and safe operation of your gas valve.
- Regular Inspection: Periodically inspect the gas valve and connections for any signs of wear, corrosion, or damage.
- Cleanliness: Keep the area around the gas valve clean and free from grease buildup, debris, or insect nests.
- Leak Checks: Perform a leak test at the beginning of each grilling season or if the grill has been moved or stored for an extended period.
- Avoid Harsh Chemicals: Do not use abrasive cleaners or harsh chemicals on the valve, as this can damage the brass or seals.
Troubleshooting
| Problem | Possible Cause | Solution |
|---|---|---|
| Gas odor detected | Gas leak at connections or damaged hose/valve. | Immediately turn off gas. Perform a leak test. Tighten connections. If leak persists or valve is damaged, replace the faulty component. Do not operate. |
| Burner not lighting or low flame | Improperly installed orifice, clogged orifice, or faulty valve. | Ensure orifice is correctly installed and clear of debris. Check gas supply. If problem persists, the valve may be faulty and require replacement. |
| Control knob stiff or difficult to turn | Internal valve mechanism issue or debris. | Do not force. The valve may need to be replaced. |
If you encounter issues not listed here or if troubleshooting steps do not resolve the problem, contact Ducane customer support or a qualified service technician.
Specifications
- Part Number: 20175401
- Replaces Part Numbers: G1827566, 37800
- Material: Brass
- Stem Length: 5/8 inch
- Overall Length: 2 5/8 inches
- Height: 1 3/4 inches
- Gas Type: LP Propane Gas
- Orifice: Not included (re-use existing orifice)
Warranty and Support
For information regarding warranty coverage or technical support, please refer to the original purchase documentation or contact Ducane customer service directly. Keep your proof of purchase for any warranty claims.
Customer Support: Please visit the official Ducane website or refer to your grill's original manual for contact information.
Related Documents - 20175401
 |
Ducane 436 Inch² 2-Burner Assembly Guide Assembly guide for the Ducane 436 Inch² 2-Burner gas grill, including safety warnings, step-by-step instructions, and a parts list. |
 |
GUH95C Furnace Parts List Comprehensive parts list and exploded view reference for the GUH95C series gas furnace, including model-specific components and assembly diagrams. |
 |
Ducane Refrigerant Detection System: Field-Installed Kits Guide Explore Ducane's multi-refrigerant coils and air handlers for R-410A and R-454B systems, detailing field-convertible and factory-ready components for refrigerant detection systems. |
 |
Ducane A95UH2V & 95G2UHV Gas Furnace Installation Instructions Comprehensive installation instructions for the Ducane A95UH2V and 95G2UHV Warm Air Gas Furnace. Covers direct vent installation, safety, clearances, gas piping, electrical connections, and startup procedures. |
 |
Ducane HVAC Installation Guide for New Refrigerants Manufacturer guidance for installing Ducane HVAC systems with new refrigerants, covering application, load calculation, duct work evaluation, wiring, equipment selection, line set inspection, and installation procedures. |
 |
AHRI Certified HVAC System Compatibility Guide: Ducane & ADP Components A comprehensive guide detailing AHRI Certified HVAC system configurations, listing compatible outdoor units, indoor units, and furnace models from brands like Ducane and ADP, along with their Cooling EER and SEER ratings. |
Ask a question about this manual
Ask about setup, troubleshooting, compatibility, parts, safety, or missing instructions. Manuals+ will review the question and use this page’s manual context to help answer it.