BLACK+DECKER BCD001C1-QW
BLACK+DECKER 18V Cordless Drill/Driver BCD001C1-QW User Manual
Model: BCD001C1-QW
Introduction
This manual provides essential information for the safe and efficient operation of your BLACK+DECKER 18V Cordless Drill/Driver, model BCD001C1-QW. Please read this manual thoroughly before using the tool and keep it for future reference.
The BLACK+DECKER 18V Lithium-Ion Drill/Driver is a compact and lightweight tool designed for various drilling and screwdriving tasks. It features an 18V 1.5Ah lithium-ion battery, a 10mm keyless chuck, 10 torque settings, variable speed control (0-600 RPM), and an integrated LED light for improved visibility.
Safety Information
Always follow basic safety precautions when using electric tools to reduce the risk of fire, electric shock, and personal injury.
- Wear appropriate personal protective equipment, including safety glasses, hearing protection, and gloves.
- Keep your work area clean and well-lit. Cluttered or dark areas invite accidents.
- Do not operate power tools in explosive atmospheres, such as in the presence of flammable liquids, gases, or dust.
- Keep children and bystanders away while operating a power tool. Distractions can cause you to lose control.
- Ensure the battery is fully charged before use.
- Always remove the battery pack before making any adjustments, changing accessories, or storing the tool.
- Use the correct tool for your application. Do not force the tool.
- Maintain tools with care. Keep cutting tools sharp and clean.
- Store idle tools out of reach of children and untrained persons.
Package Contents
Your BLACK+DECKER 18V Cordless Drill/Driver package should include the following items:
- 1 x BLACK+DECKER 18V Cordless Drill/Driver (Model: BCD001C1-QW)
- 1 x 18V 1.5Ah Lithium-Ion Battery
- 1 x Battery Charger
- Instruction Manual
Product Overview
Familiarize yourself with the components of your drill/driver.

Figure 1: Front view of the BLACK+DECKER 18V Cordless Drill/Driver with battery attached.

Figure 2: Side view showing the ergonomic handle and battery connection.
- Keyless Chuck: For quick and easy bit changes.
- Torque Collar: Adjusts the clutch setting for different materials and screw sizes.
- Forward/Reverse Switch: Controls the direction of rotation.
- Variable Speed Trigger: Controls the drilling/driving speed.
- LED Work Light: Illuminates the work area.
- Battery Pack: 18V Lithium-Ion battery.
- Battery Release Button: For removing the battery.
Setup
1. Charging the Battery
The battery pack is not fully charged out of the carton. Before using the drill/driver, the battery pack must be charged for at least 3-5 hours with the supplied charger.
- Connect the charger to a standard electrical outlet.
- Slide the battery pack onto the charger until it clicks into place.
- The charging indicator light on the charger will illuminate.
- Once charging is complete, remove the battery pack from the charger.
- Note: Lithium-ion batteries retain 80% of their charge for up to 90 days when not in use. It is not necessary to recharge the battery before each use if it has been recently charged.
2. Installing and Removing the Battery Pack
- To Install: Align the battery pack with the base of the tool and slide it in until it locks securely into place.
- To Remove: Press the battery release button (usually located on the front or sides of the battery pack) and slide the battery pack out of the tool.
3. Installing and Removing Drill Bits/Screwdriver Bits
This drill/driver features a 10mm keyless chuck for easy bit changes.

Figure 3: The keyless chuck and torque setting collar.
- To Install:
- Rotate the chuck collar counter-clockwise until the chuck jaws are open wide enough to insert the bit.
- Insert the drill bit or screwdriver bit fully into the chuck.
- Rotate the chuck collar clockwise to tighten the jaws securely around the bit. Ensure the bit is centered and firmly gripped.
- To Remove: Rotate the chuck collar counter-clockwise to loosen the jaws and pull the bit out.
Operating Instructions
1. Powering On/Off and Variable Speed Control
- To turn the tool ON, squeeze the variable speed trigger.
- To turn the tool OFF, release the variable speed trigger.
- The speed of the tool is controlled by the amount of pressure applied to the trigger. Pressing the trigger further increases the speed.
2. Forward/Reverse Operation
The forward/reverse switch controls the direction of rotation for drilling and screwdriving.
- For drilling or driving screws, push the switch to the left (when viewed from the rear of the tool) for forward rotation.
- For removing screws or backing out a drill bit, push the switch to the right for reverse rotation.
- To lock the trigger and prevent accidental starting, place the switch in the center position.
3. Adjusting Torque Settings
The torque collar allows you to select the appropriate torque setting for your application, preventing overtightening of screws or stripping screw heads.

Figure 4: The integrated LED light illuminates the work area during use.
- Rotate the torque collar to align the desired number with the arrow indicator.
- Settings 1-9 are for screwdriving, with 1 being the lowest torque and 9 being the highest.
- The drill icon setting (often indicated by a drill bit symbol) provides maximum torque for drilling applications.
- Start with a lower torque setting and increase it if the clutch slips before the screw is fully driven.
4. LED Work Light
The integrated LED work light automatically activates when the trigger is pressed, providing illumination for dimly lit work areas.
5. Drilling and Screwdriving Tips

Figure 5: Drilling into wood. Max drilling capacity for wood is 25mm.
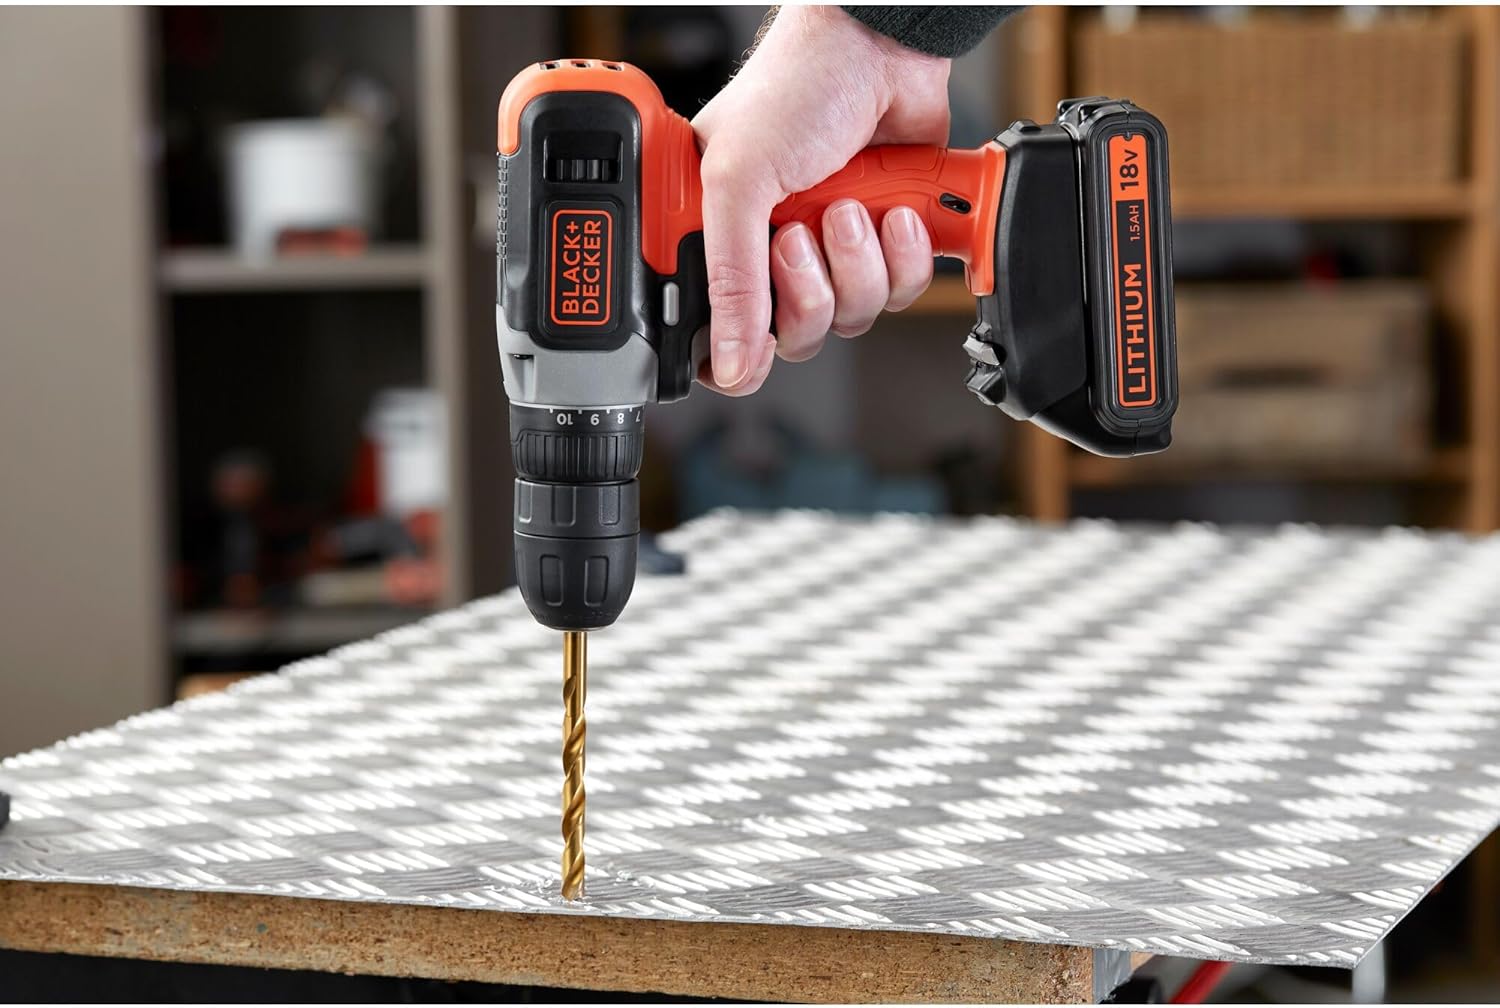
Figure 6: Drilling into metal. Max drilling capacity for metal is 10mm.
- Drilling:
- Select the appropriate drill bit for the material.
- Set the torque collar to the drill icon setting.
- Apply firm, steady pressure to the tool, keeping it perpendicular to the workpiece.
- Start at a slow speed and increase as the bit engages the material.
- Screwdriving:
- Select the correct screwdriver bit for the screw head.
- Set the torque collar to a suitable screwdriving setting (1-9).
- Apply firm pressure to the tool to prevent the bit from camming out of the screw head.
- Use variable speed to control the driving process, especially when starting or finishing.
Maintenance
1. Cleaning
- Regularly clean the ventilation slots of the tool to prevent overheating.
- Use a soft, damp cloth to wipe down the exterior of the tool. Do not use harsh chemicals or abrasive cleaners.
- Keep the chuck jaws free of debris to ensure proper bit gripping.
2. Storage
- Store the tool and battery pack in a cool, dry place, away from direct sunlight and extreme temperatures.
- Ensure the battery is partially charged before long-term storage to maintain battery health.
- Store out of reach of children.
Troubleshooting
This section addresses common issues you might encounter with your drill/driver. If you experience a problem not listed here, contact customer support.
| Problem | Possible Cause | Solution |
|---|---|---|
| Tool does not start. | Battery not charged; Battery not properly installed; Forward/reverse switch in center (locked) position. | Charge the battery; Reinstall battery securely; Move switch to forward or reverse position. |
| Loss of power during operation. | Battery charge is low. | Recharge the battery. |
| Bit slips in chuck. | Chuck not tightened sufficiently; Bit shank is dirty or damaged. | Tighten chuck firmly; Clean or replace bit. |
| Screws are stripped or overtightened. | Torque setting is too high. | Reduce the torque setting. |
Specifications
| Feature | Specification |
|---|---|
| Model Number | BCD001C1-QW |
| Voltage | 18 Volts |
| Battery Type | Lithium-ion |
| Battery Capacity | 1.5 Ah |
| Chuck Size | 10 mm (Keyless) |
| No-Load Speed | 0-600 RPM |
| Torque Settings | 10 + Drill Mode |
| Max Drilling Capacity (Wood) | 25 mm |
| Max Drilling Capacity (Metal) | 10 mm |
| Weight | 770 grams (tool only, approximate) |
| Dimensions (L x W x H) | 30 x 15 x 20 cm |
| Power Source | Battery Powered |
| Special Features | Keyless Chuck, Rechargeable, Variable Speed, LED Work Light |
Warranty and Support
BLACK+DECKER products are manufactured to high quality standards and are guaranteed for a period of 2 years from the date of purchase against faulty materials or workmanship. This guarantee does not affect your statutory rights.
For technical assistance, spare parts, or warranty claims, please contact your local BLACK+DECKER service center or visit the official BLACK+DECKER website for support information.
Website: www.blackanddecker.com
Ask a question about this manual
Ask about setup, troubleshooting, compatibility, parts, safety, or missing instructions. Manuals+ will review the question and use this page’s manual context to help answer it.