Introduction
This manual provides detailed instructions for the installation, operation, and maintenance of your Antec Dark Phantom DP501 ATX Mid Tower Gaming Case. Please read this manual thoroughly before beginning installation to ensure proper setup and optimal performance.

Image: Front-side view of the Antec Dark Phantom DP501 case, showcasing its sleek design and ARGB lighting elements.
Package Contents
Verify that all components are present in the package:
- Antec Dark Phantom DP501 ATX Mid Tower Gaming Case
- Accessory Box (screws, cable ties, standoffs)
- User Manual (this document)
Setup
1. Unpacking and Inspection
Carefully remove the case from its packaging. Inspect for any signs of damage during transit. Remove the tempered glass side panel by unscrewing the thumb screws at the rear of the case.

Image: Interior view of the Antec DP501 case, highlighting the spacious motherboard tray and cable management cutouts.
2. Motherboard Installation
Install the necessary standoffs onto the motherboard tray according to your motherboard's form factor (ATX, Micro-ATX, Mini-ITX). Carefully place your motherboard onto the standoffs and secure it with screws.
3. Power Supply Unit (PSU) Installation
The DP501 supports standard ATX power supplies. Install the PSU into the dedicated compartment at the bottom rear of the case. It is recommended to install modular PSU cables before securing the PSU if space is limited, especially for larger units like the Corsair RM1000i mentioned in user feedback.
4. Storage Drive Installation
The case includes bays for 2.5-inch SSDs and 3.5-inch HDDs. Locate the drive cages and trays, install your storage devices, and secure them. The HDD bay may need to be temporarily removed for easier PSU installation.
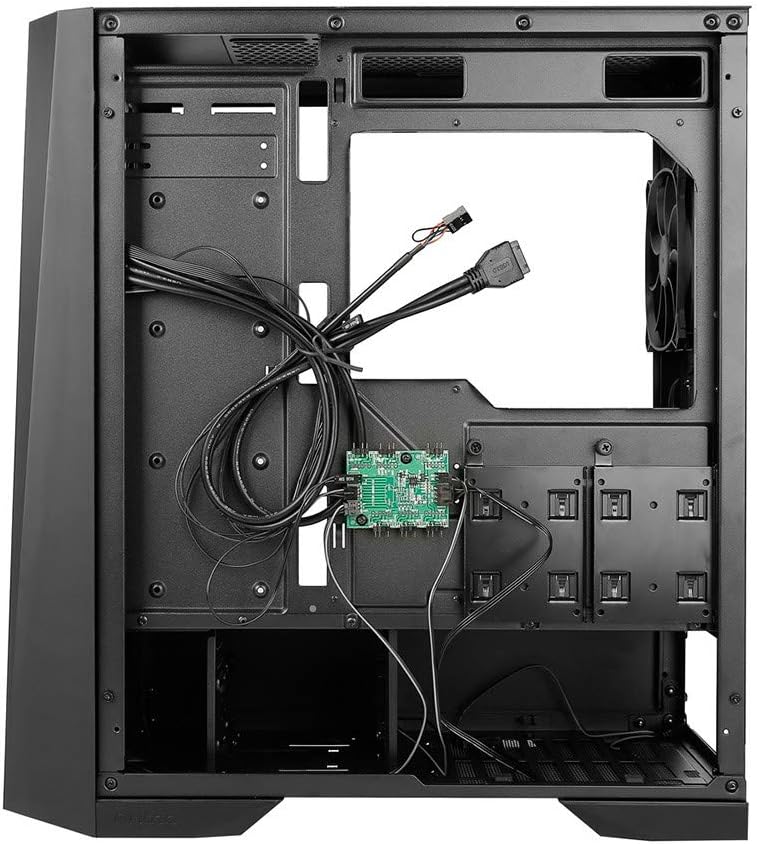
Image: Rear interior view of the Antec DP501 case, illustrating the cable management area and accessible drive bays.
5. Graphics Card and Expansion Card Installation
Install your graphics card and any other expansion cards into the appropriate PCIe slots on your motherboard. Secure them with screws at the rear of the case.
6. Cooling System Installation
The DP501 supports various cooling configurations:
- Fans: Up to six LED case fans can be installed for optimal thermal performance.
- Liquid Cooling: Ample room is provided for both All-In-One (AIO) and custom loop liquid cooling systems. Note that installing a 3-fan liquid cooler at the front may limit space for longer graphics cards. Consider top mounting for radiators where possible.
7. Cable Management
Utilize the cable routing cutouts and tie-down points behind the motherboard tray to organize cables. This improves airflow and aesthetics.
Operating
1. Powering On/Off
Connect the power cable to your PSU and a wall outlet. Press the power button located on the top front panel of the case to turn on your system. Press again to turn off, or hold for a forced shutdown.
2. ARGB Lighting Control
The DP501 features an inbuilt LED controller for its ARGB lighting elements. You can control the colors and modes using the dedicated LED mode I/O button on the top panel. For 16.8 million custom colors and advanced synchronization, connect the 3-pin ARGB module to a compatible motherboard header and use the motherboard's software (e.g., ASUS Aura Sync, MSI Mystic Light, Gigabyte RGB Fusion).

Image: Front view of the Antec DP501 case, demonstrating the active ARGB lighting on the front panel.
Video: Antec Dark Phantom DP501 ATX Mid Tower Gaming Case overview, showcasing ARGB lighting effects and internal components.
Maintenance
1. Dust Filter Cleaning
The DP501 includes dust filters to prevent dust buildup. Regularly clean the removable dust filters located on the top and bottom of the case. Gently slide them out, clean with water or a soft brush, and ensure they are dry before reinserting.

Image: Bottom view of the Antec DP501 case, showing the removable dust filter for the power supply intake.
2. General Cleaning
Use a soft, damp cloth to clean the exterior surfaces of the case. For the tempered glass panel, use a glass cleaner and a microfiber cloth to avoid streaks. Avoid abrasive cleaners or solvents.
Troubleshooting
- System Does Not Power On:
Check all power connections, including the PSU to the wall, PSU to motherboard, and front panel power switch header to the motherboard. Ensure the PSU switch is in the 'ON' position. - ARGB Lighting Not Working/Syncing:
Verify that the ARGB controller is properly connected to the PSU and, if using motherboard sync, that the 3-pin ARGB cable is connected to the correct motherboard header. Ensure motherboard ARGB software is installed and configured correctly. - Overheating Issues:
Ensure all case fans are spinning correctly and oriented for proper airflow (intake/exhaust). Clean dust filters regularly. Verify CPU cooler and GPU cooler are properly seated and functioning. - Components Not Fitting:
The DP501 is a mid-tower case. While spacious, some oversized components (e.g., very long graphics cards, large 3-fan liquid coolers) may have fitment challenges, especially when front-mounted. Always check component dimensions against case specifications before purchase.
Specifications
| Brand | Antec |
| Model Name | DP501 |
| Case Type | Mid Tower |
| Motherboard Compatibility | ATX |
| Material | SGCC+Plastic |
| Color | Black |
| Item Weight | 5.6 Kilograms (12.32 pounds) |
| Product Dimensions (LxWxH) | 0.81 x 0.76 x 0.39 inches (Note: These dimensions appear to be incorrect and likely refer to packaging or a small component. Refer to manufacturer's official product page for accurate case dimensions.) |
| USB 2.0 Ports | 2 |
| Cooling Method | Water (supports liquid cooling) |
Warranty and Support
For warranty information and technical support, please refer to the official Antec website or contact Antec customer service directly. Keep your proof of purchase for warranty claims.