1. Product Overview
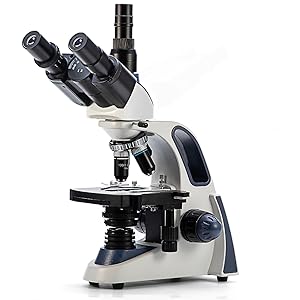
The SWIFT SW380T is a versatile compound trinocular microscope designed for detailed observation of specimen slides. It is suitable for clinical use, educational settings, and advanced hobbyists. Key features include a Siedentopf head, multiple magnification levels, and a camera-compatible port.
This microscope offers a magnification range from 40X to 2500X, achieved through interchangeable wide-field 10X and 25X eyepieces and 4 DIN Achromatic objectives (4X, 10X, 40X, 100X). The 30-degree inclined Siedentopf head is rotatable for comfortable viewing and shared use, with adjustable interpupillary distance to minimize eye strain. An ultra-precise focusing system allows for both coarse and fine adjustments, ensuring clear and sharp images. The trinocular port provides a dedicated connection for microscope cameras (sold separately) for image capture, live streaming, and recording.
2. Setup and Assembly
Carefully unpack all components and ensure all parts are present before beginning assembly. Place the microscope base on a stable, level surface.
2.1 Attaching the Head
- Loosen the head retaining screw on the top of the microscope body.
- Gently slide the Siedentopf trinocular head onto the top of the microscope body, aligning the keyway.
- Tighten the head retaining screw to secure the head in place.

2.2 Installing Eyepieces
- Remove the protective caps from the eyepiece tubes on the Siedentopf head.
- Insert the desired wide-field eyepieces (10X or 25X) into the eyepiece tubes.
- For the trinocular port, remove its protective cap and insert a camera adapter or additional eyepiece if desired.

2.3 Installing Objective Lenses
- Rotate the revolving nosepiece until an empty slot is positioned directly over the stage.
- Carefully screw each objective lens (4X, 10X, 40X, 100X) into the nosepiece in increasing order of magnification.
- Ensure all objectives are securely tightened.


2.4 Power Connection
Connect the power cord to the microscope's power input and then to a standard 110V AC outlet. Use the power switch located at the rear of the microscope to turn it on/off.

3. Operating Instructions
3.1 Placing a Specimen
- Ensure the lowest power objective (4X) is in position.
- Use the coarse focus knob to lower the stage.
- Open the stage clips on the mechanical stage and place your prepared slide securely.
- Use the stage control knobs to center the specimen area you wish to observe under the objective lens.
3.2 Focusing and Magnification
- Turn on the LED illuminator using the power switch and adjust brightness with the dimming handwheel.
- Look through the eyepieces and use the coarse focus knob to bring the specimen into approximate focus.
- Use the fine focus knob for precise focusing.
- Adjust the interpupillary distance by moving the eyepiece tubes until a single, clear field of view is achieved. Use the diopter adjustment on one eyepiece to compensate for differences in vision between your eyes.
- To increase magnification, rotate the revolving nosepiece to the next objective lens. The microscope is parfocal, meaning minimal refocusing should be needed when changing objectives. Use the fine focus knob for minor adjustments.
- For the 100X objective, apply a small drop of immersion oil directly onto the slide in the area to be viewed before rotating the 100X objective into position. The objective lens should make contact with the oil.

3.3 Adjusting Illumination
The microscope features an adjustable LED light source. Use the dimming handwheel to control the intensity of the light. The Abbe condenser and iris diaphragm below the stage allow for further control over light intensity and contrast, which is crucial for optimal viewing at different magnifications.
4. Maintenance
Proper maintenance ensures the longevity and optimal performance of your microscope.
4.1 Cleaning Optics
- Use a soft, lint-free cloth or lens paper specifically designed for optics.
- For stubborn smudges, use a small amount of lens cleaning solution. Apply the solution to the cloth, not directly to the lens.
- Clean eyepieces and objective lenses gently.
- After using the 100X oil immersion objective, always clean off the immersion oil immediately with lens paper and lens cleaning solution.
4.2 General Cleaning
- Wipe down the microscope body with a soft, damp cloth. Avoid harsh chemicals.
- Keep the microscope covered with a dust cover when not in use to prevent dust accumulation.
4.3 Storage
Store the microscope in a dry, dust-free environment. When storing for extended periods, ensure the lowest power objective is in position and the stage is lowered.
5. Troubleshooting
| Problem | Possible Cause | Solution |
|---|---|---|
| No illumination | Power cord disconnected, power switch off, brightness too low, LED bulb failure. | Check power connection, turn on switch, adjust dimming handwheel, contact support if LED is faulty. |
| Image blurry or out of focus | Incorrect focus adjustment, dirty objective/eyepiece, slide upside down, incorrect objective selected. | Adjust coarse and fine focus, clean optics, ensure slide cover slip is up, start with 4X objective. |
| Dark field of view | Iris diaphragm closed, condenser too low, light intensity too low. | Open iris diaphragm, raise condenser, increase light intensity. |
| Dust or spots visible in view | Dust on eyepiece, objective, or slide. | Clean eyepieces, objectives, and slide. Rotate eyepiece to determine if dust is on it. |
| Difficulty changing objectives | Nosepiece not rotating smoothly. | Ensure no obstructions. Do not force rotation. Contact support if mechanism is stiff. |
6. Specifications
| Feature | Detail |
|---|---|
| Model Name | SW380T |
| Magnification Range | 40X - 2500X |
| Eyepieces | Wide-Field 10X, 25X |
| Objective Lenses | 4X, 10X, 40X (Spring), 100X (Spring, Oil) DIN Achromatic |
| Head Type | Siedentopf Trinocular, 30-degree incline, 360-degree rotatable |
| Focusing System | Coaxial Coarse & Fine Focus |
| Stage | Mechanical Stage with Slide Holder |
| Illumination | LED, adjustable brightness |
| Condenser | Abbe Condenser with Iris Diaphragm |
| Power Source | AC 110 Volts |
| Material | Metal |
| Product Dimensions (L x W x H) | 13.39" x 9.45" x 17.72" |
| Item Weight | 4.3 Kilograms |
7. Warranty and Support
For warranty information and technical support, please refer to the official SWIFT website or contact your retailer. A digital User Guide (PDF) is available for download via the provided link:
For further assistance, please contact SWIFT customer service directly.

