Royal Gourmet MG6001-R
Instruction Manual
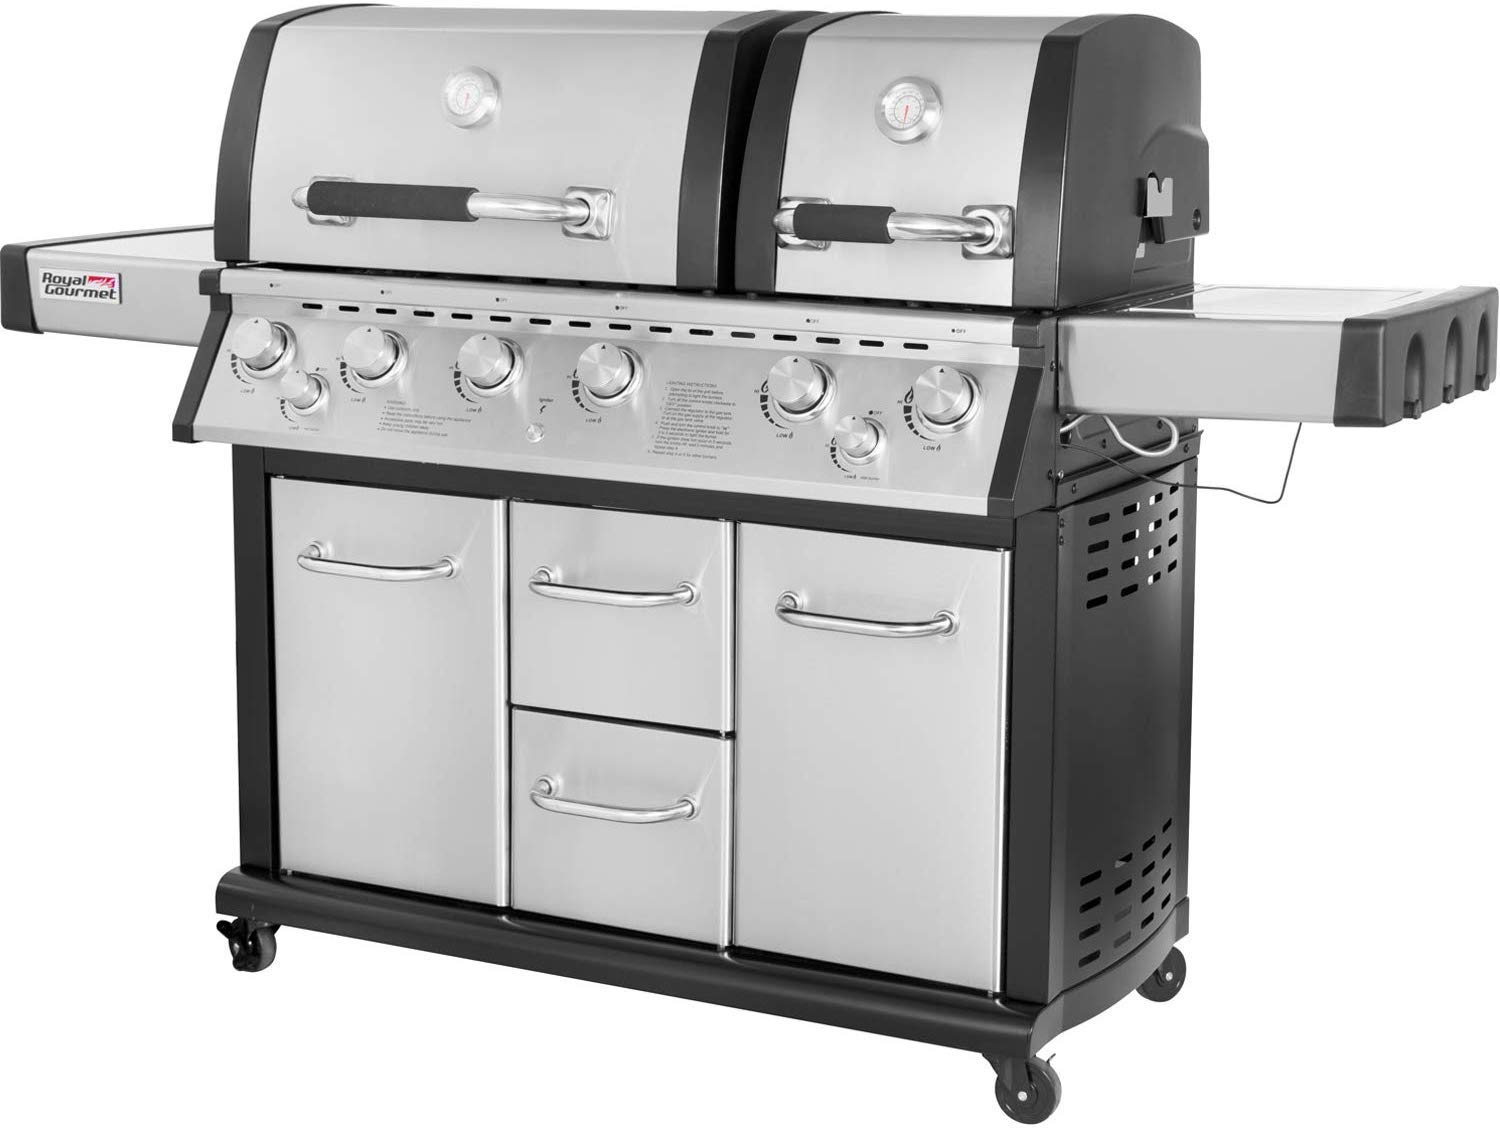
Royal Gourmet Mirage MG6001-R 6-Burner Cabinet Propane Infrared Burner Gas Grill
1. Important Safety Information
WARNING: For outdoor use only. Do not store or use gasoline or other flammable vapors and liquids in the vicinity of this or any other appliance.
DANGER: If you smell gas:
- Shut off gas to the appliance.
- Extinguish any open flame.
- Open lid.
- If odor continues, keep away from the appliance and immediately call your gas supplier or fire department.
CARBON MONOXIDE HAZARD: This appliance can produce carbon monoxide which has no odor. Using it in an enclosed space can kill you. Never use this appliance in an enclosed space such as a camper, tent, car, or home.
Always maintain proper clearances from combustible materials. Keep children and pets away from the grill. Never leave a lit grill unattended.
Gas Leak Check: Before first use and after every cylinder change, perform a leak test. Apply a soapy water solution (50% soap, 50% water) to all gas connections. Bubbles indicate a leak. Tighten connections or replace parts as necessary. Do not use an open flame to check for leaks.
2. Product Overview
The Royal Gourmet Mirage MG6001-R is a 6-burner liquid propane gas grill designed for outdoor cooking. It features a split lid design, an infrared burner, and a side burner, providing versatile cooking options. The primary cooking area measures 555 sq. inches.
Key components include two stainless steel lids with integrated thermometers and cast aluminum end caps, porcelain cast iron cooking grates with a slope design for efficient grease drainage, a stainless steel side table with integrated tool hooks, and an enclosed steel cabinet with doors for convenient storage of a propane tank and accessories. The grill's functions are controlled via a front-mounted panel with individual burner knobs.
3. Setup and Assembly
This grill requires assembly prior to use. Refer to the detailed assembly instructions provided in the separate assembly guide for step-by-step procedures. Ensure all parts are present and undamaged before beginning assembly.
3.1 Propane Tank Connection
- Ensure the propane tank valve is closed.
- Place the propane tank securely in the designated compartment within the grill cabinet.
- Connect the regulator hose to the propane tank valve. Hand-tighten firmly. Do not use tools to tighten, as this may damage the connection.
- Perform a gas leak check as described in Section 1.

3.2 Initial Burn-Off
Before cooking for the first time, perform an initial burn-off to remove any manufacturing residues. Light all main burners to their highest setting and close the lid. Allow the grill to heat for 10-15 minutes. Turn off the burners and let the grill cool completely.
4. Operating Instructions
4.1 Lighting Main Burners
- Open the grill lid.
- Ensure all burner control knobs are in the 'OFF' position.
- Slowly open the propane tank valve fully.
- Push and turn one main burner control knob to the 'HIGH' position.
- Press the electronic igniter button (if equipped) repeatedly until the burner lights.
- Once lit, release the igniter button. If the burner does not light within 5 seconds, turn the knob to 'OFF', wait 5 minutes, and repeat the process.
- Repeat for other main burners as needed.
4.2 Lighting Side Burner
- Open the side burner lid.
- Ensure the side burner control knob is in the 'OFF' position.
- Slowly open the propane tank valve fully.
- Push and turn the side burner control knob to the 'HIGH' position.
- Press the electronic igniter button (if equipped) repeatedly until the burner lights.
- Once lit, release the igniter button. If the burner does not light within 5 seconds, turn the knob to 'OFF', wait 5 minutes, and repeat the process.

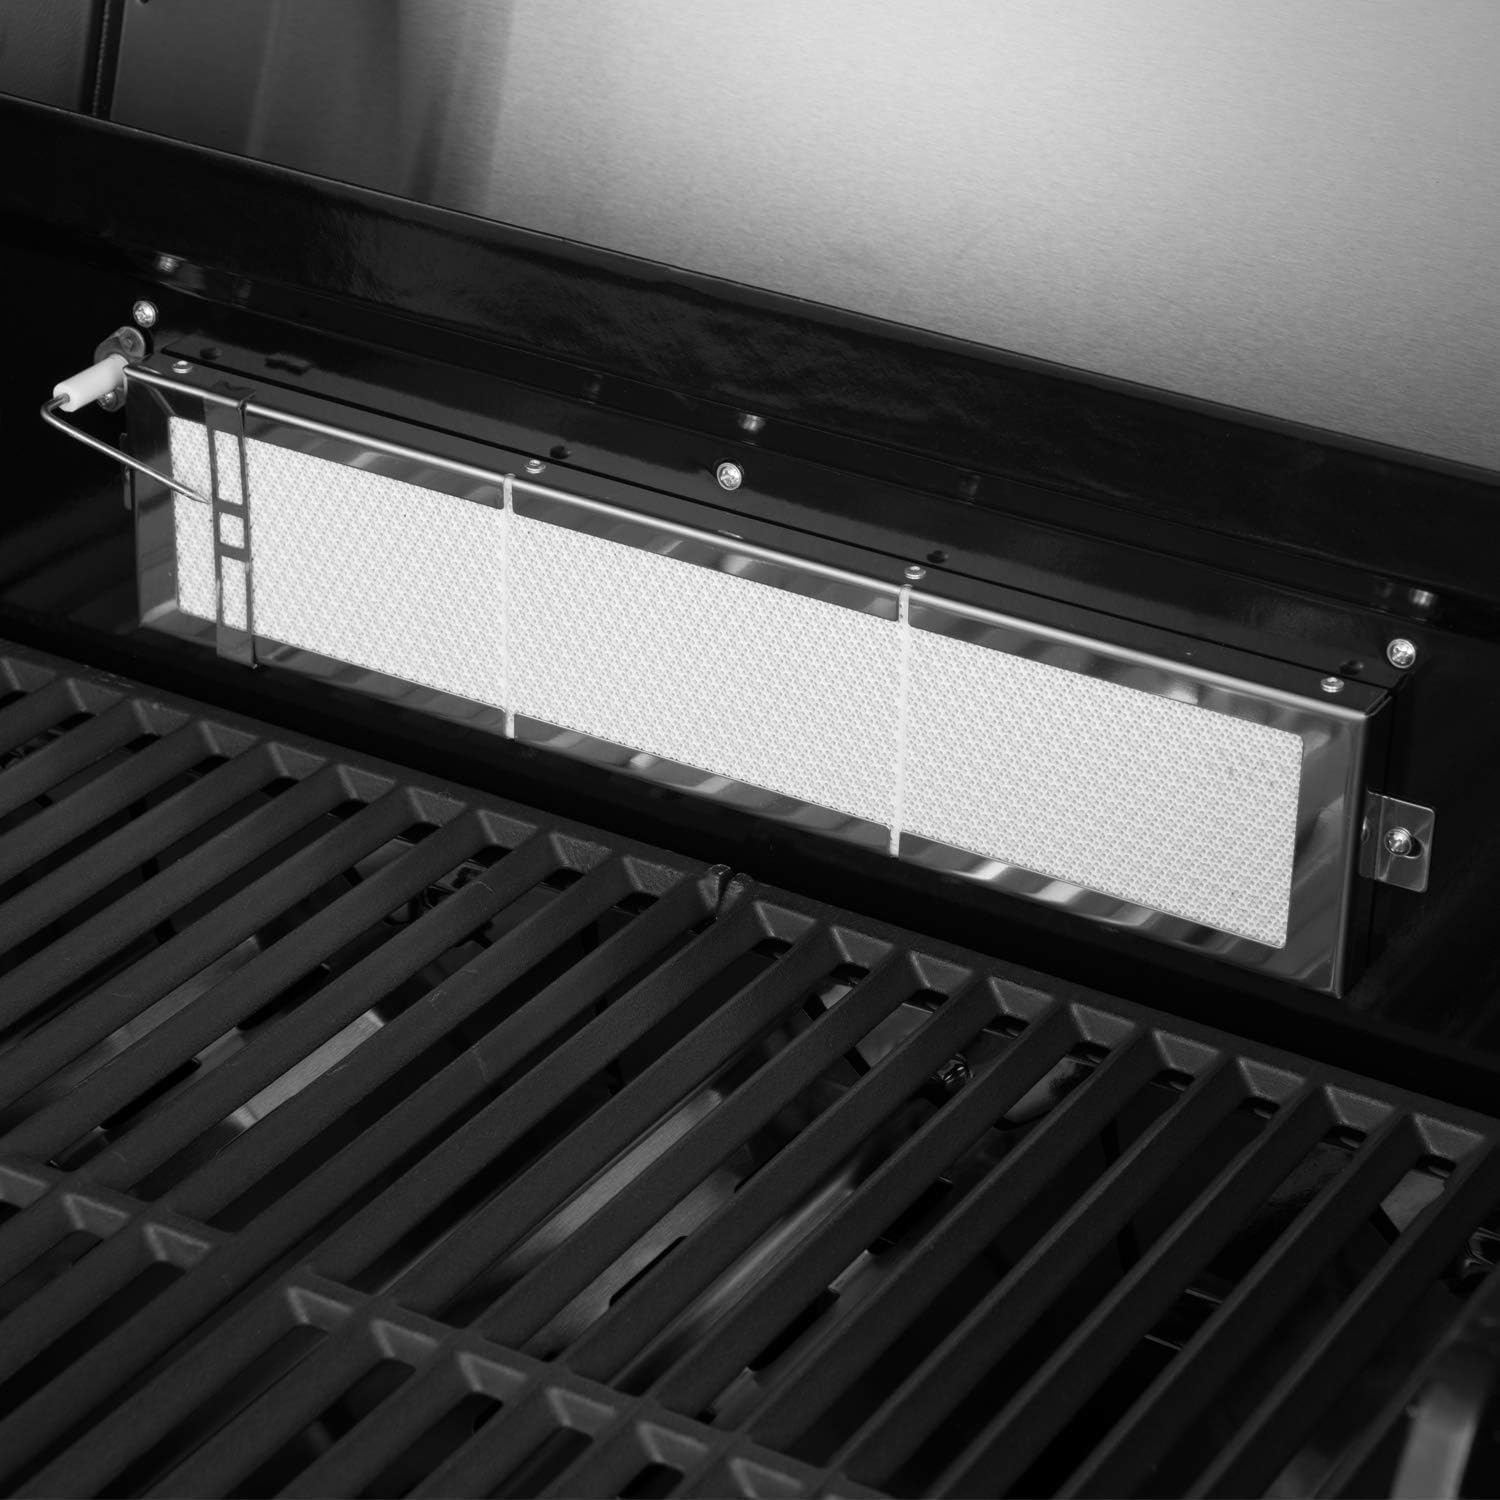
4.3 Using the Infrared Burner
The infrared burner provides intense, even heat for searing. To use:
- Ensure the infrared burner control knob is in the 'OFF' position.
- Push and turn the infrared burner control knob to the 'HIGH' position.
- Press the electronic igniter button until the burner lights.
- Allow the burner to preheat for a few minutes before placing food directly over it for searing.
4.4 Temperature Control and Warming Rack
Adjust the burner control knobs between 'LOW' and 'HIGH' to achieve desired cooking temperatures. The built-in lid thermometers provide an indication of the internal grill temperature. The warming rack can be used to keep cooked food warm or to gently heat items.

4.5 Using the Side Table
The stainless steel side table provides a convenient surface for food preparation and holding utensils. It includes integrated hooks for hanging grilling tools.

5. Maintenance and Care
5.1 Cleaning Cooking Grates
After each use, while the grates are still warm, use a grill brush to remove food residue. For deeper cleaning, remove grates and wash with warm soapy water, then rinse and dry thoroughly.
5.2 Cleaning Burners
Periodically inspect burner ports for blockages (e.g., spider webs, food debris). Use a wire brush or a stiff wire to clear any obstructions. Ensure gas flow is unobstructed.
5.3 Grease Management
Regularly check and clean the grease tray and grease cup. Excessive grease buildup can lead to flare-ups. Dispose of grease properly.
5.4 Exterior Cleaning
Wipe down stainless steel surfaces with a soft cloth and a stainless steel cleaner. For painted surfaces, use mild soap and water. Avoid abrasive cleaners or pads that can scratch the finish.
5.5 Storage
When not in use, especially during extended periods or inclement weather, cover the grill with a suitable grill cover to protect it from the elements. Store the propane tank outdoors in a well-ventilated area, away from direct sunlight and heat sources.
6. Troubleshooting
| Problem | Possible Cause | Solution |
|---|---|---|
| Burner does not light | No gas flow; clogged burner ports; faulty igniter. | Check propane tank connection and valve; clear burner ports; check igniter electrode and wire. |
| Low flame or uneven heat | Low gas in tank; clogged burner ports; regulator issue. | Check propane tank level; clean burner ports; reset regulator by turning off all gas, disconnecting, waiting 30 seconds, and reconnecting. |
| Excessive flare-ups | Grease buildup; high fat content in food. | Clean grease tray and cooking grates; trim excess fat from meat; use indirect heat for fatty foods. |
7. Specifications
| Feature | Detail |
|---|---|
| Brand | Royal Gourmet |
| Model Name | Mirage |
| Model Number | MG6001-R |
| Fuel Type | Gas (Propane) |
| Main Burner Count | 6 |
| Total BTU Output | 96,000 BTU |
| Primary Cooking Area | 700 sq. in. (Note: Product description states 555 sq. in., using feature bullet for consistency) |
| Secondary Cooking Area (Warming Rack) | 260 sq. in. |
| Special Features | Warming Rack, Side Burner, Infrared Rear Burner, Enclosed Steel Cabinet |
| Material Type | Stainless Steel (Grates: Porcelain Cast Iron) |
| Item Dimensions (L x W x H) | 74.8 x 24.4 x 49 inches |
| Item Weight | 213 Pounds |
| Required Assembly | Yes |
8. Warranty and Support
8.1 Warranty Information
This Royal Gourmet grill is covered by a manufacturer warranty for 1 year from the date of purchase. Please retain your proof of purchase for warranty claims.
8.2 Customer Support
For technical assistance, replacement parts, or warranty inquiries, please contact Royal Gourmet customer service. Refer to the contact information provided in your product packaging or on the official Royal Gourmet website.
Ask a question about this manual
Ask about setup, troubleshooting, compatibility, parts, safety, or missing instructions. Manuals+ will review the question and use this page’s manual context to help answer it.