1. Introduction
The SNDWAY SW-T40 Digital Laser Distance Meter is a precision instrument designed for accurate distance, area, and volume measurements. It utilizes laser technology to provide quick and reliable readings, making it suitable for various applications in construction, interior design, and general home use. This manual provides essential information for the safe and effective operation of your device.
2. Safety Instructions
Please read and understand all safety instructions before using the device. Failure to follow these instructions may result in laser radiation exposure or other hazards.
- Laser Radiation: This device emits Class II laser radiation (wavelength 635nm, output <1mW). Do not stare directly into the laser beam or aim it at other people or animals.
- Eye Protection: Avoid direct eye exposure to the laser beam.
- Children: Keep the device out of reach of children.
- Environment: Do not operate the device in explosive environments or near flammable materials.
- Maintenance: Do not attempt to modify or disassemble the device. Repairs should only be performed by authorized service personnel.
- Storage: Store the device in a dry, cool place, away from direct sunlight and extreme temperatures.
3. Product Components
Familiarize yourself with the main parts of your SNDWAY SW-T40 device:

Figure 3.1: Front View. This image displays the front of the SNDWAY SW-T40 laser distance meter, showing the LCD screen, the red 'READ' button, and other function buttons for addition, subtraction, area, volume, unit selection, and clear/off. A small bubble level is visible on the right side.

Figure 3.2: Side View. This image shows the side profile of the SNDWAY SW-T40, highlighting its compact design and the integrated bubble level on the right edge, which aids in ensuring level measurements.
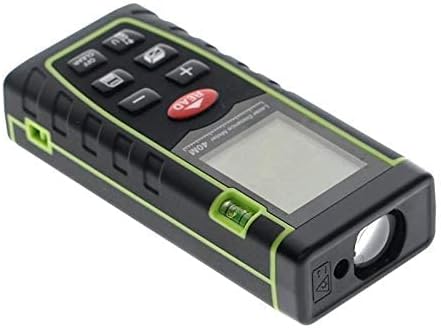
Figure 3.3: Angled View. This image provides an angled perspective of the device, clearly showing the laser emission aperture at the top, the LCD screen, and the keypad. The robust casing and green trim are also visible.
4. Setup
4.1 Battery Installation
The SNDWAY SW-T40 requires two (2) 1.5V AAA batteries for operation. Batteries are not included with the device.
- Locate the battery compartment cover on the back of the device.
- Slide the cover downwards or press the latch (if present) to open the compartment.
- Insert two AAA batteries, ensuring correct polarity (+/-) as indicated inside the compartment.
- Close the battery compartment cover securely.

Figure 4.1: Battery Compartment. This image shows the rear of the SNDWAY SW-T40, with the battery compartment cover clearly visible. The cover is designed for easy access to insert or replace the two AAA batteries.
5. Operating Instructions
5.1 Power On/Off
- Power On: Press the READ button once to turn on the device and activate the laser.
- Power Off: Press and hold the OFF/CLEAR button to turn off the device. The device will automatically power off after 150 seconds of inactivity, and the laser will turn off after 20 seconds of inactivity.
5.2 Basic Measurement (Single Distance)
- Point the laser at the target surface.
- Press the READ button once. The measured distance will be displayed on the screen.
5.3 Continuous Measurement (Max/Min Tracking)
- Press and hold the READ button. The device will enter continuous measurement mode.
- Move the device to track maximum and minimum distances. The current, maximum, and minimum values will be displayed.
- Press the READ button again to stop continuous measurement.
5.4 Area Measurement
- Press the Area/Volume button once (the icon for area measurement will appear).
- Take the first distance measurement (e.g., length) by pressing READ.
- Take the second distance measurement (e.g., width) by pressing READ.
- The device will automatically calculate and display the area.
5.5 Volume Measurement
- Press the Area/Volume button twice (the icon for volume measurement will appear).
- Take the first distance measurement (length) by pressing READ.
- Take the second distance measurement (width) by pressing READ.
- Take the third distance measurement (height) by pressing READ.
- The device will automatically calculate and display the volume.
5.6 Pythagorean Measurement
The device supports indirect measurement using the Pythagorean theorem for inaccessible distances.
- Press the Pythagorean button (icon will appear).
- Follow the on-screen prompts to measure the required sides (e.g., hypotenuse, one leg).
- The device will calculate and display the unknown side.
5.7 Addition/Subtraction of Measurements
- After a measurement, press the + button to add the next measurement.
- Press the - button to subtract the next measurement.
- Perform the next measurement by pressing READ. The result will be updated.
5.8 Changing Measurement Units
Press the U button (or similar unit button) to cycle through available units: meters (m), inches (in), and feet (ft).
5.9 Setting Reference Point
The device allows you to set the measurement reference point from either the front or the rear of the device. This is typically done by pressing a dedicated reference button or a combination of buttons. Refer to the on-screen indicator for the active reference point.
5.10 Data Storage and Recall
The device can store and recall measurement data. Consult the specific button (often labeled 'MEM' or similar) and on-screen prompts for saving and retrieving measurements.
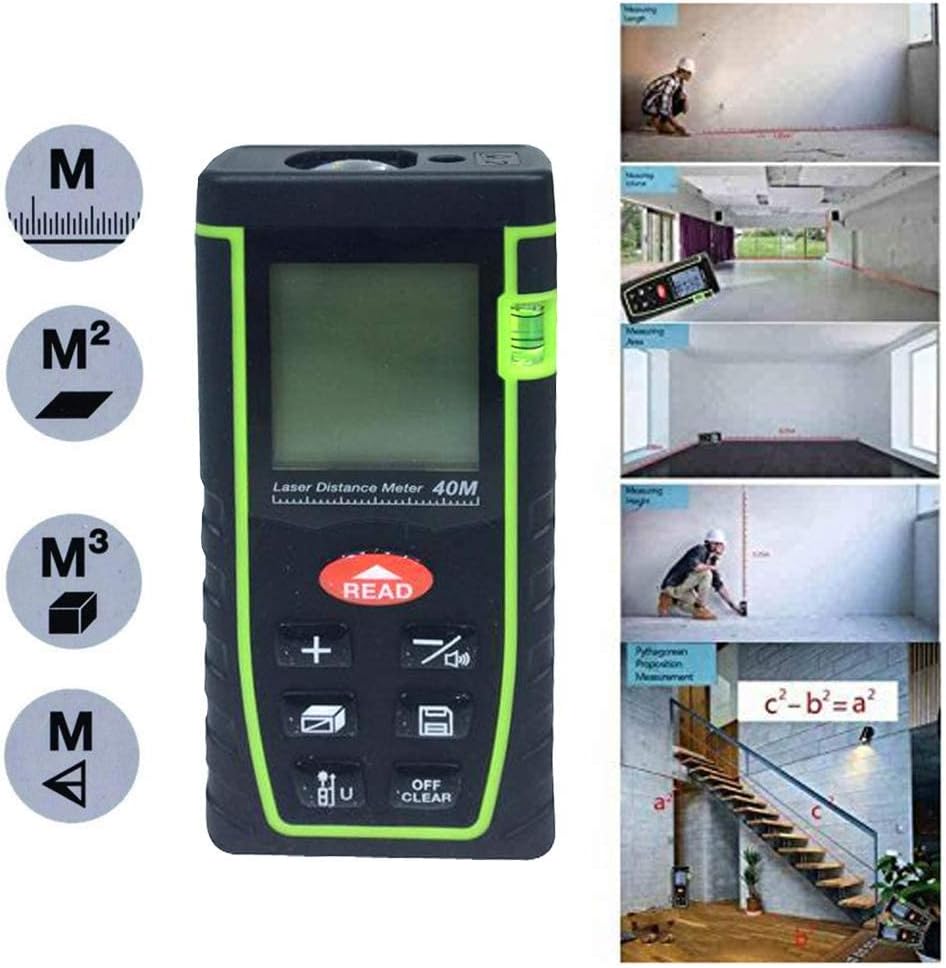
Figure 5.1: Measurement Functions. This image illustrates the various measurement capabilities of the SNDWAY SW-T40, including single distance, continuous measurement, area, volume, and Pythagorean calculations, indicated by corresponding icons on the display and keypad.
6. Maintenance
Proper maintenance ensures the longevity and accuracy of your device.
- Cleaning: Use a soft, damp cloth to clean the device casing. Do not use abrasive cleaners or solvents. For the laser lens, use a soft cloth specifically designed for optical lenses.
- Storage: When not in use for extended periods, remove the batteries to prevent leakage. Store the device in its original packaging or a protective case in a dry, dust-free environment.
- Avoid Impact: Protect the device from drops and strong impacts, which can affect its calibration and functionality.
7. Troubleshooting
If you encounter issues with your SNDWAY SW-T40, refer to the table below for common problems and solutions.
| Problem | Possible Cause | Solution |
|---|---|---|
| Device does not power on | Low or dead batteries; Incorrect battery installation | Replace batteries; Check battery polarity |
| Inaccurate measurements | Laser lens dirty; Unstable measurement surface; Incorrect reference point setting | Clean laser lens; Ensure stable positioning; Verify reference point (front/rear) |
| "Error" displayed on screen | Measurement out of range; Laser beam obstructed; Strong light interference | Ensure target is within 0.05-40m; Clear obstructions; Measure in less bright conditions |
| Laser not visible during daytime | High ambient light conditions | This is normal for Class II lasers in bright environments. Use in shaded areas or indoors for better visibility. |
8. Technical Specifications
Below are the detailed technical specifications for the SNDWAY SW-T40 Digital Laser Distance Meter:
| Feature | Specification |
|---|---|
| Measuring Range | 0.05 to 40 meters |
| Accuracy | ±2mm (0.079 inch) |
| Laser Class | Class II, <1mW, 635nm |
| Dust & Splash Proof | IP54 |
| Laser Auto Off | 20 seconds |
| Power Auto Off | 150 seconds |
| Operation Temperature | 0°C to 40°C (32°F to 104°F) |
| Storage Temperature | -20°C to 60°C (14°F to 140°F) |
| Power Supply | 2 x 1.5V AAA batteries (not included) |
| Dimensions | 112 x 50 x 25 mm (4.41 x 1.97 x 0.99 inches) |
| Weight | Approx. 180 g |
| Material | Plastic |
| Color | Green |

Figure 8.1: Device Dimensions. This image provides a visual representation of the SNDWAY SW-T40's dimensions, indicating its length, width, and height for reference.
9. Warranty and Support
For information regarding warranty coverage, technical support, or service, please refer to the documentation provided at the point of purchase or contact your retailer. Keep your purchase receipt as proof of purchase for any warranty claims.