1. Safety Instructions
Always read and understand all safety warnings and instructions before operating this power tool. Failure to follow the warnings and instructions may result in electric shock, fire, and/or serious injury.
1.1 General Power Tool Safety Warnings
- Work Area Safety: Keep the work area clean and well-lit. Cluttered or dark areas invite accidents. Do not operate power tools in explosive atmospheres, such as in the presence of flammable liquids, gases, or dust.
- Electrical Safety: Power tool plugs must match the outlet. Never modify the plug in any way. Avoid body contact with earthed or grounded surfaces.
- Personal Safety: Always wear eye protection, hearing protection, and a dust mask. Dress properly; avoid loose clothing or jewelry. Keep hair, clothing, and gloves away from moving parts.
- Tool Use and Care: Do not force the power tool. Use the correct power tool for your application. Disconnect the plug from the power source before making any adjustments, changing accessories, or storing power tools.
1.2 Miter Saw Specific Safety Warnings
- Always use the blade guard. Ensure it is functioning correctly before each use.
- Secure the workpiece. Do not hold small pieces by hand. Use the provided workpiece clamp.
- Ensure the blade is sharp and suitable for the material being cut. This saw is supplied with a TCT 24T blade suitable for wood, laminates, and plastics.
- Keep hands away from the cutting area and the blade.
- Never reach around the blade or over the saw table while the blade is rotating.
- Allow the blade to reach full speed before beginning a cut.
- Do not attempt to cut materials that are too large for the saw's capacity.
2. Product Overview
The KATSU Tools 210mm Sliding Compound Miter Saw Model 101502 is a versatile power tool designed for precise cross-cutting and miter cutting in various materials such as wood, laminates, and plastics. Its sliding feature allows for cutting wider workpieces, while the compound functionality enables simultaneous miter and bevel cuts.
2.1 Key Features
- Powerful 1700W motor with a cutting speed of 5000 RPM.
- Rotating table for precise angular cuts, adjustable from -45° to +45°.
- Workpiece support and clamping device for secure cutting performance.
- Equipped with a TCT 24T blade, ideal for cutting hardwood, laminates, and plastic.
- Suitable for various cutting applications in woodworking.
2.2 Components
Familiarize yourself with the main components of your miter saw:
- Motor Housing and Handle
- Blade Guard (Upper and Lower)
- Saw Blade
- Miter Table / Base
- Miter Angle Lock Knob
- Workpiece Clamp
- Dust Bag / Dust Port
- Extension Wings

Figure 1: Front view of the KATSU Tools 210mm Sliding Compound Miter Saw, showing the blade, motor, handle, and base.

Figure 2: Side view of the miter saw, highlighting the motor housing and ergonomic handle.
3. Setup and Assembly
3.1 Unpacking
Carefully remove the miter saw and all accessories from the packaging. Inspect for any damage. Retain packaging for future transport or storage.
3.2 Base Installation
The saw typically comes pre-assembled to its base. Ensure all bolts securing the saw to its base are tight. For stability, it is recommended to mount the saw to a workbench using appropriate fasteners through the holes in the base.
3.3 Blade Installation/Check
The saw comes with a 210mm TCT 24T blade. Before first use, ensure the blade is correctly installed and securely tightened. Refer to the blade change instructions in the Maintenance section if replacement is needed.
3.4 Workpiece Support and Clamp
Attach the extension wings to the sides of the miter saw table for supporting longer workpieces. Install the workpiece clamp into the designated slot on the saw table. This clamp is crucial for securing the material during cutting operations.

Figure 3: Close-up view of the workpiece clamp and miter adjustment knob, essential for securing material and setting angles.
4. Operating the Miter Saw
4.1 Power Connection
Connect the saw to a standard 230V/50Hz power outlet. Ensure the power switch is in the OFF position before plugging in.
4.2 Adjusting Miter Angle
To adjust the miter angle:
- Loosen the miter lock knob located at the front of the saw table.
- Rotate the miter table to the desired angle (from -45° to +45°), aligning the indicator with the scale.
- Tighten the miter lock knob securely to fix the angle.

Figure 4: Close-up of the miter angle adjustment mechanism, showing the scale and locking knob.
4.3 Adjusting Bevel Angle
This compound miter saw allows for bevel cuts. To adjust the bevel angle:
- Locate the bevel lock lever/knob, usually at the rear or side of the saw head.
- Loosen the lock.
- Tilt the saw head to the desired bevel angle.
- Securely tighten the bevel lock.
4.4 Making a Cut
Follow these steps for safe and accurate cutting:
- Prepare Workpiece: Place the workpiece firmly against the fence and the saw table.
- Secure Workpiece: Use the workpiece clamp to hold the material securely in place.
- Position Saw Head: For sliding cuts, pull the saw head towards you. For non-sliding cuts, push it back.
- Start Motor: Press the power switch to start the motor. Allow the blade to reach full operating speed (5000 RPM) before beginning the cut.
- Perform Cut: Slowly and steadily push the saw head down and forward through the workpiece. Do not force the cut.
- Retract Blade: Once the cut is complete, release the power switch and allow the blade to stop completely before raising the saw head and retracting it.
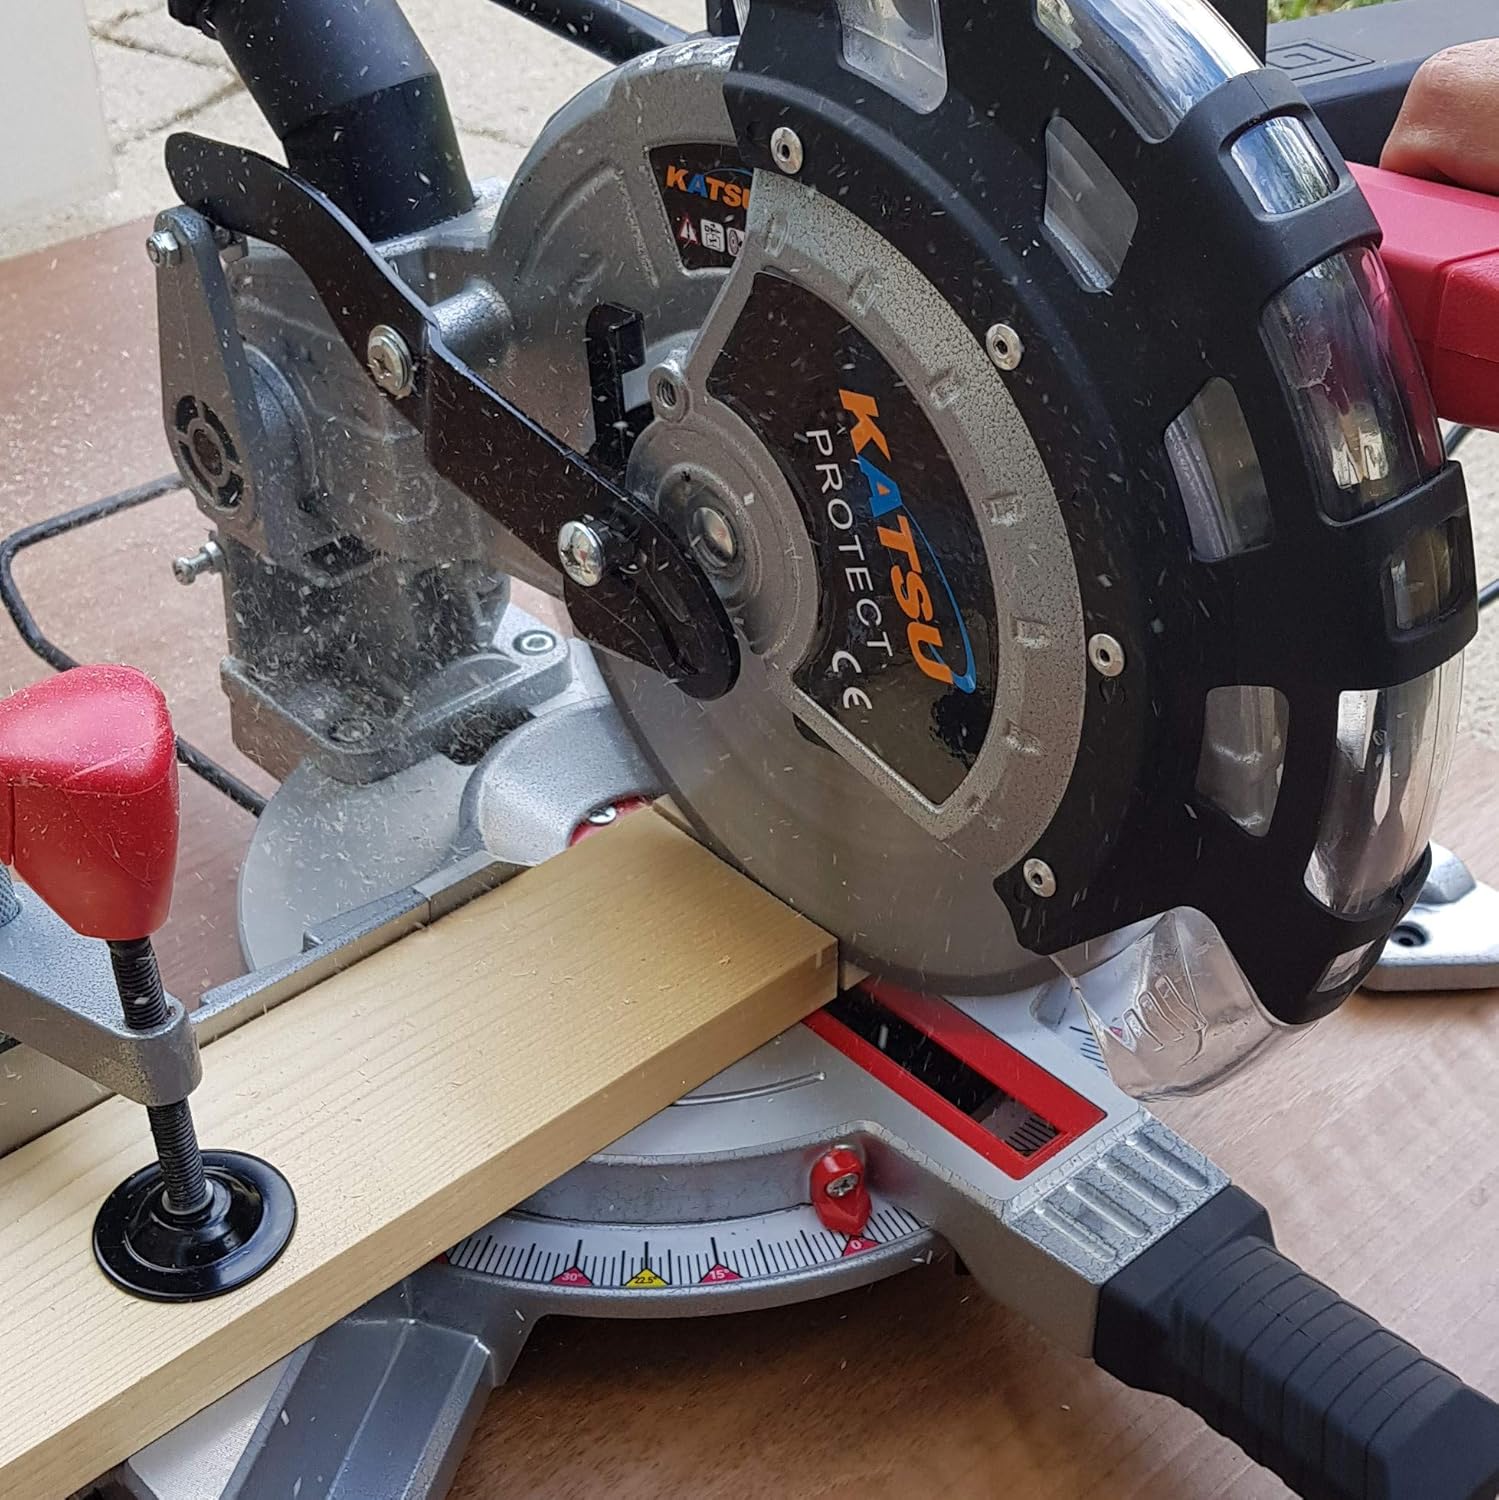
Figure 5: The miter saw in operation, demonstrating a straight cut on a wooden workpiece with the blade guard in position.

Figure 6: The miter saw performing an angled cut, showcasing its versatility for various woodworking tasks.
4.5 Dust Collection
Attach the provided dust bag to the dust port at the rear of the saw to collect sawdust and maintain a cleaner work environment. Empty the dust bag regularly for optimal performance.
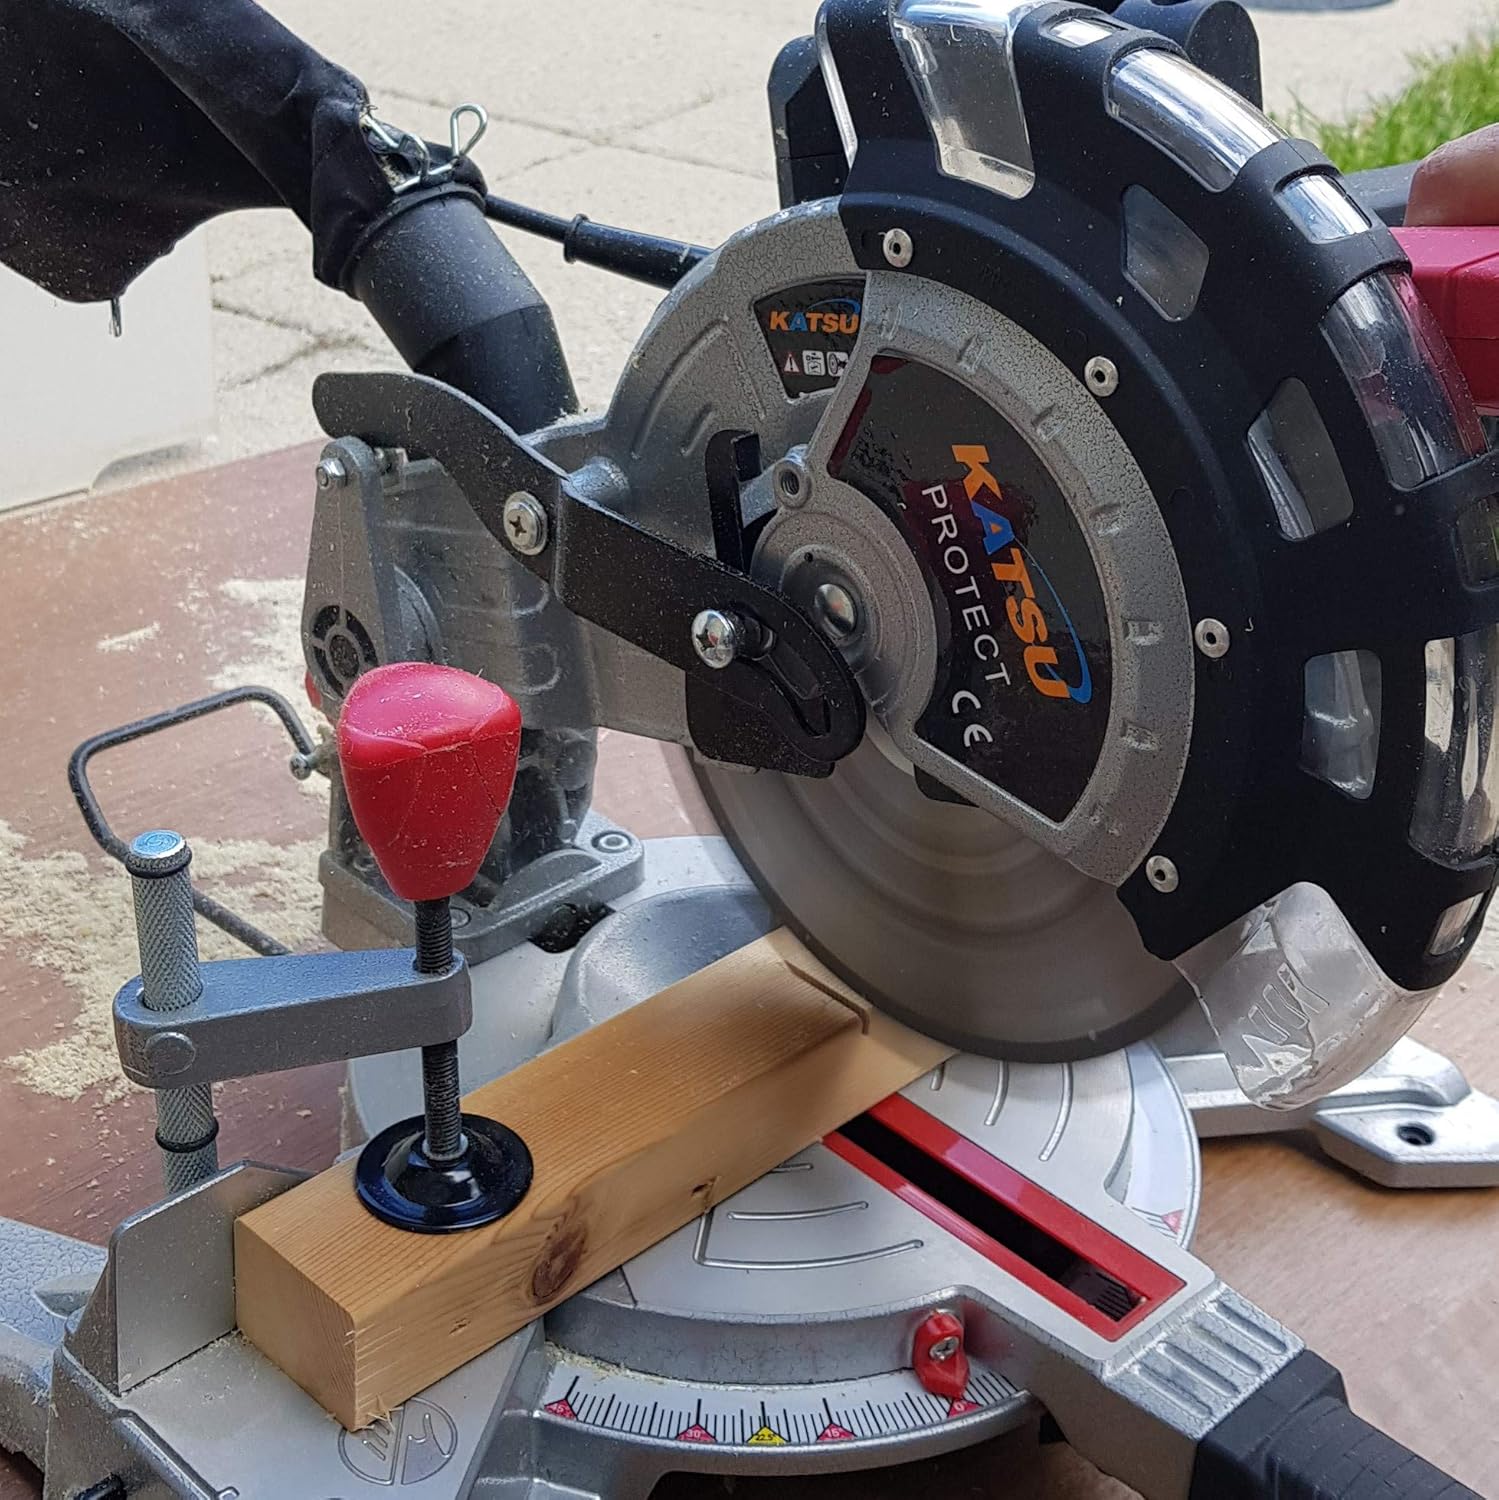
Figure 7: Rear view of the miter saw, showing the dust bag attached to the dust port for efficient chip collection.
5. Maintenance
Regular maintenance ensures the longevity and safe operation of your miter saw.
5.1 Cleaning
- Always disconnect the saw from the power supply before cleaning.
- Use a brush or compressed air to remove sawdust and debris from the motor vents, blade guard, and table.
- Do not use solvents or abrasive cleaners.
5.2 Blade Replacement
When replacing the blade:
- Disconnect the saw from the power supply.
- Raise the blade guard and use the provided wrench to loosen the arbor nut.
- Carefully remove the old blade, noting its rotation direction.
- Install the new 210mm TCT blade, ensuring the teeth are pointing in the correct direction (usually indicated by an arrow on the blade and saw).
- Tighten the arbor nut securely.
- Lower the blade guard and test its movement.
5.3 General Inspection
Periodically check for:
- Damaged power cord or plug.
- Loose fasteners or components.
- Wear on the blade or blade guard.
- Smooth operation of sliding and pivoting mechanisms.
6. Troubleshooting
This section addresses common issues you might encounter with your miter saw.
| Problem | Possible Cause | Solution |
|---|---|---|
| Saw does not start | No power supply; Faulty switch; Motor overload. | Check power connection; Test outlet; Contact qualified service personnel. |
| Blade not cutting cleanly | Dull blade; Incorrect blade for material; Blade installed backward. | Replace blade; Use appropriate blade; Reinstall blade correctly. |
| Excessive vibration | Loose blade; Damaged blade; Unsecured saw base. | Tighten blade arbor nut; Replace blade; Secure saw to workbench. |
| Inaccurate cuts | Miter/bevel angle not locked; Fence not square; Workpiece not secured. | Ensure all locks are tight; Check fence alignment; Use workpiece clamp. |
7. Technical Specifications
| Specification | Value |
|---|---|
| Model Number | 101502 |
| Rated Voltage | 230V / 50Hz |
| Rated Input Power (S1/S6) | 1400W / 1700W |
| No-Load Speed | 5000 RPM |
| Blade Diameter | 210mm TCT 24T |
| Max Cutting Capacity (0° x 90°) | H60 x W120mm |
| Max Cutting Capacity (45° x 90°) | H60 x W80mm |
| Max Cutting Capacity (0° x 45°) | H35 x W120mm |
| Max Cutting Capacity (45° x 45°) | H35 x W80mm |
| Product Dimensions | 32 x 34.5 x 48.5 cm |
| Product Weight | 8.66 kg |
| Included Accessories | 3 Extension Wings, 1 Dust Bag, 1 Wrench, 1 Workpiece Clamp |
8. Warranty and Support
KATSU Tools products are manufactured to high-quality standards. For information regarding warranty coverage, technical support, or service, please refer to the warranty card included with your product or contact KATSU Tools customer service. Keep your purchase receipt as proof of purchase.
For further assistance, please visit the official KATSU Tools website or contact your retailer.