Introduction
This manual provides comprehensive instructions for the setup, operation, and maintenance of your JVC GY-HM250 UHD 4K Streaming Camcorder. Designed for professional use, this camcorder offers advanced features including UHD 4K recording, Full HD live streaming, and integrated lower-thirds graphics capabilities. Please read this manual thoroughly before using the camcorder to ensure proper and safe operation.
Safety Information
Always observe the following safety precautions to prevent injury and damage to the camcorder:
- Do not expose the camcorder to rain, moisture, or extreme temperatures.
- Avoid direct exposure to sunlight for extended periods.
- Use only JVC-approved accessories and power adapters.
- Do not attempt to disassemble or modify the camcorder. Refer all servicing to qualified personnel.
- Keep the camcorder away from strong magnetic fields.
Package Contents
Verify that all items listed below are included in your package:
- JVC GY-HM250 UHD 4K Streaming Camcorder
- Handle Unit
- SSL-JVC50 7.4V IDX Lithium-Ion Battery
- AC Adapter
- High Quality Dust Cleaner Blower (Bundle Item)
- Lens Cleaning Solution (Bundle Item)
- Blower Brush (Bundle Item)
- Microfiber Cloth (Bundle Item)
- 5pc Cotton Swabs (Bundle Item)
Product Overview
Familiarize yourself with the main components of the JVC GY-HM250 camcorder.

Figure 1: JVC GY-HM250 Camcorder with included cleaning accessories. This image shows the camcorder from the front-left angle, highlighting the lens, main body, and the detachable handle unit. Various cleaning tools are displayed in the foreground.

Figure 2: Front-left view of the JVC GY-HM250 Camcorder. This image provides a clear view of the camcorder's lens, the JVC logo, and the 4K CAM branding on the side.
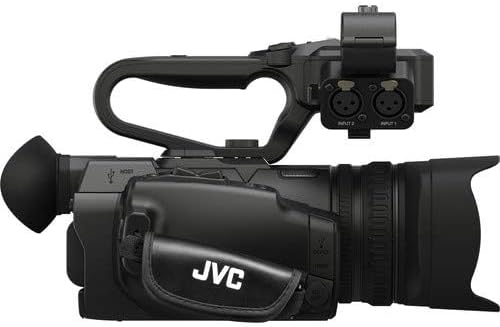
Figure 3: Top-down view of the JVC GY-HM250 Camcorder. This perspective highlights the handle unit with its audio input controls and the overall ergonomic design of the camcorder body.
Setup
1. Charging and Installing the Battery
- Connect the supplied AC adapter to the camcorder and a power outlet.
- Insert the SSL-JVC50 battery into the battery slot at the rear of the camcorder until it clicks into place.
- Allow the battery to fully charge before first use. The charging indicator will show status.
2. Inserting SD Cards
The GY-HM250 supports SDXC Class 3 cards for UHD 4K recording at 150 Mb/s, and SDXC/SDHC Class 10 cards for 70 Mb/s. The camcorder has dual SD card slots.
- Locate the SD card slots, typically on the side or rear of the camcorder.
- Insert the SD card with the label facing the correct direction (refer to the diagram near the slot) until it clicks.
- To remove, gently push the card in until it springs out.
3. Attaching the Handle Unit
The handle unit provides additional audio inputs and ergonomic grip.
- Align the handle unit with the mounting shoe on top of the camcorder.
- Slide the handle unit forward until it locks into position.
- Secure it with the locking screw, if present.
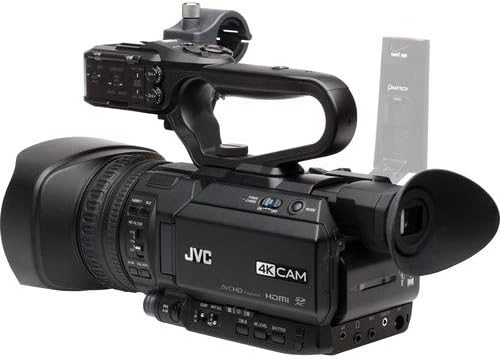
Figure 4: Rear-right view of the JVC GY-HM250 Camcorder, showing the handle unit attached and the viewfinder. This angle also reveals some of the control buttons on the camcorder's body.
Operating Instructions
1. Basic Recording
- Power On: Slide the POWER switch to ON.
- Select Recording Mode: Use the MODE dial to select your desired recording format (e.g., UHD 4K, HD).
- Adjust Settings: Use the menu system via the LCD screen to adjust exposure, white balance, and other parameters.
- Start/Stop Recording: Press the REC START/STOP button.
2. Live Streaming
The GY-HM250 features an integrated IP engine for Full HD live streaming.
- Network Connection: Connect the camcorder to a network via Ethernet or Wi-Fi (if applicable).
- Streaming Setup: Access the streaming settings in the camcorder's menu. Configure RTMP, Zixi, or Wowza streaming parameters.
- Zeroconf Configuration: For common LAN setups, use the one-click zeroconf configuration for simplified setup.
- Start Streaming: Initiate streaming from the camcorder's controls or remotely via a mobile device/laptop.
3. Lower-Thirds and Titling System
The camcorder allows for on-board creation and display of lower-thirds and titles in HD mode.
- Access Graphics Menu: Navigate to the graphics settings in the camcorder's menu.
- Create/Select Graphics: Choose from pre-installed color schemes or upload custom icons/logos.
- Control: Graphics can be controlled via a browser-controlled tablet or smartphone connected to the same network as the camcorder.
Maintenance
1. Cleaning the Camcorder
- Lens: Use a lens brush or blower to remove dust, then gently wipe with a microfiber cloth and lens cleaning solution. Avoid touching the lens surface directly.
- Body: Wipe the camcorder body with a soft, dry cloth. For stubborn dirt, slightly dampen the cloth with water. Do not use harsh chemicals.
- LCD Screen: Use a clean, soft cloth specifically designed for LCD screens.
2. Battery Care
- Store batteries in a cool, dry place when not in use.
- Avoid fully discharging the battery frequently to prolong its lifespan.
- If storing for extended periods, charge the battery to approximately 50% capacity.
3. Storage
When not in use, store the camcorder in a dust-free, dry environment, preferably in a padded case to protect it from impacts.
Troubleshooting
| Problem | Possible Cause | Solution |
|---|---|---|
| Camcorder does not power on. | Battery is not charged or not inserted correctly. | Charge the battery fully. Ensure the battery is securely inserted. Check AC adapter connection. |
| Recording stops unexpectedly. | SD card is full or too slow. | Delete unnecessary files or replace with an empty card. Use a high-speed SDXC Class 3 or Class 10 card. |
| Live streaming is unstable or fails. | Poor network connection; incorrect streaming settings. | Ensure a stable internet connection. Verify all streaming parameters (RTMP URL, stream key). Check firewall settings. |
| Lower-thirds graphics not appearing. | Not in HD mode; incorrect browser control setup. | Ensure the camcorder is operating in HD mode. Verify the tablet/smartphone is on the same network and correctly configured for browser control. |
Specifications
| Feature | Detail |
|---|---|
| Sensor | 1/2.3" CMOS Sensor |
| Video Resolution | UHD 4K (24/30p), 4:2:2 4K (24/30p), Full HD |
| Recording Bit Rate | Up to 150 Mb/s (UHD 4K), 70 Mb/s (UHD 4K) |
| Storage Media | SDXC Class 3, SDXC/SDHC Class 10 |
| Streaming Capabilities | Full HD Live Streaming (RTMP, Zixi, Wowza) |
| Lens | 12x Optical Zoom Lens |
| Connectivity | 3G-SDI Out, HDMI Out (Live HDMI UHD 4K Out) |
| Special Features | Built-in Lower-Thirds & Titling System, IP Control, Zeroconf |
| Dimensions | 10.9 x 13.6 x 10.1 inches |
| Weight | 6.43 pounds |
Warranty and Support
For warranty information and technical support, please refer to the official JVC website or contact JVC customer service. Keep your proof of purchase for warranty claims.
JVC Official Website: www.jvc.com