1. Product Overview
The Evertech 32-Channel HD Digital Video Recorder (DVR) is designed for comprehensive security surveillance applications in homes, offices, shops, businesses, and restaurants. This advanced DVR system records professional-quality video from up to 32 cameras in high resolution, ensuring detailed monitoring and playback capabilities. It comes equipped with a pre-installed 8TB surveillance-grade hard drive for extensive recording memory.
The DVR supports multichannel playback, allowing users to search and download footage efficiently. Its user-friendly interface facilitates easy setup for remote viewing on smartphones (via the Xmeye App), tablets, or PCs (using CMS Software), providing access to live and recorded footage from any location with an internet connection. Key features include motion detection, email alerts for triggered events, and convenient USB backup options.

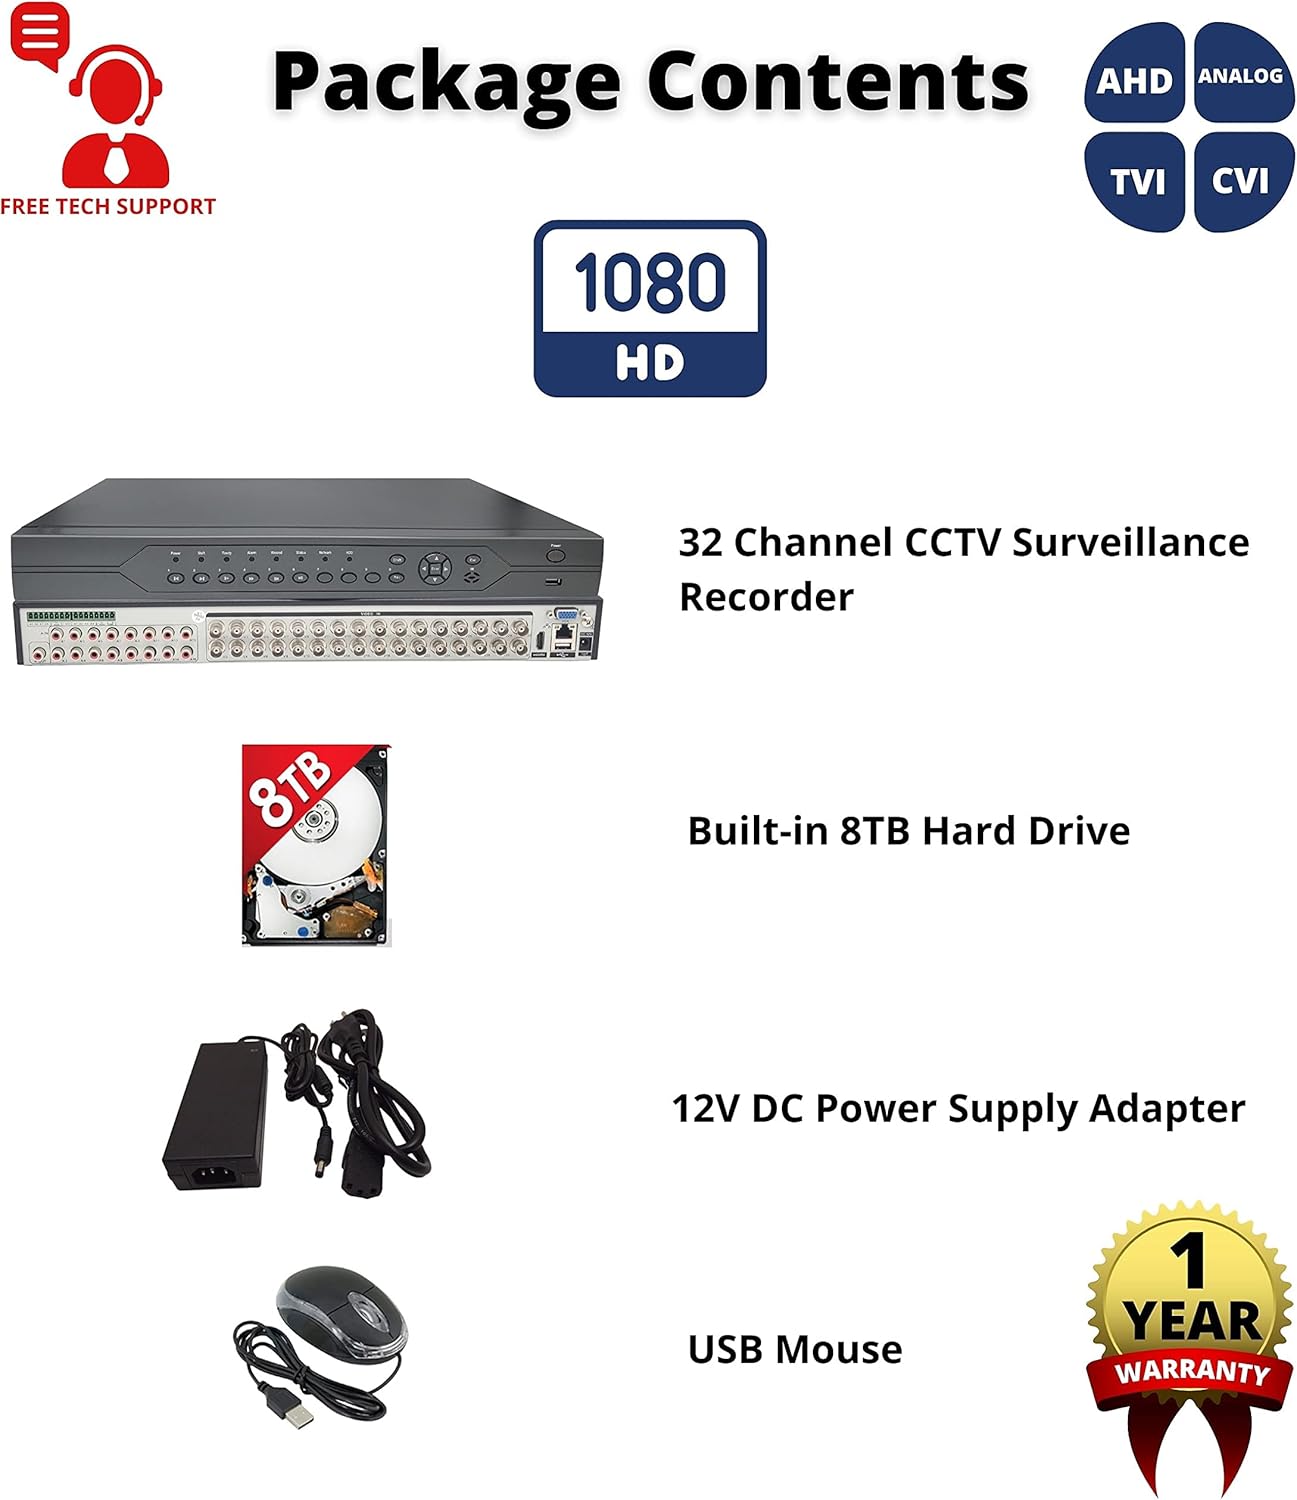
2. Package Contents
Please verify that all items listed below are included in your package. If any items are missing or damaged, please contact Evertech customer support.
- 1 x Evertech 32 Channel CCTV Surveillance Recorder
- 1 x Built-in 8TB Surveillance Hard Drive
- 1 x 12V DC Power Supply Adapter
- 1 x USB Mouse
3. Features and Camera Compatibility
The Evertech 32 Channel DVR is designed for broad compatibility and robust performance. It supports various camera technologies and offers extensive recording and playback features.
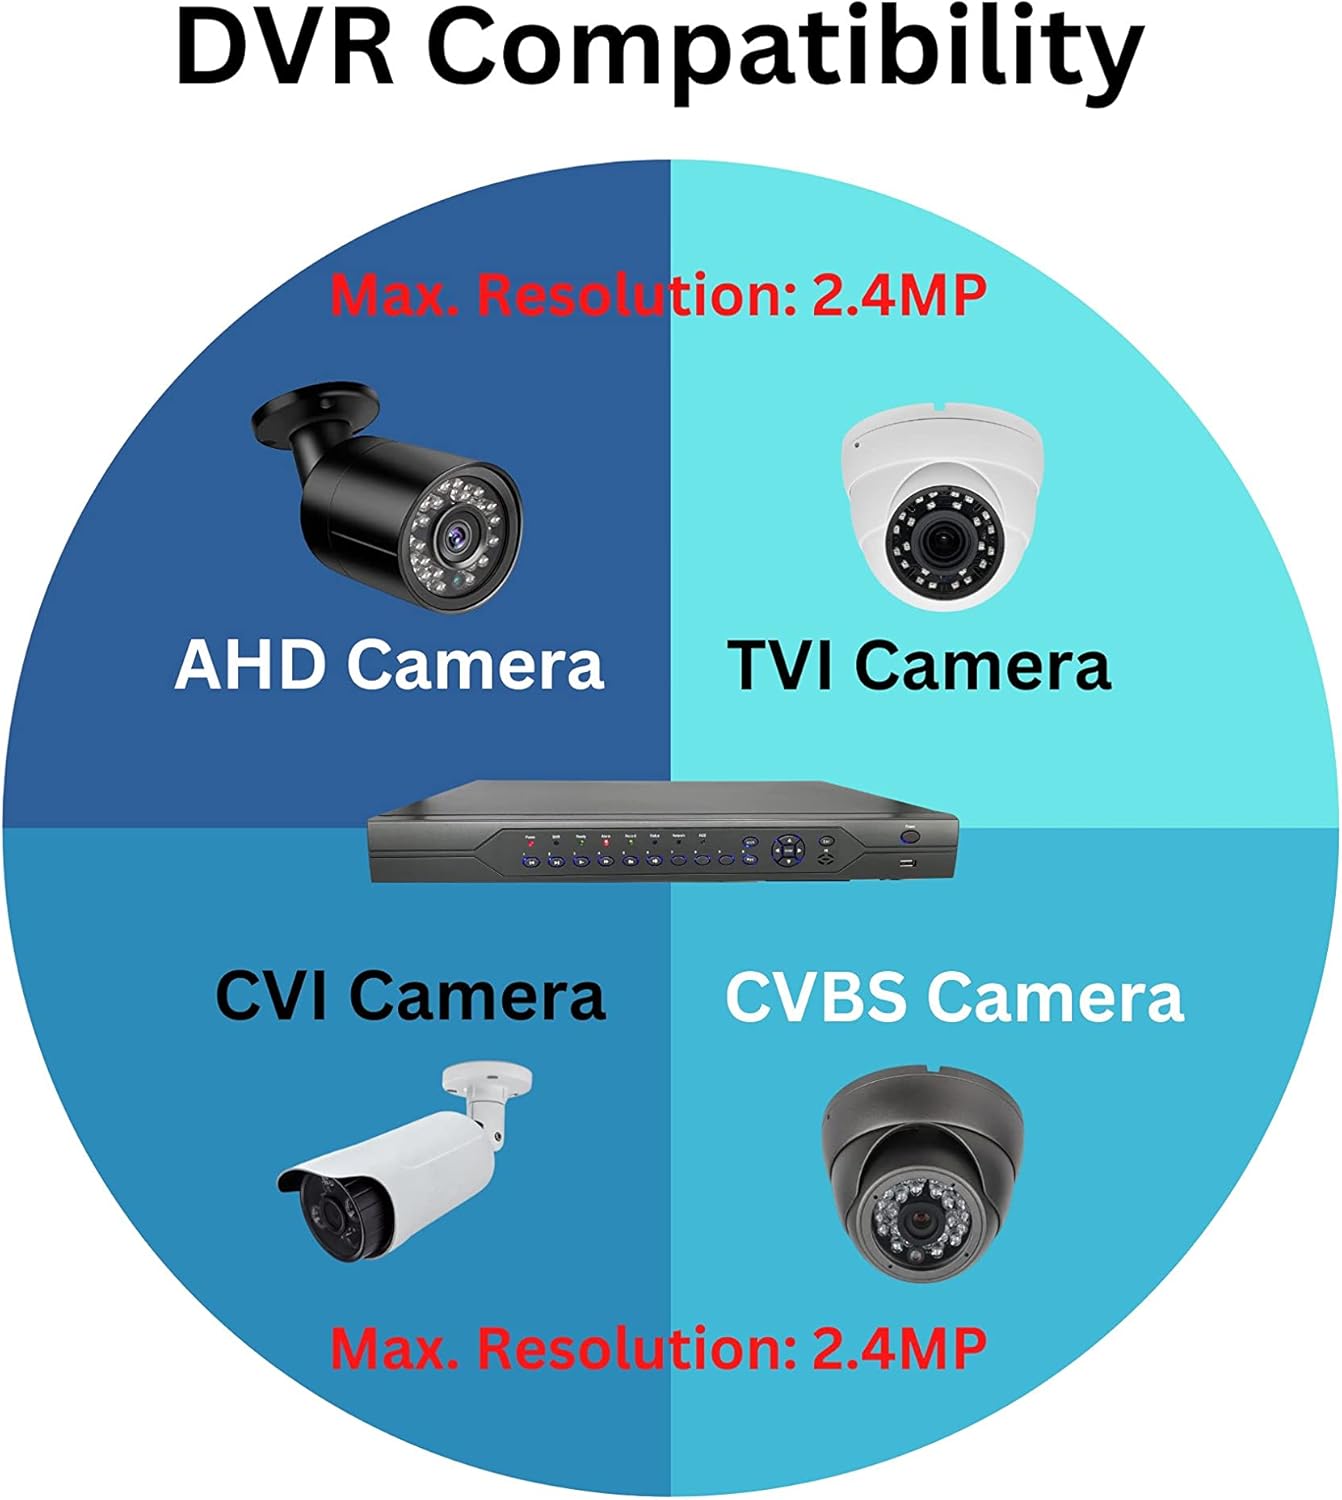
3.1 Camera Compatibility
This DVR is compatible with a wide range of camera types, including 1080P, 960P, and 720P TVI, AHD, CVI, and Traditional Analog (CVBS/960H) cameras. It is important to note that this DVR is not compatible with SDI cameras or cameras exceeding 2.4MP resolution. Please ensure your cameras meet these compatibility requirements before connecting.
3.2 Key Features
- Video Compression: H.265 / H.264 for efficient storage.
- Video Input: 32 Channel BNC inputs.
- Video Output: 1 Channel VGA, 1 Channel HDMI output.
- Audio Input/Output: 16 Channel Audio Input / 1 Channel Audio Output (RCA).
- Max. Recording Pixels: Supports 32 Channels AHD, TVI, CVI 1080N@15fps (DVR mode).
- Hard Disk Storage: Supports 2 SATA HDDs, each up to 8TB (total 16TB capacity).
- Playback Modes: Multiple slow and rapid play speeds, manual, and single-frame play modes with a sliding bar for precise control.
- Backup Device: Supports USB flash drive, USB hard disk, and network backup.
- Network Protocols: TCP/IP, PPPoE, DDNS, NTP, ARSP.
- CMS/Mobile Access: Compatible with XMEYE App or GOODEYE App for easy remote monitoring.
- PTZ Control: Equipped with RS485 for Pan-Tilt-Zoom camera control.
- Remote View Users: Supports up to 10 simultaneous remote users.
- Adjustable Video Settings: Hue, Saturation, Contrast, Brightness.
- Security Features: USB Mouse support, Password Protection, Power-Down Recovery.
4. Setup Guide
Follow these steps to set up your Evertech 32 Channel DVR system.
4.1 Physical Connections
- Connect Cameras: Connect your TVI, AHD, CVI, or Analog cameras to the BNC video input ports (V1-V32) on the rear panel of the DVR.
- Connect Audio: If using microphones or audio output devices, connect them to the Audio In (A1-A16) and Audio Out (A) RCA ports.
- Connect Monitor: Connect a monitor to either the HDMI Output or VGA Output port for local viewing and configuration.
- Connect USB Mouse: Plug the included USB mouse into one of the USB ports on the front or rear of the DVR.
- Network Connection: For remote viewing and network features, connect an Ethernet cable from the DVR's Network Interface (RJ45 port) to your router or modem.
- Power Connection: Connect the 12V DC power supply adapter to the DVR's Power In port, then plug the adapter into a power outlet.

4.2 Initial Power On and Configuration
Once all physical connections are made, power on the DVR. The system will boot up, and you should see the interface on your connected monitor. Follow the on-screen prompts for initial setup, which typically includes setting the date/time, creating an administrator password, and configuring network settings (DHCP is recommended for most home/office networks).
5. Operation
This section covers the basic operation of your Evertech DVR, including live viewing, recording, and remote access.
5.1 Live View and Playback
After initial setup, you can view live camera feeds on your connected monitor. Use the USB mouse to navigate the DVR's graphical user interface (GUI). The DVR supports various display modes (e.g., 1/4/8/9/32 split screen) to view multiple cameras simultaneously.
To play back recorded footage, access the playback menu. You can search for recordings by time, date, event (e.g., motion detection), or channel. The system offers multiple playback speeds and single-frame playback for detailed review.
5.2 Remote Viewing (Xmeye App / CMS Software)
The Evertech DVR supports remote viewing via the Xmeye App (available on App Store and Google Play) for smartphones and tablets, and CMS Software for PC. This allows you to monitor your premises from anywhere with an internet connection.
- Download App/Software: Download and install the Xmeye App on your mobile device or the CMS Software on your PC.
- Register Account: Create an account within the app/software.
- Add Device: Add your DVR by scanning the QR code displayed on the DVR's monitor (usually found in the network settings or P2P menu) or by manually entering the device ID.
- View Feeds: Once added, you can view live feeds, access recorded footage, and configure certain DVR settings remotely.

5.3 Recording Modes and Backup
The DVR supports various recording modes, including continuous recording, scheduled recording, and motion detection recording. Motion detection can be configured for specific areas and sensitivity levels, triggering recordings and email alerts when activity is detected.
To back up footage, connect a USB flash drive or external USB hard disk to the DVR's USB port. Navigate to the backup menu in the DVR's interface to select and export desired video files. Network backup is also available for transferring files over the local network.
6. Maintenance
Regular maintenance helps ensure the longevity and optimal performance of your DVR system.
- Hard Drive Management: The pre-installed 8TB hard drive provides ample storage. Periodically check the hard drive status in the DVR's menu to ensure it is functioning correctly. The DVR supports overwriting old footage when the disk is full, but you can also manually delete old recordings if needed.
- Firmware Updates: Check the Evertech website or contact technical support for any available firmware updates. Keeping your DVR's firmware up-to-date can improve performance and add new features.
- Cleaning: Keep the DVR unit clean and free from dust. Use a soft, dry cloth to wipe the exterior. Ensure ventilation openings are not blocked to prevent overheating.
- Password Security: Regularly change your DVR's administrator password and ensure strong, unique passwords for remote access accounts.
7. Troubleshooting
If you encounter issues with your Evertech DVR, refer to the common troubleshooting tips below. For more complex problems, please contact technical support.
- No Video Output:
- Ensure the monitor is powered on and correctly connected to the DVR's HDMI or VGA port.
- Verify the correct input source is selected on your monitor.
- Check the DVR's power supply connection.
- No Camera Image:
- Confirm cameras are powered on and properly connected to the DVR's BNC inputs.
- Check camera compatibility (TVI, AHD, CVI, Analog; max 2.4MP).
- Ensure video cables are not damaged.
- Remote Viewing Not Working:
- Verify the DVR is connected to the internet via an Ethernet cable.
- Check your router's internet connection.
- Ensure the Xmeye App or CMS Software is updated to the latest version.
- Confirm the device ID or QR code was correctly added to the app/software.
- Check firewall settings on your network if applicable.
- Recording Issues:
- Check the hard drive status in the DVR's menu; ensure it is initialized and has free space.
- Verify recording schedules or motion detection settings are correctly configured.
8. Technical Specifications
Below are the detailed technical specifications for the Evertech 32 Channel H.265 HD 1080 DVR.
| Feature | Detail |
|---|---|
| Model Number | EVERTECH-32CH-HD |
| Number of Channels | 32 |
| Hard Disk Size | 8 TB (Pre-installed, supports up to 2 x 8TB) |
| Memory Storage Capacity | 8 TB |
| Connectivity Technology | USB, Ethernet |
| Video Compression | H.265 / H.264 |
| Video Input | 32 Channel BNC |
| Video Output | 1 Ch VGA, 1 Ch HDMI |
| Audio Input/Output | 16 Ch Audio In / 1 Ch Audio Out (RCA) |
| Power Source | 12V DC, 4A |
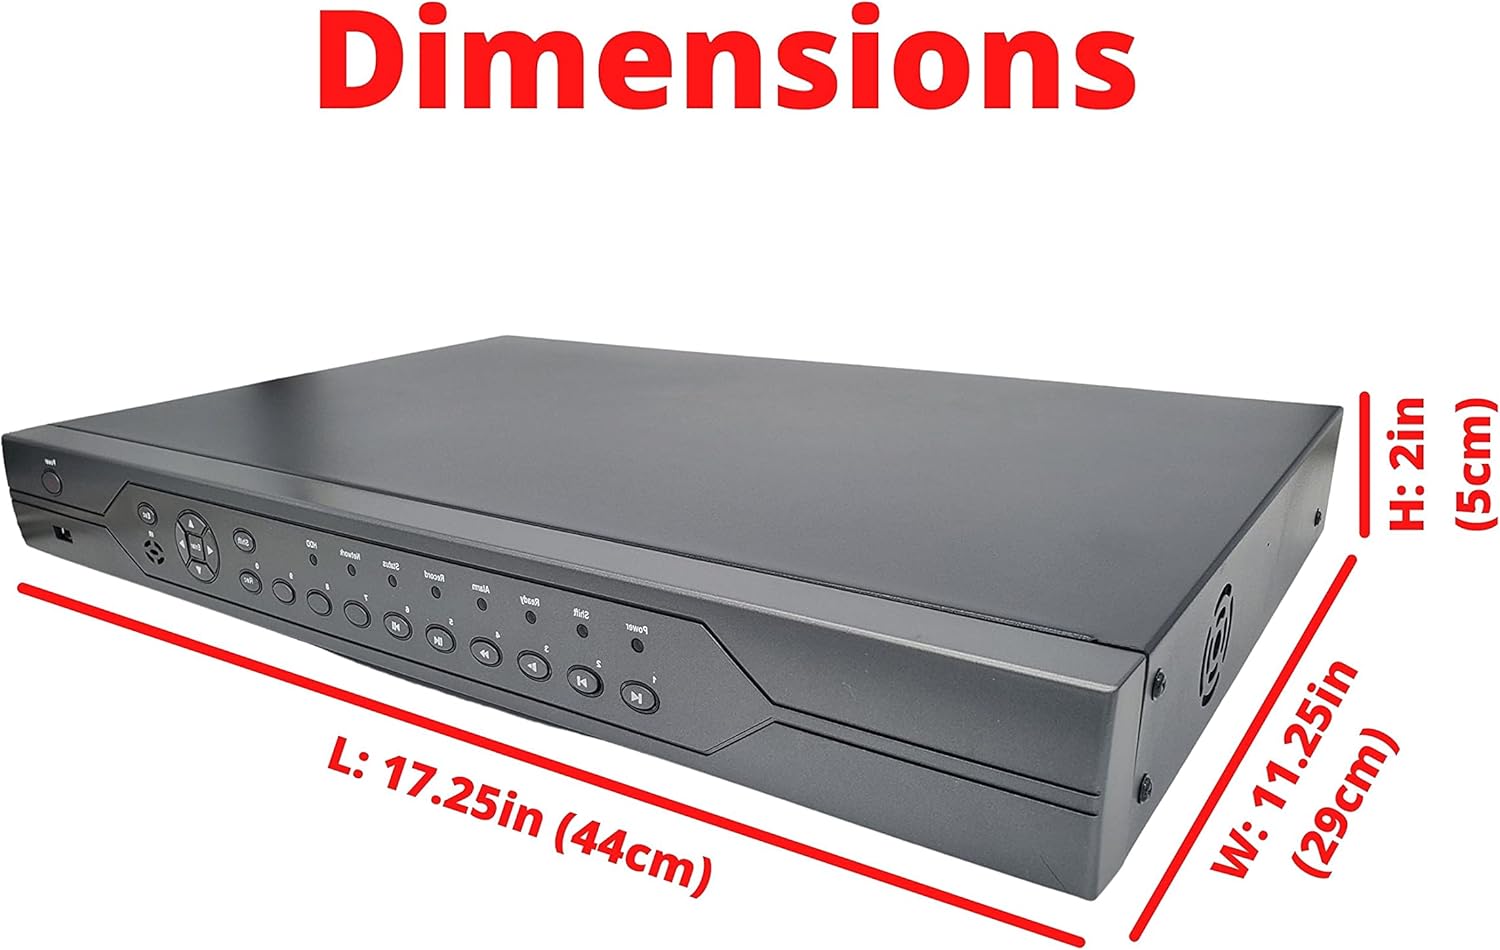
| Product Dimensions | 16.87 x 14 x 3 inches (440mm x 290mm x 50mm) |
| Item Weight | 10 pounds |
| Manufacturer | EVERTECH |
9. Warranty and Support
Evertech is committed to providing high-quality products and excellent customer service.
9.1 Product Warranty
This Evertech DVR product comes with a One Year Warranty from the date of purchase. This warranty covers defects in materials and workmanship under normal use. Please retain your proof of purchase for warranty claims.
9.2 Technical Support
If you encounter any questions or require assistance with setting up, operating, or troubleshooting your Evertech DVR, our dedicated technical support team is available to help. Please feel free to contact us through the official Evertech support channels provided on our website or through your purchase platform.