Introduction
The GTDaudio 733L wireless microphone system is designed for professional audio applications, offering superior sound quality and advanced features. This system utilizes UHF diversity technology with 800 selectable channels, automatic frequency scanning, and automatic transmitter setup to ensure reliable and interference-free operation. This manual provides comprehensive instructions for the proper setup, operation, and maintenance of your GTDaudio 733L system.
Package Contents
Verify that all items listed below are included in your package. If any items are missing or damaged, please contact GTDaudio customer support.
- 1x GTDaudio 733L Receiver Unit
- 2x Bodypack Transmitters
- 2x Lapel Microphones
- 1x Power Adapter (DC 12V/800mA)
- 1x 1/4" Audio Cable
- User Manual
Product Overview
The GTDaudio 733L system consists of a receiver unit and two bodypack transmitters, each connectable to a lapel or headset microphone. Understanding the components is crucial for proper setup and operation.
Receiver Unit Rear Panel

Image: Rear panel of the GTDaudio 733L receiver. It features two XLR outputs (OUTPUT A, OUTPUT B), a 1/4" MIX OUT, a DC 12V/800mA power input, and a power switch. A "CAUTION RISK OF ELECTRIC SHOCK DO NOT OPEN" warning is visible.
Power Adapter and Audio Cable
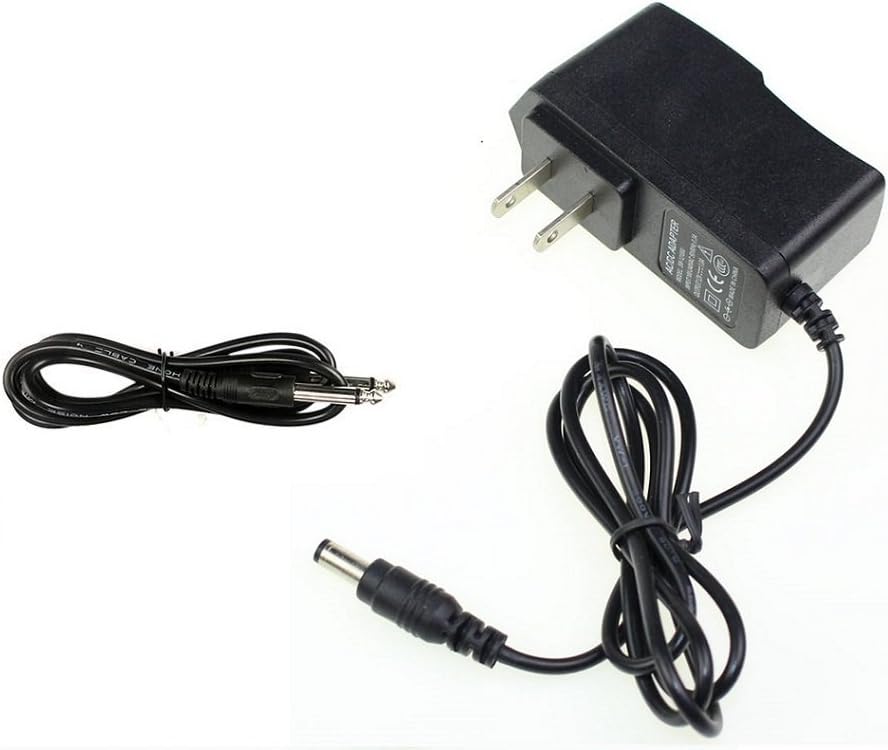
Image: The included power adapter (AC/DC ADAPTER, DC 12V) and a 1/4 inch audio cable for connecting the receiver to an audio mixer or amplifier.
Key Features
The GTDaudio 733L system incorporates several professional features for enhanced performance:
- 800 Selectable Frequencies: Each channel offers 800 selectable frequencies, allowing up to 20 sets to be used simultaneously without interference.
- True Diversity Operation: Enhances range and reliability while significantly reducing audio dropouts.
- Automatic Frequency Scanning: Automatically scans and sets the clearest available channel to avoid interference.
- Automatic Transmitter Setup: Facilitates easy synchronization between the transmitter and receiver channels.
- Extended Range: Operates effectively up to 450 feet (150 meters).
- Programmable Frequency: Operates within the 550MHz - 590MHz range (FCC Compliant).

Image: A graphic summarizing the professional features of the GTDaudio 733L system, including 2x800 selectable frequencies, true diversity, automatic frequency scanning, automatic transmitter setup, 450 feet range, and 550MHz-590MHz programmable frequency.
Setup Instructions
- Position the Receiver: Place the GTDaudio 733L receiver in a stable location, away from large metal objects or other wireless devices that may cause interference. Ensure good line-of-sight to the intended area of use for the transmitters.
- Connect Power: Connect the included DC 12V/800mA power adapter to the "POWER" input on the rear of the receiver. Plug the adapter into a suitable power outlet. Do not power on the receiver yet.
- Connect Audio Output:
- For individual channel outputs, connect XLR cables from "OUTPUT A" and "OUTPUT B" on the receiver to the corresponding inputs on your mixer or amplifier.
- For a mixed output of both channels, connect the 1/4" audio cable from the "MIX OUT" port on the receiver to a 1/4" input on your mixer or amplifier.
- Install Transmitter Batteries: Open the battery compartment of each bodypack transmitter. Insert two fresh AA batteries, observing the correct polarity (+/-). Close the compartment securely.
- Connect Microphones to Transmitters: Plug the lapel microphones into the input jacks on the bodypack transmitters. Ensure a secure connection.
- Power On and Scan for Frequencies:
- Power on the receiver unit using the power switch on the rear panel.
- Power on each bodypack transmitter.
- Utilize the automatic frequency scanning feature on the receiver to find and set the clearest available channels. Refer to the receiver's display and controls for specific instructions on initiating the scan.
- Synchronize Transmitters: Once clear frequencies are found, use the automatic transmitter setup function to synchronize the bodypack transmitters with the receiver. This typically involves aligning an IR sensor on the transmitter with one on the receiver.
- Initial Sound Check: Speak into each microphone while monitoring the audio output from your mixer/amplifier. Adjust the volume levels on both the receiver and your audio system for optimal sound.
Operating Instructions
Power On/Off
- To power on the receiver, flip the power switch on the rear panel to the "ON" position.
- To power on a bodypack transmitter, press and hold its power button until the display illuminates.
- To power off, reverse the process. Always power off transmitters before the receiver to prevent pops or noise.
Volume Adjustment
- Adjust the output volume for each channel using the dedicated volume knobs on the front panel of the receiver.
- Fine-tune the overall volume and individual microphone levels on your connected audio mixer or amplifier.
Microphone Usage
- Lapel Microphones: Clip the lapel microphone to clothing, approximately 6-8 inches (15-20 cm) below the mouth, ensuring it is not covered by fabric. Position the bodypack transmitter securely on a belt or pocket.
- Headset Microphones (if used): Position the headset microphone boom approximately 1 inch (2.5 cm) from the corner of the mouth.
Range and Line of Sight
The system has an operational range of up to 450 feet (150 meters) under optimal conditions. Maintain a clear line of sight between the transmitters and the receiver antennas for best performance. Obstacles such as walls, large crowds, or metal structures can reduce the effective range.
Maintenance
- Cleaning: Use a soft, dry cloth to clean the exterior of the receiver and transmitters. Do not use liquid cleaners or solvents, as they may damage the finish or internal components.
- Battery Replacement: Replace transmitter batteries when the low battery indicator appears on the transmitter display or when audio quality degrades. Always use fresh, high-quality AA alkaline batteries. Remove batteries if the system will not be used for an extended period to prevent leakage.
- Storage: Store the system in a cool, dry place, away from direct sunlight, extreme temperatures, and high humidity.
- Antenna Care: Handle receiver antennas carefully. Do not bend or force them, as this can affect signal reception.
Troubleshooting
| Problem | Possible Cause | Solution |
|---|---|---|
| No sound from microphone |
|
|
| Interference or static noise |
|
|
| Short operating range or dropouts |
|
|
Specifications
| Feature | Detail |
|---|---|
| Brand | GTDaudio |
| Model Number | 733L |
| Connectivity Technology | UHF |
| Number of Channels | 800 (selectable per channel) |
| Frequency Range | 550MHz - 590MHz |
| Operating Range | Up to 450 feet (150 meters) |
| Signal-to-Noise Ratio | 80 dB |
| Frequency Response | 35 Hz (lower bound provided, upper not specified) |
| Microphone Form Factor | Lavalier (Lapel) |
| Polar Pattern | Omnidirectional |
| Power Source | Corded Electric (Receiver), AA Batteries (Transmitters) |
| Material | Plastic Or Metal |
| Item Weight | 7 pounds (System) |
| Package Dimensions | 21 x 12 x 6 inches |
| UPC | 854318007509 |
| ASIN | B07MXQ9XGZ |
Warranty and Support
For warranty information, technical support, or service inquiries regarding your GTDaudio 733L wireless microphone system, please contact GTDaudio customer service directly. Refer to the product packaging or the official GTDaudio website for the most current contact details and warranty terms.
Online Support: Visit the GTDaudio Store on Amazon