1. Introduction
The DuraComm LPX-18 is a low-profile desktop power supply, part of the next-generation LPX series. It features enhanced electronic filtering, noise shielding, auto-ranging AC input, and adjustable DC output. Designed with a rugged 7-inch standard form factor, this unit meets DOE Level VI Green energy standards for improved efficiency. This manual provides essential information for the safe and effective use of your LPX-18 power supply.
2. Key Features
- Universal AC input: Full range 90-264 VAC.
- Filtered and regulated output with built-in active Power Factor Correction (PFC) function.
- 125% peak load capability for demanding applications.
- Meets Level VI Efficiency standards for energy conservation.
- Complies with Elsa 2007/DoE, NRCan, and EU ErP regulations.
- Adjustable DC output voltage (typically 11-15V).
- Passive cooling design for quiet operation.
3. Setup Instructions
3.1 Safety Precautions
- Ensure the power supply is disconnected from the AC mains before making any connections.
- Operate the unit in a well-ventilated area to prevent overheating.
- Do not expose the unit to moisture or extreme temperatures.
- Verify that the input voltage matches the power supply's requirements (90-264 VAC).
3.2 AC Power Connection
Connect the supplied AC power cord to the IEC C14 inlet located on the rear of the power supply. Plug the other end of the AC power cord into a standard wall outlet. Ensure the connection is secure.
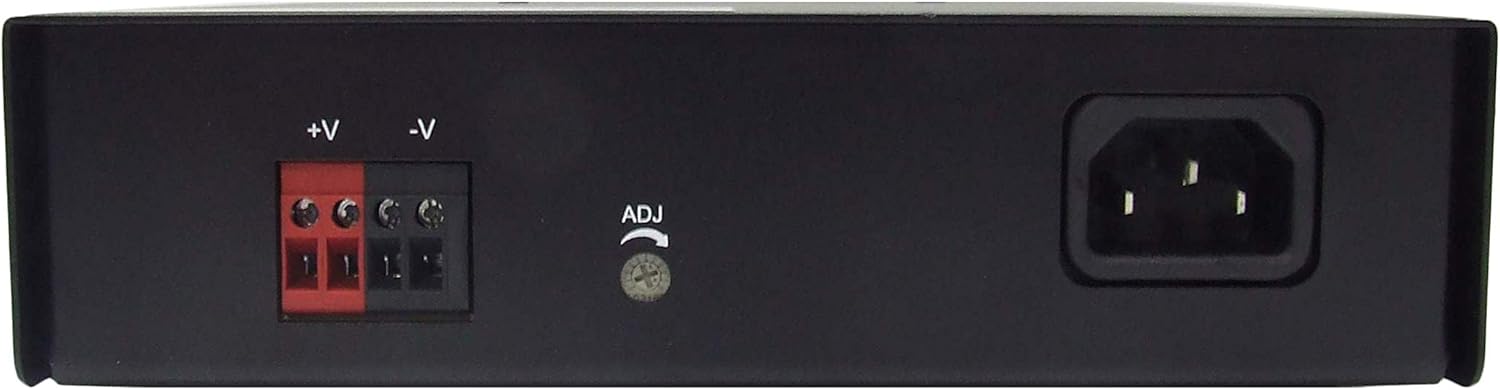
Figure 1: Rear view of the LPX-18 with AC inlet and DC terminals.
3.3 DC Output Connection
The LPX-18 features screw terminals for DC output. Connect your device's positive (+) lead to the red terminal and the negative (-) lead to the black terminal. Ensure all connections are tight and correctly polarized to prevent damage to the power supply or connected equipment.
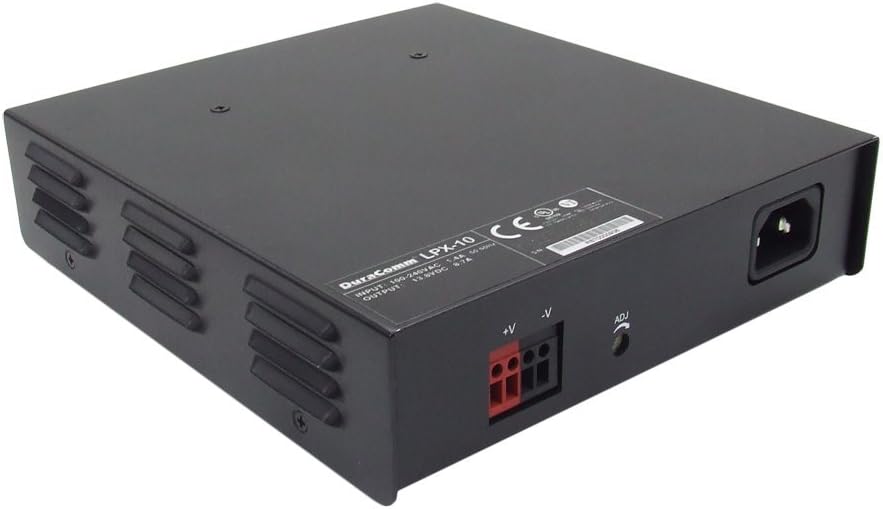
Figure 2: Side view showing DC output terminals and voltage adjustment.
3.4 Output Voltage Adjustment
The LPX-18 offers an adjustable DC output voltage, typically ranging from 11V to 15V. To adjust the voltage, locate the small adjustment screw (often labeled 'ADJ' or 'VR') near the DC output terminals on the rear panel. Use a small screwdriver to carefully turn this screw clockwise to increase the voltage or counter-clockwise to decrease it. It is recommended to use a voltmeter to accurately set the desired output voltage before connecting sensitive equipment.
4. Operating Instructions
4.1 Powering On/Off
After all connections are made, locate the ON/OFF switch on the front panel of the power supply. Flip the switch to the 'ON' position to power on the unit. The power indicator LED (if present) will illuminate. To power off, flip the switch to the 'OFF' position.

Figure 3: Front view of the LPX-18 with ON/OFF switch.
4.2 Normal Operation
Once powered on, the LPX-18 will provide stable DC power at the set voltage. Monitor your connected devices for proper function. The power supply is designed for continuous operation within its specified limits.
5. Maintenance
- Cleaning: Keep the power supply clean and free from dust. Use a soft, dry cloth for cleaning. Do not use liquid cleaners or solvents.
- Ventilation: Ensure that the ventilation openings on the unit are not blocked. Adequate airflow is crucial for passive cooling.
- Environmental Conditions: Operate the power supply within its specified temperature and humidity ranges. Avoid direct sunlight or heat sources.
- Cable Inspection: Periodically inspect all power and output cables for any signs of damage or wear. Replace damaged cables immediately.
6. Troubleshooting
| Problem | Possible Cause | Solution |
|---|---|---|
| No power output / Unit does not turn on | AC power cord not connected or loose. Wall outlet not functioning. ON/OFF switch in 'OFF' position. Internal fuse blown. | Check AC power cord connection. Test wall outlet with another device. Ensure ON/OFF switch is 'ON'. If still no power, contact support. |
| Output voltage is incorrect | Voltage adjustment screw set incorrectly. | Adjust the voltage using the adjustment screw on the rear panel while monitoring with a voltmeter. |
| Unit shuts down unexpectedly | Overload protection activated. Overheating due to poor ventilation. | Reduce the load on the power supply. Ensure adequate ventilation around the unit. Allow unit to cool down before restarting. |
| Unusual noise or smell | Internal component failure. | Immediately disconnect power. Do not attempt to repair. Contact DuraComm support. |
7. Specifications
| Feature | Detail |
|---|---|
| Model Number | LPX-18 |
| Input Voltage | 90-264 VAC (Universal AC Input) |
| Output Voltage | Adjustable 11-15 VDC |
| Output Power (LPX-18) | 240 Watts |
| Peak Load Capability | 125% |
| Cooling Method | Convection |
| Dimensions (LxWxH) | 7.56 x 7 x 1.77 inches |
| Weight | 3.03 pounds |
| Efficiency Standards | Meets DOE Level VI |
| Compliance | Elsa 2007/DoE, NRCan, EU ErP |
| First Available | January 21, 2019 |
8. Official Product Video
This video provides an overview of the DuraComm LPX Series Desktop Power Supplies, highlighting key features and available models.
9. Warranty and Support
DuraComm products are designed for reliability and performance. For specific warranty information, please refer to the warranty card included with your product or visit the official DuraComm website. For technical support, troubleshooting assistance beyond this manual, or service inquiries, please contact DuraComm customer service directly. Keep your purchase receipt as proof of purchase for warranty claims.