1. Introduction
This manual provides essential information for the safe and efficient operation of your Hoover 2-in-1 Steam Mop and Handheld Steam Cleaner, model HS86-SFC-M. This versatile appliance is designed for comprehensive cleaning of various surfaces using steam and, when desired, a cleaning solution. Please read all instructions carefully before first use and retain this manual for future reference.
2. Safety Information
WARNING: Always follow basic safety precautions when using electrical appliances to reduce the risk of fire, electric shock, or injury.
- Ensure the voltage indicated on the product corresponds to your mains supply voltage.
- Do not immerse the appliance in water or other liquids.
- Never leave the appliance unattended when plugged in. Unplug from the outlet when not in use and before servicing.
- Do not use with a damaged cord or plug. If the appliance is not working as it should, has been dropped, damaged, left outdoors, or dropped into water, return it to a service center.
- Do not direct steam at people, animals, or electrical outlets. Steam is hot and can cause burns.
- Use only manufacturer-recommended accessories and cleaning solutions.
- Keep hair, loose clothing, fingers, and all parts of the body away from openings and moving parts.
- Do not use on unsealed hardwood floors or surfaces that are sensitive to heat and moisture. Test on an inconspicuous area first.
3. Package Contents
Carefully unpack your Hoover HS86-SFC-M and ensure all items are present:
- Hoover 2-in-1 Steam Mop and Handheld Steam Cleaner Unit
- 10-piece accessory kit (various brushes, nozzles, and tools)
- Power cord
- 2 Microfiber cleaning pads
- Small bottle of cleaning solution

Image 3.1: Main unit and included accessories.
4. Setup
4.1 Assembling the Steam Mop
- Attach the handle to the main body of the steam mop until it clicks securely into place.
- Place a microfiber cleaning pad onto the floor head. Ensure it is centered and securely attached.
- Connect the floor head to the main unit by aligning the connection points and pushing firmly until it locks.

Image 4.1: Attaching the microfiber cleaning pad to the floor head.
4.2 Filling the Water and Detergent Tanks
- Locate the water tank and detergent tank on the main unit.
- Remove the water tank by pulling it upwards. Fill it with clean tap water. Do not overfill.
- Reinsert the water tank until it clicks into place.
- Open the cap of the detergent tank and fill with the recommended cleaning solution. Close the cap securely.
Video 4.2: Demonstrates assembly, attaching pads, and filling tanks for the Hoover Steam Mop.
5. Operating Instructions
5.1 Steam Mop Mode
- Plug the power cord into a suitable electrical outlet. The power indicator light will illuminate.
- Wait approximately 30 seconds for the unit to heat up and produce steam.
- Press the steam trigger on the handle to release steam.
- For detergent use, turn the detergent dial to the 'On' position. Adjust the steam output using the variable steam control dial to suit your floor type and cleaning needs.
- Move the steam mop slowly and steadily over the floor surface.
- When finished, turn the detergent dial to 'Off' (if used), release the steam trigger, and unplug the unit.
5.2 Handheld Steam Cleaner Mode
- To detach the handheld unit, press the release button and lift the main body from the floor head.
- Attach the flexible hose to the handheld unit.
- Select the appropriate accessory from the 10-piece kit for the task (e.g., small brush for grout, nozzle for tight spaces). Attach it to the end of the hose or directly to the handheld unit if preferred.
- Plug in the unit and wait for it to heat up.
- Press the steam trigger to release steam and clean the desired surface.
- After use, release the steam trigger and unplug the unit. Allow it to cool before detaching accessories.
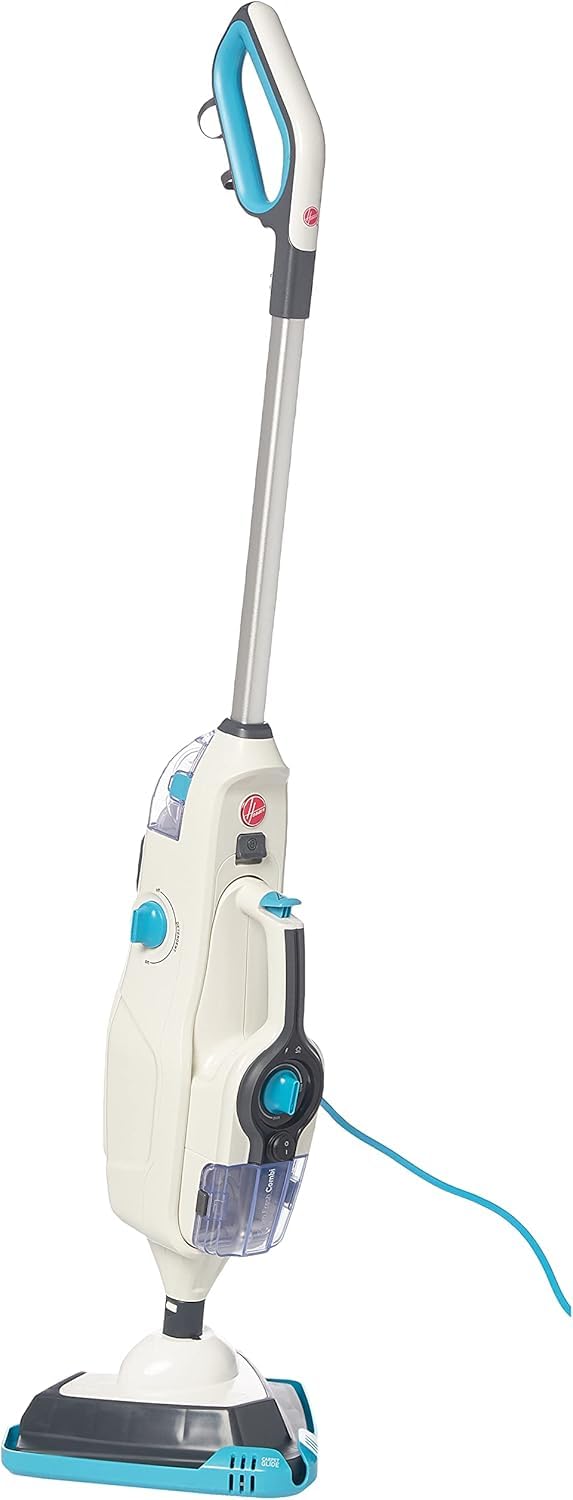
Image 5.1: The Hoover 2-in-1 Steam Mop ready for use.
6. Maintenance
6.1 Cleaning Pads
The microfiber cleaning pads are machine washable. Remove them from the floor head after each use and wash according to the care instructions on the label. Do not use bleach or fabric softeners.
6.2 Emptying Tanks
After each use, ensure the unit is unplugged and cooled. Remove and empty any remaining water from the water tank and detergent from the detergent tank. Rinse the tanks with clean water and allow them to air dry before storing.
6.3 General Cleaning and Storage
Wipe the exterior of the appliance with a soft, damp cloth. Do not use abrasive cleaners. Store the steam cleaner in a cool, dry place, out of reach of children.
7. Troubleshooting
If you encounter issues with your steam cleaner, refer to the following common problems and solutions:
| Problem | Possible Cause | Solution |
|---|---|---|
| No steam produced | Unit not plugged in; Water tank empty; Not heated up; Steam trigger not pressed. | Plug in the unit; Fill water tank; Wait 30 seconds for heat-up; Press steam trigger. |
| Poor cleaning results | Dirty cleaning pad; Incorrect steam setting; Detergent tank empty (if using detergent). | Replace or wash cleaning pad; Adjust steam control; Refill detergent tank. |
| Water leaking | Water tank not properly seated; Overfilled tank. | Ensure water tank is securely in place; Do not overfill tanks. |
If the problem persists after attempting these solutions, please contact customer support.
8. Specifications
- Brand: Hoover
- Model Number: HS86-SFC-M
- Color: Silver
- Product Dimensions: 22.4 x 65.4 x 28.6 cm
- Item Weight: 5.5 Kilograms
- Power/Wattage: 1600 watts
- Power Source: Corded Electric
- Water Tank Capacity: 0.26 Liters
- Solution Tank Capacity: 200 ml
- Heat-up Time: Less than 30 seconds
- Steam Cleaning Time: Up to 12 minutes
- Steam Flow Rate: 15 grams per minute
- Special Features: 2-in-1 design (Steam Mop & Handheld), 10 accessories, small cleaning brush, variable steam control.
- Surface Recommendation: Floors (suitable for various sealed hard floor types)
9. Warranty and Support
Your Hoover HS86-SFC-M Steam Mop and Handheld Steam Cleaner comes with a standard manufacturer's warranty. Please refer to the warranty card included in your package for specific terms and conditions. For technical support, spare parts, or warranty claims, please contact Hoover customer service through their official website or the contact information provided with your purchase.


