
1. Product Overview
The hansgrohe Focus soap dispenser combines aesthetic design with practical functionality for your kitchen or bath. This model features a durable metal construction and a Steel Optic finish, designed to complement modern kitchen aesthetics. It is engineered for reliable performance and ease of use.
- Attractive Design: The Focus design line offers a clear, flat design language.
- Above Counter Height: Approximately 2-3/4 inches.
- Diameter: 2 inches.
- Capacity: The included reservoir bottle has a storage capacity of 16 oz.
- Components: Includes the soap dispenser head and the reservoir bottle.

Image 1: hansgrohe Focus Soap Dispenser installed in a kitchen setting.
2. Installation Instructions
Proper installation ensures optimal performance and longevity of your soap dispenser. Follow these steps carefully.
2.1. Unpacking and Component Check
- Carefully remove all components from the packaging.
- Verify that all parts are present: dispenser head, pump mechanism, rubber washer, mounting nut, and 16 oz reservoir bottle.
2.2. Mounting the Dispenser Head
- Ensure the mounting hole in your sink or countertop is clean and free of debris.
- Insert the dispenser head and pump mechanism through the mounting hole from above. The integrated rubber washer should sit flush against the countertop surface to create a seal.
- From underneath the sink, secure the dispenser by threading the mounting nut onto the pump mechanism and tightening it firmly by hand. Avoid overtightening.
2.3. Attaching the Reservoir Bottle
- Screw the provided 16 oz reservoir bottle onto the threaded bottom of the pump mechanism from underneath the sink. Ensure it is securely attached to prevent leaks.
- Alternatively, an extension tube kit (sold separately) can be used to connect the pump to a larger soap bottle placed under the sink, eliminating the need for frequent refills.
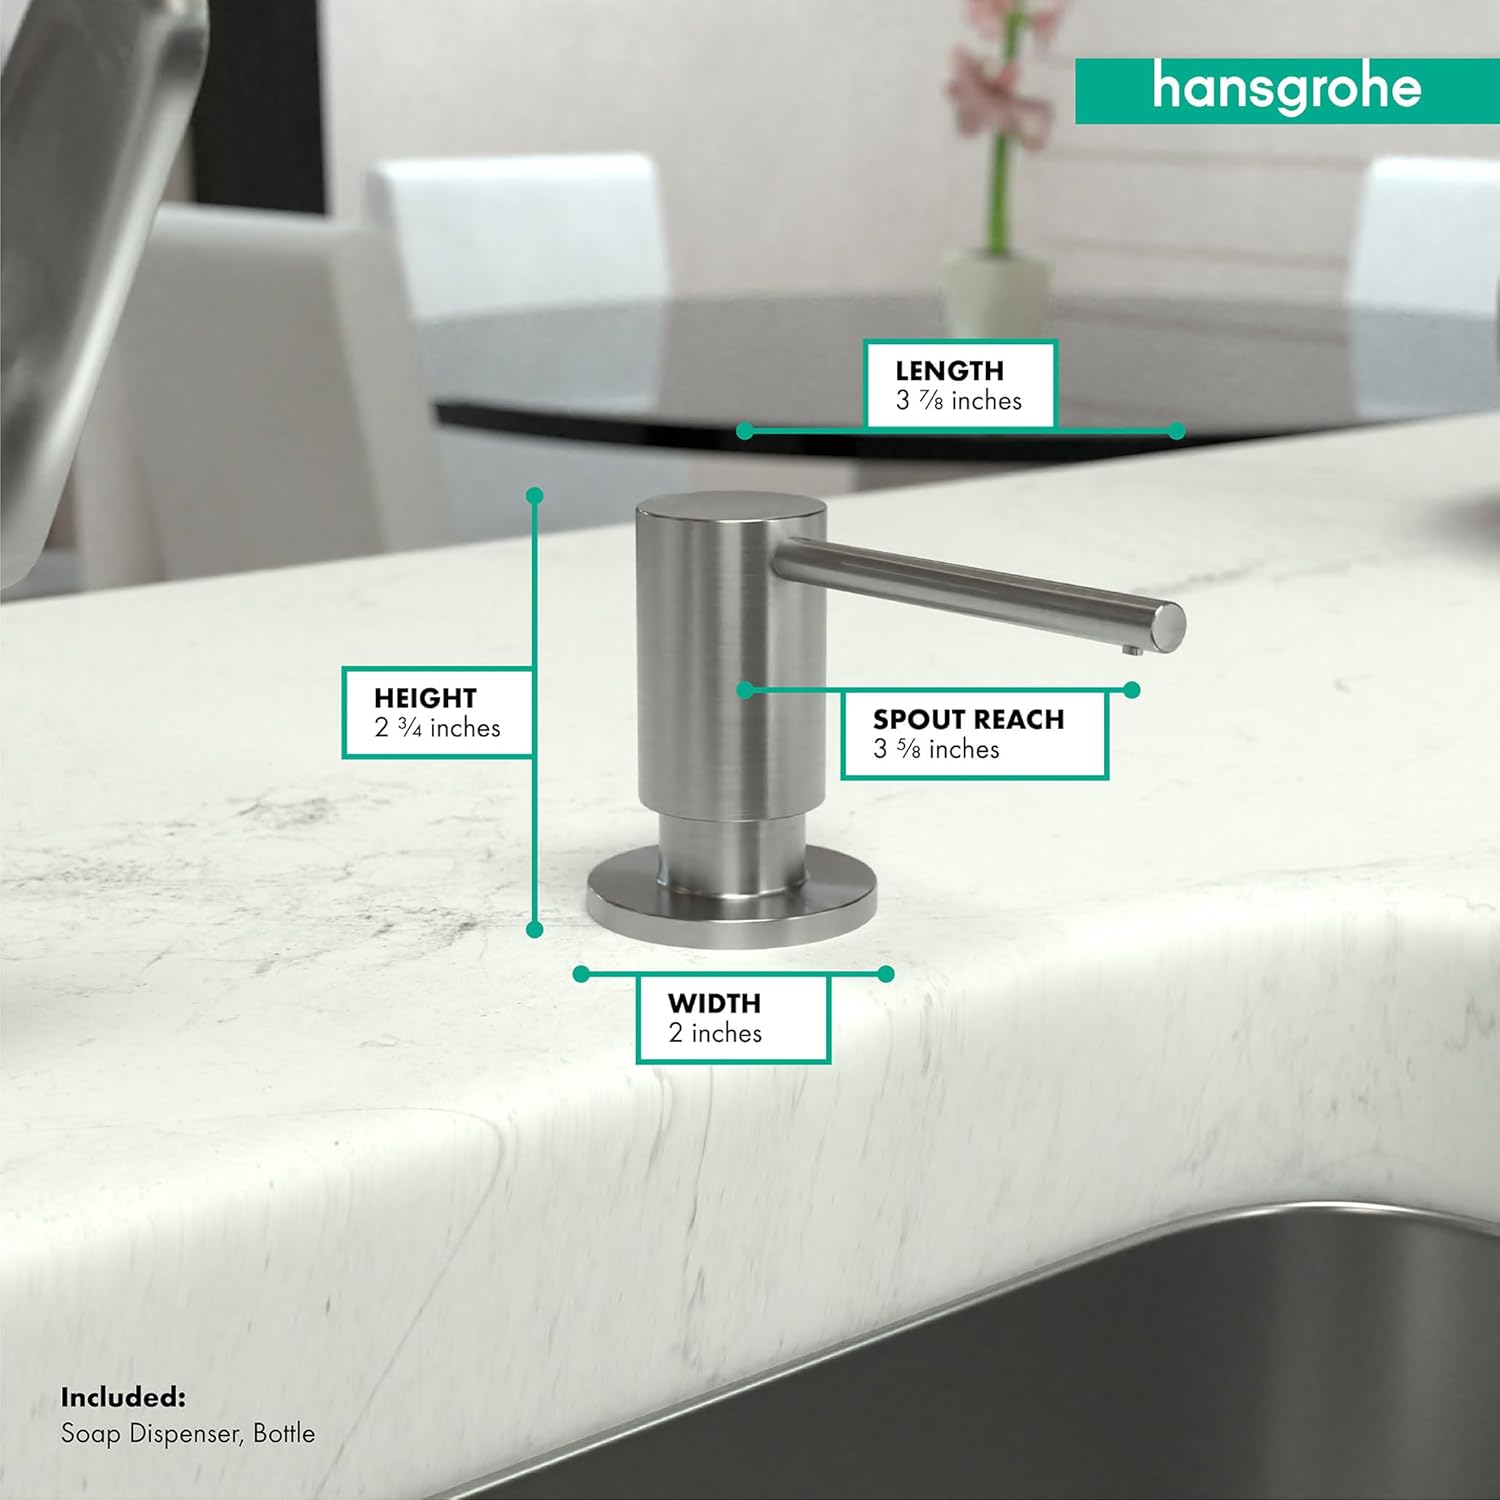
Image 2: Dimensions and included components of the hansgrohe Focus Soap Dispenser.
3. Operating Instructions
3.1. Filling the Dispenser
- To fill the dispenser, simply pull the dispenser head straight up from the base. It will detach from the pump mechanism.
- Pour liquid soap directly into the opening of the pump mechanism. A funnel may be used for easier filling.
- Once filled, reinsert the dispenser head firmly back into the pump mechanism.
3.2. Dispensing Soap
To dispense soap, press down firmly on the top of the dispenser head. The soap will be dispensed from the spout. Release to allow the pump to reset.
4. Maintenance and Care
Regular cleaning and maintenance will keep your hansgrohe soap dispenser functioning correctly and looking its best.
- Cleaning the Exterior: Clean the Steel Optic finish with a soft, damp cloth and mild soap. Avoid abrasive cleaners, scouring pads, or harsh chemicals, as these can damage the finish.
- Cleaning the Spout: The spout features a small rubber hole where soap is dispensed. This design allows for easy cleaning to prevent clogs. Periodically clean this opening with a small brush or toothpick to remove any dried soap residue.
- Preventing Water Ingress: The dispenser is designed to direct water away from the pump mechanism. Ensure the dispenser head is properly seated to maintain this protection.
5. Troubleshooting
If you encounter issues with your soap dispenser, refer to the following common solutions.
| Problem | Possible Cause | Solution |
|---|---|---|
| Dispenser not pumping soap |
|
|
| Soap drips from spout |
|
|
| Dispenser head feels loose or wobbly |
|
|
6. Specifications
| Feature | Detail |
|---|---|
| Model Number | 40438801 |
| Color | Stainless Steel Optic |
| Material | Durable metal construction |
| Above Counter Height | 2-3/4 inches |
| Diameter | 2 inches |
| Liquid Volume Capacity | 16 Fluid Ounces |
| Item Weight | 12.5 ounces |
| Product Dimensions | 4.84 x 1.97 x 2.8 inches |
| Installation Method | Deck Mounted |
7. Warranty Information
Hansgrohe, Inc. warrants to the original consumer purchaser that hansgrohe products will be free from defects in material and workmanship for as long as the original consumer purchaser owns both the product and the home in which the product was originally installed. This warranty is non-transferable.
For commercial purchasers, the warranty period is one (1) year for hansgrohe products from the date of purchase. The warranty period for products in rubbed bronze, matte black, and matte white finishes is three (3) years from the date of purchase.
This warranty does not cover hansgrohe products purchased from unauthorized sellers, unless otherwise prohibited by law. Authorized sellers can be found on hansgrohe branded websites. Additional warranty restrictions apply. Please refer to the manufacturer's website for full warranty details.
For warranty claims or further information, please visit the official hansgrohe website or contact their customer support.
8. Customer Support
For technical assistance, replacement parts, or any other inquiries regarding your hansgrohe product, please contact customer support:
- Online Support: Visit the official hansgrohe website for FAQs and contact options.
- Phone Support: Refer to your product packaging or the hansgrohe website for regional contact numbers.