1. Introduction
This manual provides comprehensive instructions for the safe and effective operation of the DUOYI DY4300 Digital Earth Tester. The DY4300 is a professional instrument designed for measuring earth resistance and soil resistivity, essential for ensuring the safety and proper functioning of electrical installations. Please read this manual thoroughly before using the device to ensure correct usage and to prevent potential hazards.
2. Safety Information
Always adhere to the following safety precautions to prevent electric shock, injury, or damage to the instrument:
- Do not operate the tester if it appears damaged or is not functioning properly.
- Ensure all test leads and connections are secure before taking measurements.
- Avoid touching the test probes or electrodes during measurement.
- Do not use the instrument in wet environments or during lightning storms.
- Always disconnect the test leads from the circuit before changing the function switch.
- Replace batteries promptly when the low battery indicator appears.
- Refer to local electrical codes and safety standards for specific requirements.
3. Product Overview
The DUOYI DY4300 is a robust and portable digital earth tester. It features a clear LCD display, intuitive controls, and dedicated terminals for 2, 3, or 4-wire measurement methods.
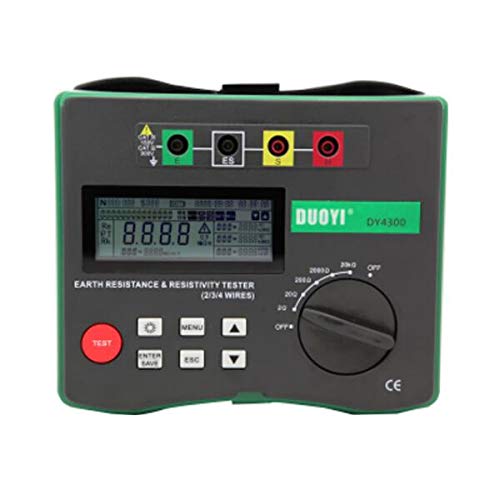
Figure 3.1: Front view of the DUOYI DY4300 Digital Earth Tester, showing the LCD display, control buttons, rotary switch, and terminal connections (E, ES, S, H).
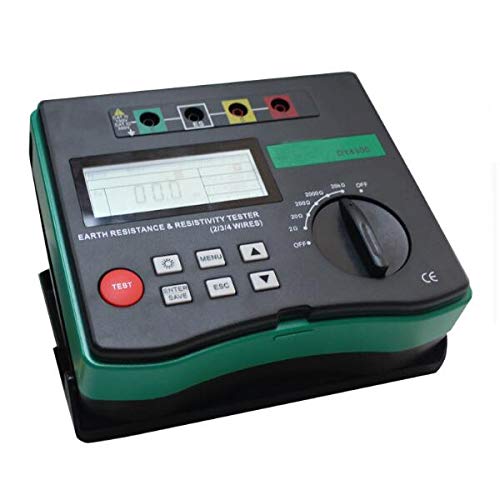
Figure 3.2: Angled view of the DUOYI DY4300, highlighting its compact design and side profile.
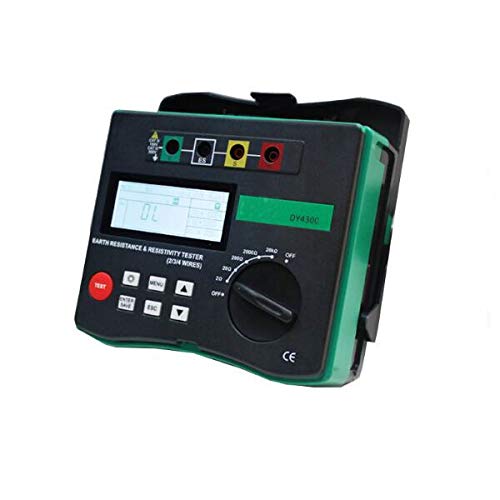
Figure 3.3: A different angled perspective of the DY4300, showing the robust casing and connection points.
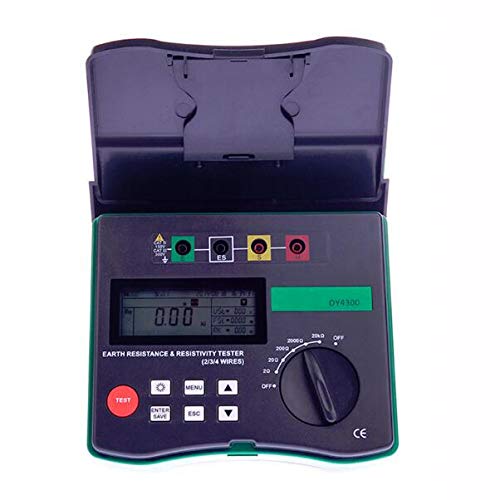
Figure 3.4: Front view of the DUOYI DY4300 with its protective cover opened, revealing the display and controls.
3.1 Key Components
- LCD Display: Shows measurement readings, units, function symbols, and battery status.
- Rotary Switch: Used to select measurement ranges (e.g., 20Ω, 200Ω, 2000Ω) and turn the device OFF.
- Function Buttons: Include TEST, MENU, ENTER/SAVE, ESC, and navigation arrows for settings and operations.
- Terminals (E, ES, S, H): Connection points for test leads and auxiliary electrodes.
4. Specifications
The following table details the technical specifications of the DUOYI DY4300 Digital Earth Tester:
| Item | Range | Accuracy | Resolution |
|---|---|---|---|
| Earth/Ground Resistance: | |||
| 0Ω ~ 6.99Ω | ±(3%+6 digits) | 0.01Ω | |
| 7.9Ω ~ 49.9Ω | ±(2%+3 digits) | 0.1Ω | |
| 50Ω ~ 299.5Ω | ±(2%+3 digits) | 0.5Ω | |
| 300Ω ~ 1500Ω | ±(2%+3 digits) | 1Ω | |
| Maximal earth resistance at H-end | Rcmax=(0-100Re) and 50KΩ less value | ||
| Maximal ground resistance at S-end | Rpmax=(0-100Re) and 50KΩ less value | ||
| Additional measurement error of Rxmac and Rpmax | ±(3%+10 digits) | ||
| Soil Resistivity: | |||
| 0.00Ωm ~ 99.99Ωm | ±(3%+6 digits) | 0.1Ω | |
| 100Ωm ~ 999.9Ωm | ±(2%+3 digits) | 0.1Ω | |
| 1000Ωm ~ 9999Ωm | ±(2%+3 digits) | 1Ω | |
| 10KΩm ~ 99.9KΩm | ±(2%+3 digits) | 10Ω | |
| 100KΩm ~ 300KΩm | ±(2%+3 digits) | 100Ω | |
| Working LED Indicator | Yes | ||
| Function Symbol Display | Yes | ||
| Low Battery Warning | Yes | ||
| LCD Backlight | Auto | ||
| Power Source | AA 1.5V x 8 (UM3) (Not included) | ||
| Product Size | 190 x 155 x 75 mm | ||
| Product Net Weight | Approx. 900g (1.98 lbs) | ||
| Item Weight (Shipping) | 4.41 Pounds (2 Kilograms) | ||
| Date First Available | January 15, 2019 | ||
| Manufacturer | Road Far | ||
5. Setup
5.1 Battery Installation
- Ensure the rotary switch is in the "OFF" position.
- Locate the battery compartment on the back of the unit.
- Open the battery compartment cover.
- Insert eight (8) AA 1.5V batteries, observing the correct polarity (+/-) as indicated inside the compartment.
- Close the battery compartment cover securely.
5.2 Connecting Test Leads and Auxiliary Electrodes
The DY4300 supports 2, 3, and 4-wire measurement methods. The choice of method depends on the specific application and required accuracy.
- E Terminal (Green): Connects to the earth electrode under test.
- ES Terminal (Yellow): Used for 4-wire measurements, connects to the potential electrode.
- S Terminal (Red): Connects to the potential electrode.
- H Terminal (Black): Connects to the current electrode.
Refer to the specific measurement method section for detailed connection diagrams.
6. Operating Instructions
6.1 Earth Resistance Measurement (3-Wire Method)
This is a common method for measuring the resistance of an earth electrode.
- Connect the earth electrode under test to the E terminal.
- Drive two auxiliary electrodes (potential electrode P and current electrode C) into the ground in a straight line from the earth electrode. The distance between electrodes should be approximately 5-10 meters, with equal spacing.
- Connect the potential electrode P to the S terminal.
- Connect the current electrode C to the H terminal.
- Turn the rotary switch to the desired Earth Resistance range (e.g., 20Ω, 200Ω, 2000Ω).
- Press the TEST button to initiate the measurement.
- Read the earth resistance value from the LCD display.
6.2 Soil Resistivity Measurement (Wenner Method - 4-Wire)
This method is used to determine the resistivity of the soil, which is crucial for designing grounding systems.
- Drive four electrodes (E1, P1, P2, E2) into the ground at equal distances (a) in a straight line.
- Connect E1 to the E terminal.
- Connect P1 to the ES terminal.
- Connect P2 to the S terminal.
- Connect E2 to the H terminal.
- Turn the rotary switch to the Soil Resistivity measurement mode.
- Enter the electrode spacing 'a' into the device using the MENU and navigation buttons (refer to the device's on-screen menu for specific steps).
- Press the TEST button.
- The soil resistivity (ρ) will be displayed on the LCD.
Note: For accurate measurements, ensure good contact between electrodes and the soil. Wetting the soil around the electrodes can improve contact in dry conditions.
7. Maintenance
7.1 Cleaning
Wipe the instrument with a soft, damp cloth. Do not use abrasive cleaners or solvents. Ensure the device is dry before storage.
7.2 Battery Replacement
When the low battery indicator appears on the LCD, replace all eight AA 1.5V batteries as described in Section 5.1. Remove batteries if the instrument will not be used for an extended period to prevent leakage.
7.3 Storage
Store the DUOYI DY4300 in a cool, dry place, away from direct sunlight and extreme temperatures. Keep it in its original packaging or a protective case to prevent damage.
8. Troubleshooting
| Problem | Possible Cause | Solution |
|---|---|---|
| No display or weak display | Dead or low batteries; incorrect battery installation. | Replace batteries; check battery polarity. |
| "OL" or "OVER" displayed | Measurement exceeds selected range; poor electrode contact; open circuit. | Select a higher range; ensure electrodes are firmly in the ground; check all connections. |
| Unstable readings | High interference; poor electrode contact; dry soil. | Move away from sources of electrical noise; improve electrode contact (e.g., wet the soil); ensure proper electrode spacing. |
| Incorrect readings | Improper connection; incorrect measurement method selected; faulty test leads. | Verify all connections according to the chosen method; ensure correct mode is selected; inspect test leads for damage. |
9. Warranty and Support
The DUOYI DY4300 Digital Earth Tester is covered by a manufacturer's warranty against defects in materials and workmanship. For specific warranty terms and conditions, please refer to the warranty card included with your product or contact the manufacturer directly.
For technical support, troubleshooting assistance, or service inquiries, please contact your retailer or the manufacturer's customer service department. Contact information can typically be found on the product packaging or the manufacturer's official website.