
1. Introduction
The SID LED KT4H Multipurpose Tester is designed for diagnosing and repairing various LED lighting components. It provides adjustable output voltage (0-330V DC) and current (0-150mA) for testing LED TV backlights, constant current driver boards, LED strips, LED panels, single LED beads, COB lighting sources, displays, computers, and vehicle LED lights. This manual provides instructions for safe and effective use of the device.
2. Setup
- Unpacking: Carefully remove the KT4H tester and all accessories from the packaging. Verify that all included components are present: LED tester, test probes, power cord, user manual, socket cable, connection clip, and carrying bag.
- Power Connection: Connect the provided power cord to the AC input port on the tester and then plug it into a standard AC 85-265V power outlet.
- Probe Connection: Connect the red and black test probes to the corresponding output terminals on the tester. Ensure a secure connection.

Figure 1: The SID LED KT4H Multipurpose Tester connected with test probes and power plug.

Figure 2: Contents of the SID LED KT4H Multipurpose Tester kit, including the tester, probes, cables, and carrying bag.
3. Operating Instructions
The default factory setting for the tester is an output voltage of 330V and an output current of 50mA. These settings are suitable for testing TV backlights of any size.
3.1. Self-Testing the Unit
- Plug in the tester and turn on the power switch.
- The display should show approximately 330V and 0mA.
- Touch the tips of the red and black test probes together. The voltage display should change to 0V, and the current display should show approximately 50mA. This confirms the tester is functioning correctly and ready for use.
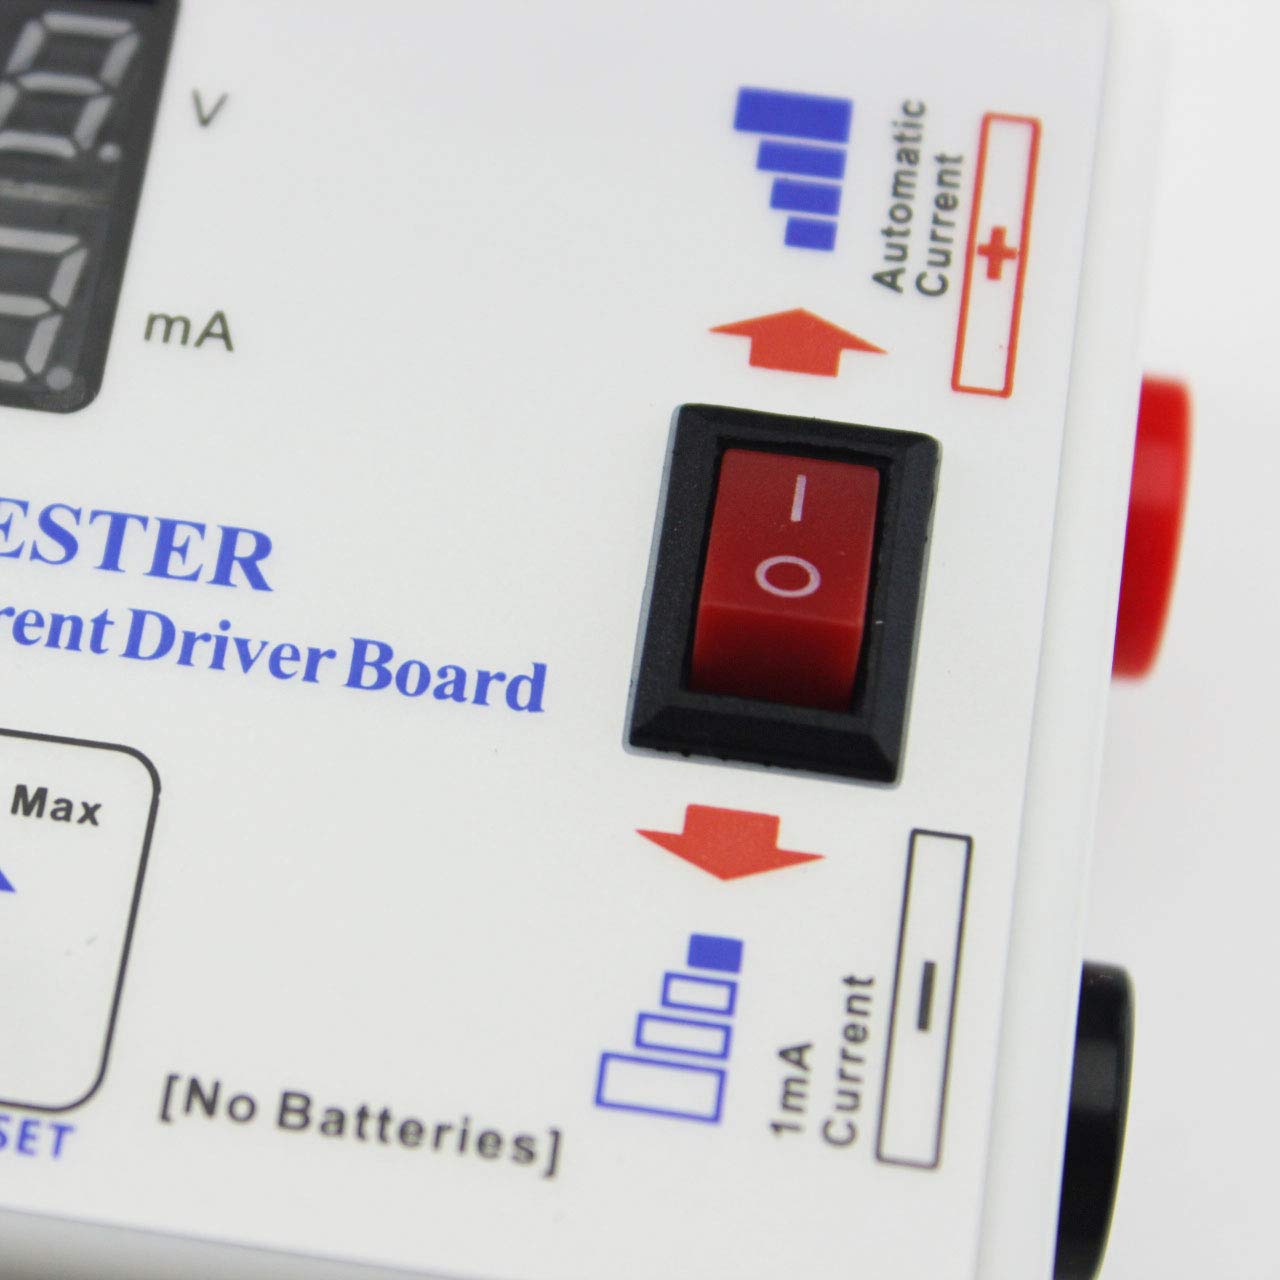
Figure 3: Detail of the power switch and current selection switch on the tester.

Figure 4: Detail of the current and voltage preset adjustment knobs.
3.2. Interpreting Test Results (Short/Open Circuit)
- If the voltage display reads 0V, it indicates a SHORT CIRCUIT.
- If the voltage display reads 330V, it indicates an OPEN CIRCUIT.
3.3. Testing a Single LED Bead
For testing single LED beads, set the voltage preset to approximately 20V and the current switch to 1mA.
- Correct Polarity: When connected with the correct polarity, a normal LED bead will display a voltage that is approximately 80% of its rated voltage (e.g., 2.4V for a 3V rated LED). The LED should illuminate.
- Incorrect Polarity: If connected with the wrong polarity, the tester will display the open circuit voltage (330V), and the LED will not illuminate. The tester is designed to prevent burnout even with incorrect polarity at these settings.

Figure 5: The sharp tips of the test probes for precise contact.
3.4. Testing LED Strips
Set the voltage preset to approximately 200V. Adjust the current preset if you need to modify the brightness of the LED strip during testing.

Figure 6: The tester in use, illuminating an LED TV backlight strip.
3.5. Testing Constant Current Driver Boards
This method is used when an LED backlight strip illuminates with the tester but fails to work with its original constant current board.
- Preparation: Disconnect the TV's power. Unplug the interface sockets connecting the constant current board and the LED light bar.
- Connect Tester: Use the provided cables to connect the constant current board to the tester, ensuring correct polarity.
- Connect LED Light Bar: Insert the red and black test probes of the tester into the anode (+) and cathode (-) interfaces of the LED light bar.
- Power On TV: Reconnect the TV's power.
- Observe Results: If the testing voltage is greater than 30V, the current is greater than 30mA, and these values remain stable, and the LED strip operates normally, then the constant current board is functioning correctly.

Figure 7: Simplified wiring diagram illustrating connections for testing LED components.
4. Maintenance
- Cleaning: Keep the tester clean and free from dust and debris. Use a soft, dry cloth for cleaning. Do not use liquid cleaners or solvents.
- Storage: Store the tester in a cool, dry place, away from direct sunlight and extreme temperatures. Use the provided carrying bag for protection during storage and transport.
- Probe Care: Inspect test probes regularly for any signs of damage or wear. Replace damaged probes immediately to ensure accurate and safe operation.
5. Troubleshooting
- No Power:
- Ensure the power cord is securely plugged into both the tester and a working AC outlet.
- Check the power switch on the tester to ensure it is in the 'ON' position.
- Incorrect Readings / No Output:
- Perform the self-test procedure (Section 3.1) to verify the tester's functionality.
- Ensure test probes are securely connected to the tester and making proper contact with the component being tested.
- Verify correct polarity when testing LED components.
- LED Not Lighting Up:
- Check for open circuit (330V display) or short circuit (0V display) as described in Section 3.2.
- Ensure the voltage and current presets are adjusted appropriately for the specific LED component being tested.
- Confirm the LED component itself is not faulty.
6. Specifications
| Model | KT4H |
| Input Voltage (Vin) | AC 85-265V |
| Output Voltage (Vout) | DC 0-330V (Automatic + Adjustable) |
| Voltmeter Accuracy | <(± 0.5 ± 1%Vout) V |
| Output Current (Iout) | 0-150mA (Automatic + Adjustable) |
| Constant Current Board Testing Current | 0-999mA |
| Ammeter Accuracy | <(±2 ±1%Iout) mA |
| Input Power (Pinput) | 50VA (MAX) |
| Operating Temperature | -20°C ~ +40°C |
| Compatible Devices | LED strips, LED panels, single LED beads, COB lighting sources, LED TV backlights, displays, computers, vehicle LED lights, constant current driver boards |
7. What's in the Box
- 1 x LED Tester (Model KT4H)
- 1 x Test Probe Set (Red and Black)
- 1 x Power Cord
- 1 x User Manual
- 1 x Socket Cable
- 1 x Connection Clip
- 1 x Carrying Bag
8. Warranty and Support
For warranty information or technical support, please refer to the contact details provided with your purchase documentation or visit the official SID LED website. Keep your purchase receipt as proof of purchase for warranty claims.