BSIDE ADMS6
BSIDE Smart Digital Multimeter ADMS6 User Manual
Model: ADMS6 | Brand: BSIDE
Introduction
The BSIDE Smart Digital Multimeter ADMS6 is designed for ease of use, especially for beginners, by automatically identifying tested parameters and selecting the appropriate range. This eliminates the need for manual function knob switching, streamlining the measurement process. Its compact design and integrated probe holders enhance portability and safety.

Image: The BSIDE Smart Digital Multimeter ADMS6, showcasing its main unit and included test probes. The device features a clear digital display and a central rotary switch.
Key Features
- Automatic Identification Design: Automatically identifies AC/DC voltage, AC/DC current, frequency (Hz), continuity, and resistance, eliminating manual range selection.
- Transparent "Hz" Button: This button illuminates green or red to indicate AC voltage strength, live wire detection, or continuity.
- Dual Side Probe Holder Design: Test probes can be securely fixed in integrated holders for convenient single-hand measurements or safely stored to prevent accidental contact with the tips.

Image: The multimeter demonstrating its dual-side probe holder design. One view shows probes extended and fixed for use, while another shows them retracted and hidden for safe storage.
- Recoverable Fuses Design: Features self-resetting fuses to protect the device and reduce repair time and costs.
- Protective Case: Durable case provides protection against shocks, friction, and bumps, and is easy to remove and replace.
- Backtop Stand: Integrated stand allows for convenient hands-free operation.

Image: The multimeter with its backtop stand partially extended, illustrating how it can be propped up for easier viewing during use.
- Compact and Portable: Designed to be pocket-sized for easy carrying.

Image: The compact BSIDE multimeter shown fitting into a standard jeans pocket, highlighting its portability.
Package Contents
Upon opening the package, please verify that all items listed below are present and in good condition:
- 1 x BSIDE Smart Digital Multimeter ADMS6
- 1 x Set of Test Probes
- 1 x User Manual

Image: A visual representation of the package contents, showing the multimeter, its test probes, and the included user manual.
Note: Batteries (2 x AAA) are not included in the package due to aviation security regulations. Please purchase them separately.
Setup
Battery Installation
- Locate the battery compartment cover on the back of the multimeter.
- Use a screwdriver (not included) to open the battery compartment.
- Insert two 1.5V AAA batteries, ensuring correct polarity (+ and -) as indicated inside the compartment.
- Replace the battery compartment cover and secure it with the screw.
Connecting Test Probes
- Insert the red test lead into the "VΩHz" input jack.
- Insert the black test lead into the "COM" (common) input jack.
- For current measurements (mA), insert the red test lead into the "mA" input jack and the black test lead into the "COM" jack.
Operating Instructions
The ADMS6 features an intelligent automatic identification system, simplifying most measurements. Turn the rotary switch to the desired general measurement mode (e.g., Multimeter, V-Alert, Live Check).
Automatic Measurement Mode (Multimeter)
When the rotary switch is set to "Multimeter", the device will automatically detect and measure:
- AC/DC Voltage: Connect probes across the circuit or component.
- AC/DC Current: Connect probes in series with the circuit.
- Resistance (Ω): Connect probes across the component.
- Continuity: If resistance is less than 30Ω, the beeper will sound.
- Frequency (Hz): The device will automatically detect frequency.

Image: The multimeter's display showing its smart identification feature, where it automatically detects the measurement type. The "Hz" button is illuminated, indicating its function.
V-Alert (Non-Contact Voltage Detection)
Set the rotary switch to "V-Alert". Bring the top of the multimeter close to an AC voltage source. The device will beep and the "Hz" button will light up, indicating the presence of voltage. The intensity of the light (green/red) indicates voltage strength.
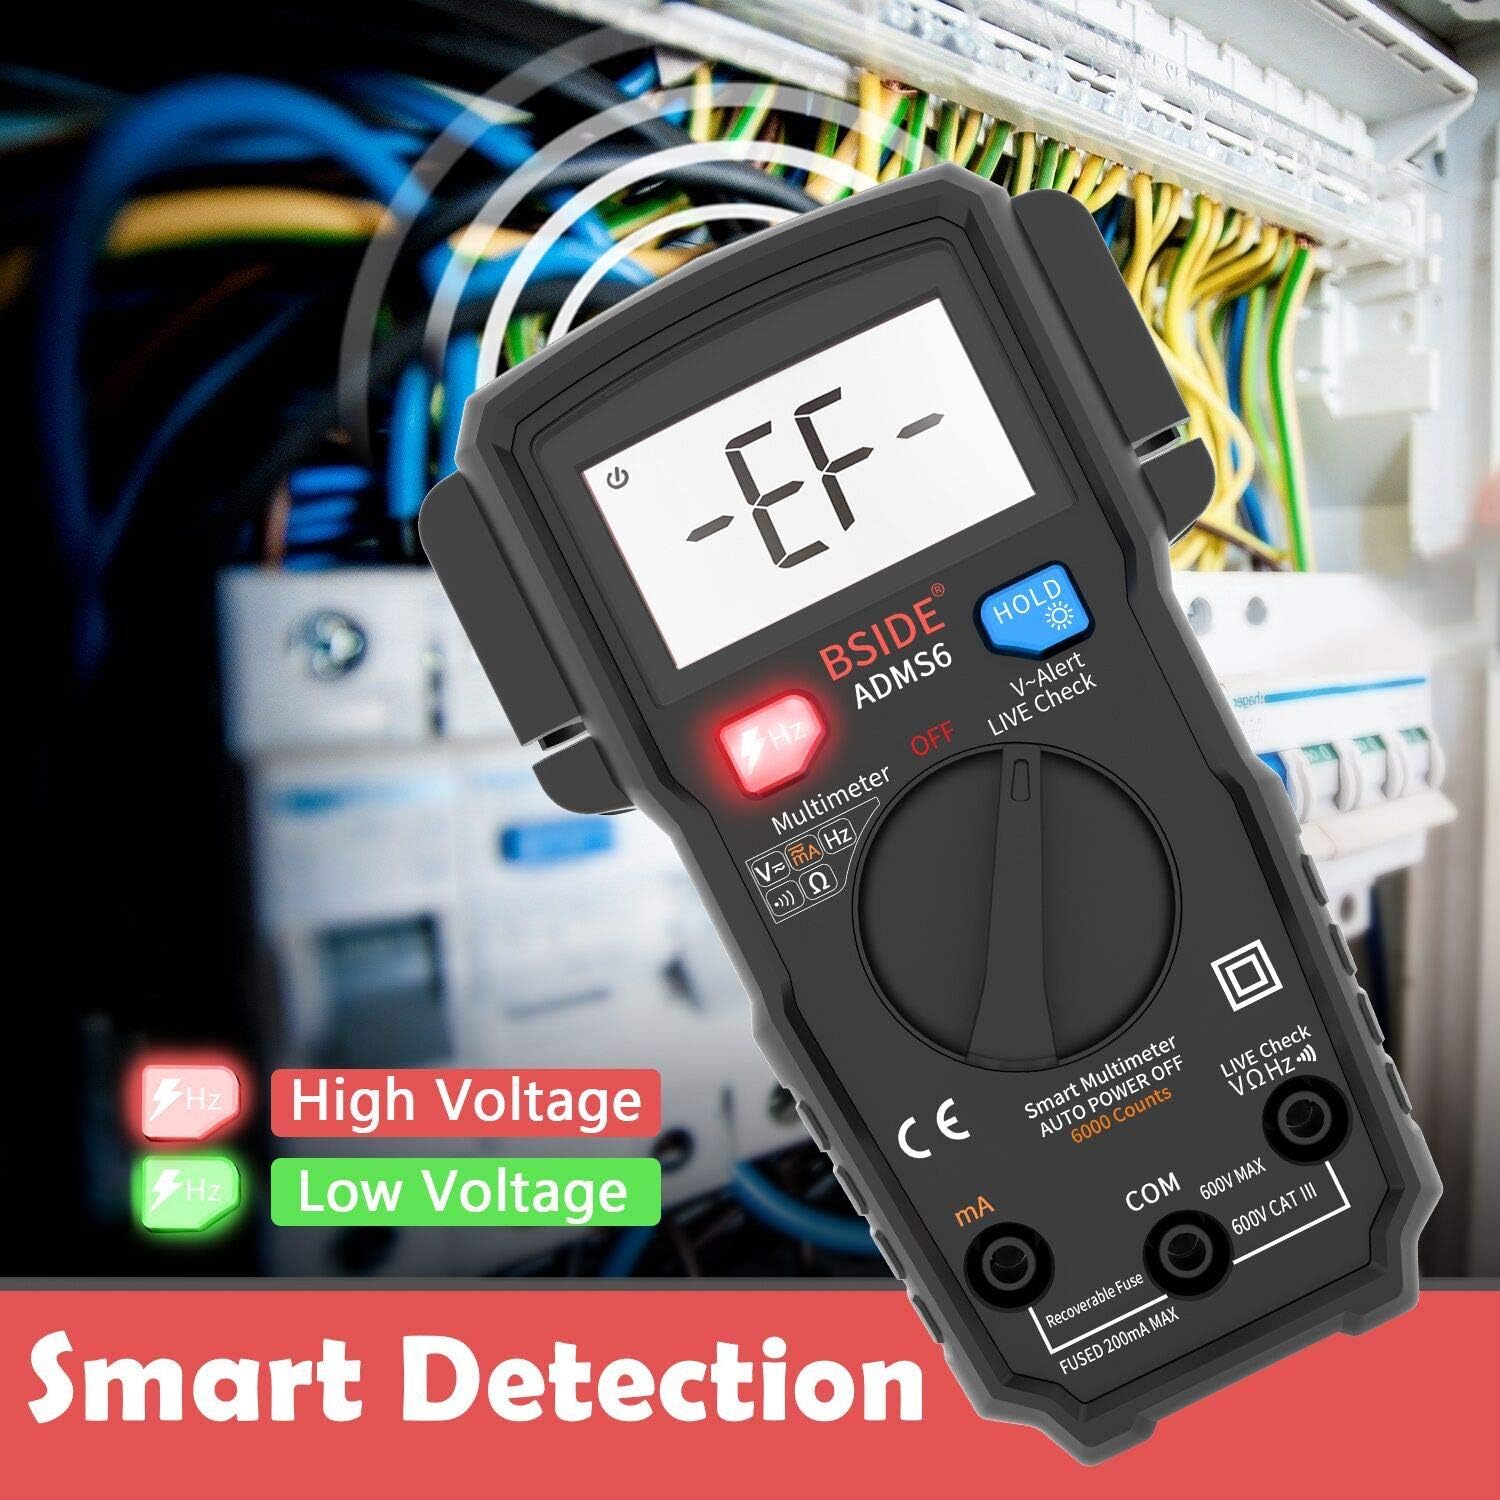
Image: The multimeter's display showing "-EF-" during V-Alert mode, with the "Hz" button illuminating red for high voltage and green for low voltage, indicating smart detection.
Live Wire Check
Set the rotary switch to "Live Check". Use the red probe to touch the wire. If it's a live wire, an alarm beep will sound, the LCD screen will display "LIVE", and the "Hz" button will light up.
HOLD Function
Press the "HOLD" button to freeze the current reading on the display. Press it again to release the hold and resume live readings.
Backlight
Press the "HOLD" button for a few seconds to turn the backlight on or off, improving visibility in low-light conditions.
Specifications
| Parameter | Value |
|---|---|
| Display | 6000 counts |
| DC Current | 600uA/6000uA/60mA/200mA ±(1.2%+3) |
| AC Current | 600uA/6000uA/60mA/200mA ±(1.5%+5) |
| DC Voltage | 60mV/600mV/6V/60V/600V ±(0.8%+3) |
| AC Voltage | 60mV/600mV/6V/60V/600V ±(1.2%+5) |
| Resistance | 6Ω/60Ω/600Ω/6kΩ ±(1.2%+3) |
| Frequency | 10Hz/100Hz/1KHz ±(1.0%+5) |
| Continuity Beeper | Sounds if resistance < 30Ω |
| Power | 2 x 1.5V AAA Batteries |
| Dimensions (L x W x H) | 139 x 83 x 36 mm (5.35 x 3.23 x 1.14 inches) |
| Weight | 160g (5.2 ounces) |
| Safety Rating | 600V CAT III |
Maintenance
Cleaning
To clean the multimeter, wipe the case with a damp cloth and a mild detergent. Do not use abrasives or solvents. Ensure the device is powered off and probes are disconnected before cleaning.
Battery Replacement
When the battery indicator appears on the display, replace the batteries promptly to ensure accurate readings. Refer to the "Battery Installation" section for instructions.
Fuse Protection
The ADMS6 features recoverable fuses. In case of an overload, the fuse will trip to protect the circuit. Allow a short period for the fuse to reset. If the issue persists, ensure correct measurement procedures are followed.

Image: A close-up of the multimeter's internal circuit board, highlighting the "Smart Anti-burn" feature, which includes a recoverable fuse for circuit protection.
Storage
When not in use for extended periods, remove the batteries to prevent leakage. Store the multimeter in a cool, dry place, away from direct sunlight and extreme temperatures.
Troubleshooting
- No Display/Power On:
- Check if batteries are installed correctly and have sufficient charge. Replace if necessary.
- Ensure the rotary switch is not in the "OFF" position.
- Inaccurate Readings:
- Verify that the test probes are securely connected to the correct input jacks.
- Ensure the probes are making good contact with the circuit or component being tested.
- Check battery level; low batteries can affect accuracy.
- "OL" (Overload) Displayed:
- The measured value exceeds the meter's maximum range for the selected function. Ensure you are within the specified limits.
- No Continuity Beep:
- Ensure the resistance is below 30Ω for the beeper to activate.
- Check for open circuits or poor connections.
Warranty and Support
BSIDE products are manufactured to high-quality standards. For specific warranty information, please refer to the warranty card included with your product or visit the official BSIDE website. If you encounter any issues or require technical assistance, please contact BSIDE customer support through their official channels. Keep your purchase receipt as proof of purchase for warranty claims.
For further assistance, you may visit the BSIDE Brand Store on Amazon.
Ask a question about this manual
Ask about setup, troubleshooting, compatibility, parts, safety, or missing instructions. Manuals+ will review the question and use this page’s manual context to help answer it.