Introduction
This manual provides detailed instructions for the installation, operation, and maintenance of the EverNice Bobbin Winder Assembly, Part #135-26157, designed specifically for the Juki LK-1850 Bartacking Machine. Please read this manual thoroughly before use to ensure proper function and longevity of the product.
Product Overview
The Bobbin Winder Assembly is a crucial component for efficient thread management on your Juki LK-1850 Bartacking Machine. It ensures bobbins are wound evenly and consistently, which is essential for smooth sewing operations and preventing thread breakage.
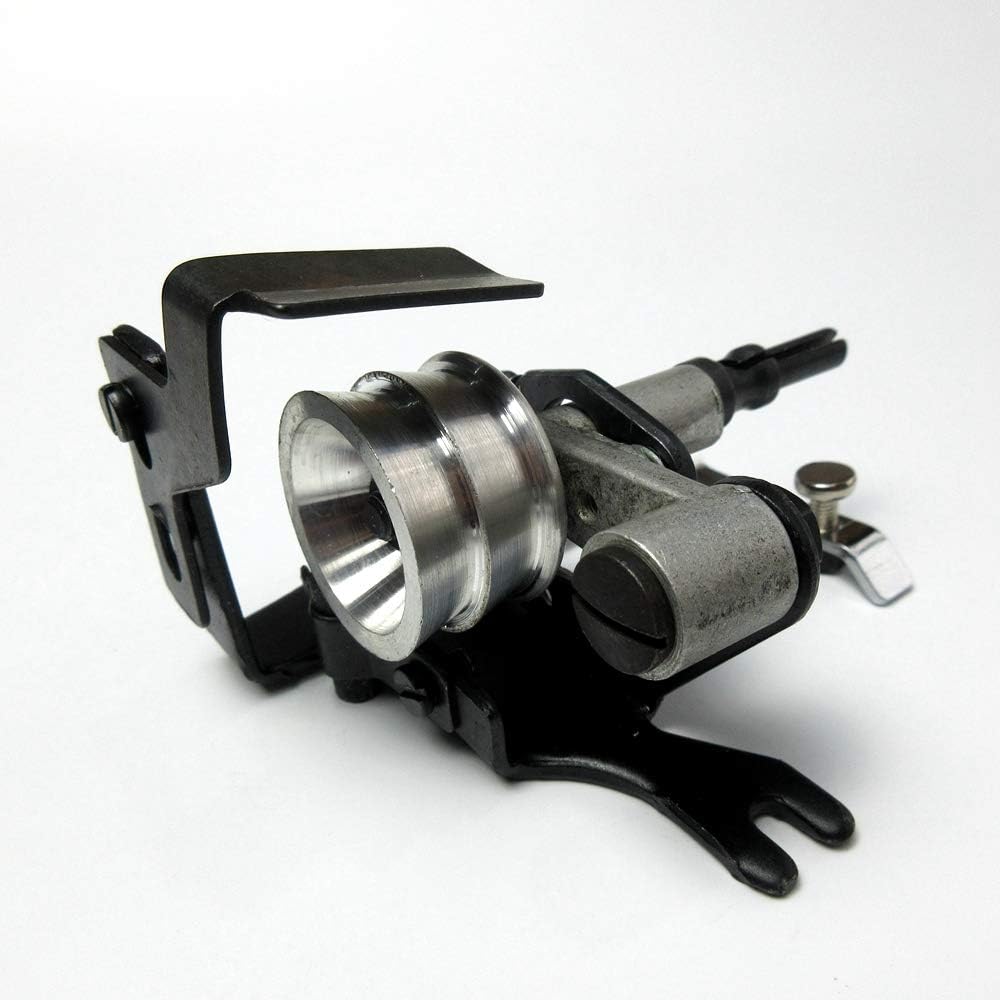
Figure 1: Front view of the Bobbin Winder Assembly, showing the main winding spindle and mounting bracket.

Figure 2: Side view of the Bobbin Winder Assembly, highlighting the tensioning mechanism and bobbin holder.

Figure 3: Another side view of the Bobbin Winder Assembly, showing the full length of the bobbin spindle and the adjustment screw.

Figure 4: Rear view of the Bobbin Winder Assembly, illustrating the mounting points and overall compact design.
Setup and Installation
- Preparation: Ensure your Juki LK-1850 Bartacking Machine is powered off and unplugged before beginning installation. Clear the area around the bobbin winder mounting point.
- Locate Mounting Point: Identify the designated mounting location for the bobbin winder assembly on your Juki LK-1850 machine. Refer to your machine's primary instruction manual if unsure.
- Attach Assembly: Align the mounting holes of the Bobbin Winder Assembly (Part #135-26157) with the corresponding holes on the machine. Secure the assembly using the appropriate screws or fasteners provided with your machine or the winder (if included). Do not overtighten.
- Check Stability: Gently test the installed winder to ensure it is firmly attached and does not wobble.
Operating Instructions
- Insert Empty Bobbin: Place an empty bobbin onto the bobbin winder spindle. Ensure it sits securely.
- Thread Path: Guide the thread from your spool through the tension disc of the bobbin winder. The thread should pass smoothly through the tension mechanism to ensure even winding.
- Initial Wind: Manually wind the thread a few times around the empty bobbin to secure the starting end.
- Engage Winder: Engage the bobbin winder mechanism. This typically involves pushing a lever or button that brings the winder into contact with the machine's drive wheel.
- Start Machine: Power on your Juki LK-1850 machine and begin operation. The bobbin winder will automatically start winding the thread onto the bobbin.
- Monitor Winding: Observe the bobbin as it fills. The winder is designed to stop automatically when the bobbin is full.
- Remove Bobbin: Once winding stops, disengage the winder and carefully remove the full bobbin from the spindle. Cut the thread.
Maintenance
- Regular Cleaning: Periodically clean the bobbin winder assembly to remove lint, dust, and thread residue. Use a soft brush or compressed air.
- Lubrication: Apply a small amount of sewing machine oil to moving parts as recommended by your Juki machine's manual for its bobbin winder mechanism. Avoid over-lubrication.
- Inspect for Wear: Regularly inspect the spindle, tension disc, and engagement points for signs of wear or damage. Replace the assembly if significant wear is observed to maintain optimal performance.
- Storage: When not in use for extended periods, ensure the machine and its components, including the bobbin winder, are stored in a clean, dry environment.
Troubleshooting
| Problem | Possible Cause | Solution |
|---|---|---|
| Bobbin not winding evenly. | Incorrect thread tension; lint in tension disc. | Adjust tension; clean tension disc. |
| Winder not engaging. | Winder not properly aligned or engaged with drive wheel. | Ensure winder is fully engaged; check for obstructions. |
| Thread breaking during winding. | Too much tension; burr on spindle; poor quality thread. | Reduce tension; inspect spindle for damage; use quality thread. |
| Winder not stopping automatically. | Sensor or stop mechanism obstructed or faulty. | Clean stop mechanism; consult a technician if issue persists. |
Specifications
- Product Name: Bobbin Winder Assembly
- Part Number: 135-26157
- Compatibility: Juki LK-1850 Bartacking Machine
- Brand: EverNice
- Material: Metal alloy components