
TUSY HPC480-3
TUSY 15x15 inch Digital Heat Press Machine User Manual
Model: HPC480-3 | Brand: TUSY
1. Introduction
Thank you for choosing the TUSY 15x15 inch Digital Heat Press Machine. This manual provides essential information for the safe and efficient operation, maintenance, and troubleshooting of your heat press. Please read this manual thoroughly before operating the machine to ensure proper usage and to prevent damage or injury.

Image: TUSY 15x15 inch Slide out Heat Press, highlighting its design for DIY projects.
2. Safety Instructions
To ensure safe operation and prevent personal injury or damage to the machine, please observe the following safety precautions:
- Always connect the heat press to a grounded electrical outlet with the correct voltage (110V).
- Do not touch the heating platen when the machine is powered on or hot. It reaches very high temperatures and can cause severe burns.
- Keep hands, hair, and loose clothing away from moving parts and the heating element during operation.
- Ensure adequate ventilation in the work area to dissipate heat and any fumes from materials being pressed.
- Do not operate the machine if the power cord is damaged or frayed.
- Unplug the machine from the power outlet when not in use, before cleaning, or before performing any maintenance.
- Keep the machine out of reach of children and pets.
- Do not immerse the machine in water or any other liquid.
- Use only recommended accessories and replacement parts.
3. Package Contents
Verify that all items are present in the package:
- TUSY 15x15 inch Digital Heat Press Machine
- Power Cord
- Silicone Pad
- Teflon Sheet (pre-installed or separate)
- User Manual
4. Product Overview
Familiarize yourself with the components of your heat press machine:

Image: Labeled diagram showing the Digital Control Box, Switch Button, Pressure Knob, Double Arm Force, Anti-slip Handle, Heating Board, and Heat Resistant Teflon surface.
- Digital Control Box: Displays and controls temperature and time settings.
- Switch Button: Powers the machine on/off.
- Pressure Knob: Adjusts the pressure applied by the heating platen. Turn clockwise for more pressure, counter-clockwise for less.
- Double Arm Force Handle: Provides even pressure distribution and durability when closing the press.
- Anti-slip Handle: Ergonomically designed for comfortable and secure operation.
- Heating Board: The upper platen that heats up to transfer designs. It is Teflon-coated for easy cleaning and heat resistance.
- Heat Resistant Teflon: A protective coating on the heating platen.
- Elastic Silicone Pad: Located on the lower platen, provides a stable and heat-resistant surface for materials.
- Slide-out Tray: The lower platen slides out for easier placement and removal of materials, reducing the risk of burns.

Image: Close-up view highlighting the Teflon-coated heating platen, Digital LED Controller, and Elastic Silicone Pad.
5. Setup
- Unpacking: Carefully remove the heat press from its packaging. Retain packaging for future storage or transport.
- Placement: Place the machine on a stable, heat-resistant surface in a well-ventilated area. Ensure there is enough space around the machine for safe operation and heat dissipation.
- Power Connection: Plug the power cord into a grounded 110V electrical outlet.
- Initial Inspection: Before first use, inspect the machine for any visible damage. Ensure all components are securely fastened.
- Adjusting Pressure: The pressure knob on top of the heating platen allows you to adjust the pressing force. Turn the knob clockwise to increase pressure and counter-clockwise to decrease pressure. Test the pressure by closing the press on a material of similar thickness to what you will be using. The handle should close with firm but manageable resistance.
6. Operating Instructions
Follow these steps for successful heat transfer:
- Power On: Press the power switch to turn on the machine. The digital display will illuminate.
- Set Temperature: Press the "SET" button once. The "TEMP" indicator will flash. Use the "+" and "-" buttons to adjust the desired temperature (range: 200°F - 480°F). Press "SET" again to confirm.
- Set Time: After setting the temperature, press the "SET" button again. The "TIME" indicator will flash. Use the "+" and "-" buttons to adjust the desired pressing time in seconds. Press "SET" a third time to confirm and exit the setting mode. The machine will begin to heat up to the set temperature.
- Pre-heating: Allow the machine to reach the set temperature. The "TEMP" indicator will stop flashing when the target temperature is reached.
- Prepare Material: Slide out the lower platen. Place your material (e.g., T-shirt, mouse pad) onto the silicone pad. Position your transfer design on the material.
- Pressing: Carefully slide the lower platen back into position. Firmly pull down the handle to close the heat press. The timer will automatically start counting down once the press is closed.
- Completion: Once the timer reaches zero, an alarm will sound. Lift the handle to open the heat press.
- Remove Material: Slide out the lower platen and carefully remove your transferred item. Be cautious as the item will be hot.
- Power Off: When finished, press the power switch to turn off the machine and unplug it from the outlet.
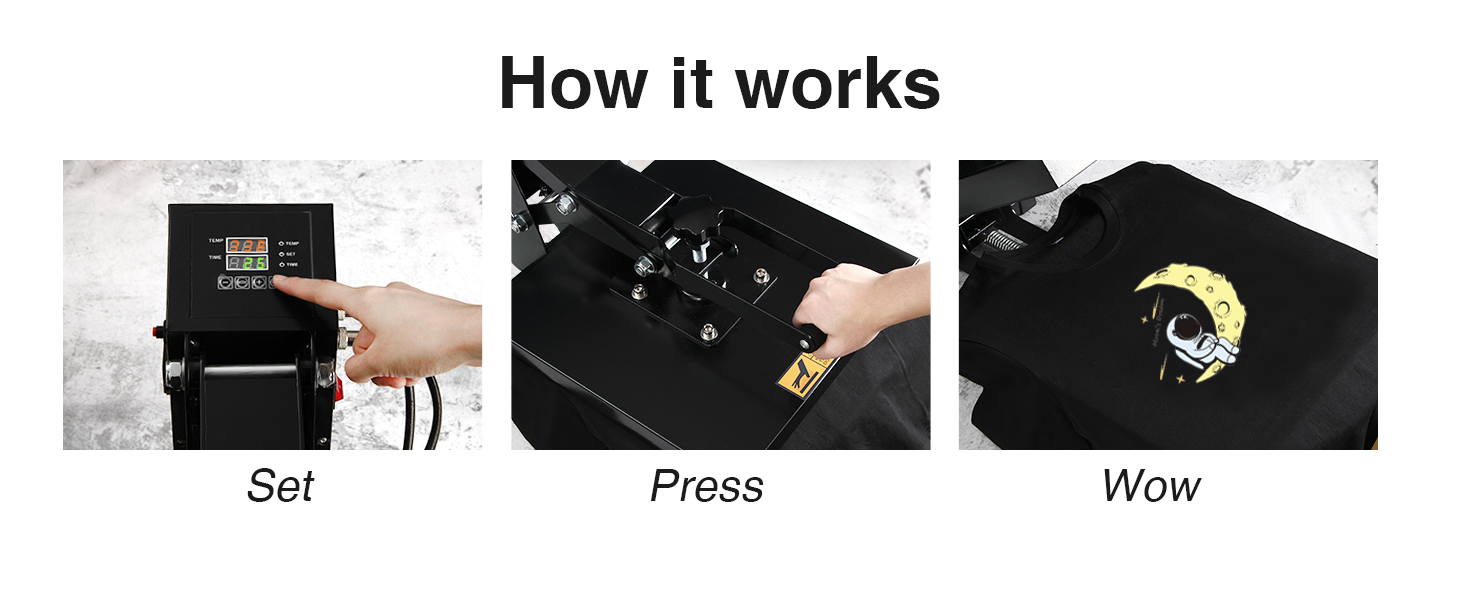
Image: Visual representation of the heat press operation: Set (temperature/time), Press (applying heat), and Wow (finished product).

Image: Examples of applications including T-shirts, Canvas Bags, Mouse Mats, and Pillows.
7. Maintenance
Proper maintenance ensures the longevity and performance of your heat press:
- Cleaning the Heating Platen: Ensure the machine is cool and unplugged. Wipe the Teflon-coated heating platen with a soft, damp cloth. For stubborn residue, use a non-abrasive cleaner specifically designed for Teflon surfaces. Do not use harsh chemicals or abrasive materials that could damage the coating.
- Cleaning the Silicone Pad: The silicone pad can be wiped clean with a damp cloth. Ensure it is dry before next use.
- General Cleaning: Wipe down the exterior of the machine with a dry or slightly damp cloth to remove dust and debris.
- Storage: Store the heat press in a dry, dust-free environment when not in use. It is recommended to keep the platen slightly open to prevent the silicone pad from sticking.
- Regular Checks: Periodically check all screws and connections to ensure they are secure.
8. Troubleshooting
If you encounter issues with your heat press, refer to the following common problems and solutions:
| Problem | Possible Cause | Solution |
|---|---|---|
| Machine does not power on | No power supply; Power switch off; Damaged power cord. | Check power outlet and cord connection; Ensure power switch is ON; Replace damaged power cord. |
| Heating platen not heating up | Temperature not set; Heating element malfunction. | Verify temperature settings on the digital controller; Contact customer support if heating element is faulty. |
| Uneven heat distribution | Heating element issue; Incorrect pressure. | Ensure even pressure adjustment; Contact customer support if heating element is suspected. |
| Digital display not working correctly | Loose connection; Control box malfunction. | Check connections to the control box; Contact customer support for repair or replacement. |
| Pressure is too loose or too tight | Pressure knob not adjusted correctly. | Adjust the pressure knob until desired pressure is achieved. Test on scrap material. |
9. Specifications
| Feature | Detail |
|---|---|
| Model Number | HPC480-3 |
| Brand | TUSY |
| Transfer Size | 15 x 15 inches |
| Voltage | 110 Volts |
| Wattage | 1400 watts |
| Upper Temperature Rating | 480 Degrees Fahrenheit (250°C) |
| Lower Temperature Rating | 200 Degrees Fahrenheit (93°C) |
| Item Weight | 46.5 pounds |
| Product Dimensions (Overall) | 26.5 x 18.5 x 16 inches |
| Material | Alloy Steel |
| Recommended Uses | Mouse Pad, T-Shirt, Canvas Bags, Pillows |

Image: Diagram illustrating power input (110V/60Hz), power (1400W), transfer size (15" x 15"), and temperature range (32-430°F / 0-250°C).
10. Warranty and Support
TUSY is committed to providing high-quality products and customer satisfaction. For warranty information, technical support, or any questions regarding your heat press machine, please contact the seller or manufacturer directly through the platform where you purchased the product. Please have your model number (HPC480-3) and purchase details ready when contacting support.
Ask a question about this manual
Ask about setup, troubleshooting, compatibility, parts, safety, or missing instructions. Manuals+ will review the question and use this page’s manual context to help answer it.