
PHILIPS GC4885/30
Philips Azur Pro Steam Iron GC4885 User Manual
Model: GC4885/30 | Brand: PHILIPS
1. Important Safety Information
Please read this user manual carefully before you use the appliance and save it for future reference. Always follow the basic safety precautions when using any electrical appliance.
- Danger: Never immerse the iron in water or any other liquid.
- Warning: Check if the voltage indicated on the appliance corresponds to the local mains voltage before you connect the appliance.
- Warning: Do not use the appliance if the plug, the mains cord, or the appliance itself shows visible damage, or if the appliance has been dropped.
- Caution: The soleplate of the iron can become extremely hot and may cause burns if touched. Always allow the iron to cool down completely before storing.
- Caution: Keep the iron and its cord out of reach of children.
- Caution: Always place the iron on a stable, heat-resistant surface when not in use.
2. Product Overview
The Philips Azur Pro Steam Iron GC4885 is designed for efficient and powerful ironing, featuring a T-ionic Glide soleplate and 3000 Watts of power for quick heat-up and strong steam performance.

Figure 2.1: Front view of the Philips Azur Pro Steam Iron GC4885. This image shows the overall design, including the purple and black casing, the water tank, the steam trigger, and the temperature control dial.
Key Components:
- A. Water filling hole: For adding water to the tank.
- B. Spray nozzle: For misting fabric.
- C. Steam boost button: For an extra burst of steam.
- D. Spray button: To activate the spray function.
- E. Steam control slider: To adjust steam output or select dry ironing.
- F. Temperature dial: To select the appropriate temperature for different fabrics.
- G. Calc-clean button/lever: For descaling the iron.
- H. Power cord: With a flexible swivel.
- I. T-ionic Glide soleplate: Advanced soleplate for smooth gliding.
3. Setup and First Use
Before First Use:
- Remove any stickers or protective film from the soleplate.
- It is normal for a small amount of smoke to be produced the first time the iron is used. This will stop after a short while.
Filling the Water Tank:
- Ensure the iron is unplugged.
- Set the steam control to the 'dry ironing' position (no steam).
- Hold the iron in a tilted position and fill the water tank with tap water up to the MAX indication. Do not overfill.
- Close the water filling hole.
Note: For optimal performance and to prolong the life of your iron, it is recommended to use demineralized or distilled water, especially in areas with hard water.
4. Operating Instructions
Setting the Temperature:
- Place the iron on its heel rest on a stable, heat-resistant surface.
- Plug the iron into a grounded wall socket.
- Turn the temperature dial to the desired setting according to the fabric type. Refer to the fabric care labels on your garments.
- The temperature indicator light will illuminate, indicating the iron is heating up. It will turn off when the set temperature is reached.
Steam Ironing:
Steam ironing is suitable for garments that can withstand high temperatures and moisture. Ensure the water tank is filled.
- Set the temperature dial to the steam zone (usually indicated by three dots or a steam symbol).
- Once the temperature indicator light goes out, select the desired steam output using the steam control slider.
- For an extra burst of steam, press the steam boost button. This is useful for stubborn creases.
Dry Ironing:
For delicate fabrics or when steam is not desired.
- Set the steam control slider to the 'dry ironing' position (no steam).
- Select the appropriate temperature for your fabric.
5. Maintenance and Cleaning
Cleaning the Soleplate:

Figure 5.1: The T-ionic Glide soleplate of the Philips Azur Pro Iron. This image highlights the unique design of the soleplate, engineered for optimal glide and steam distribution.
- To clean the soleplate, use a damp cloth and a non-abrasive (liquid) cleaner.
- Never use scouring pads, abrasive cleaning agents, or sharp objects to clean the soleplate.
Calc-Clean Function:
Regularly use the Calc-Clean function to remove scale particles from the iron's steam chamber, ensuring optimal steam performance and extending the iron's lifespan.
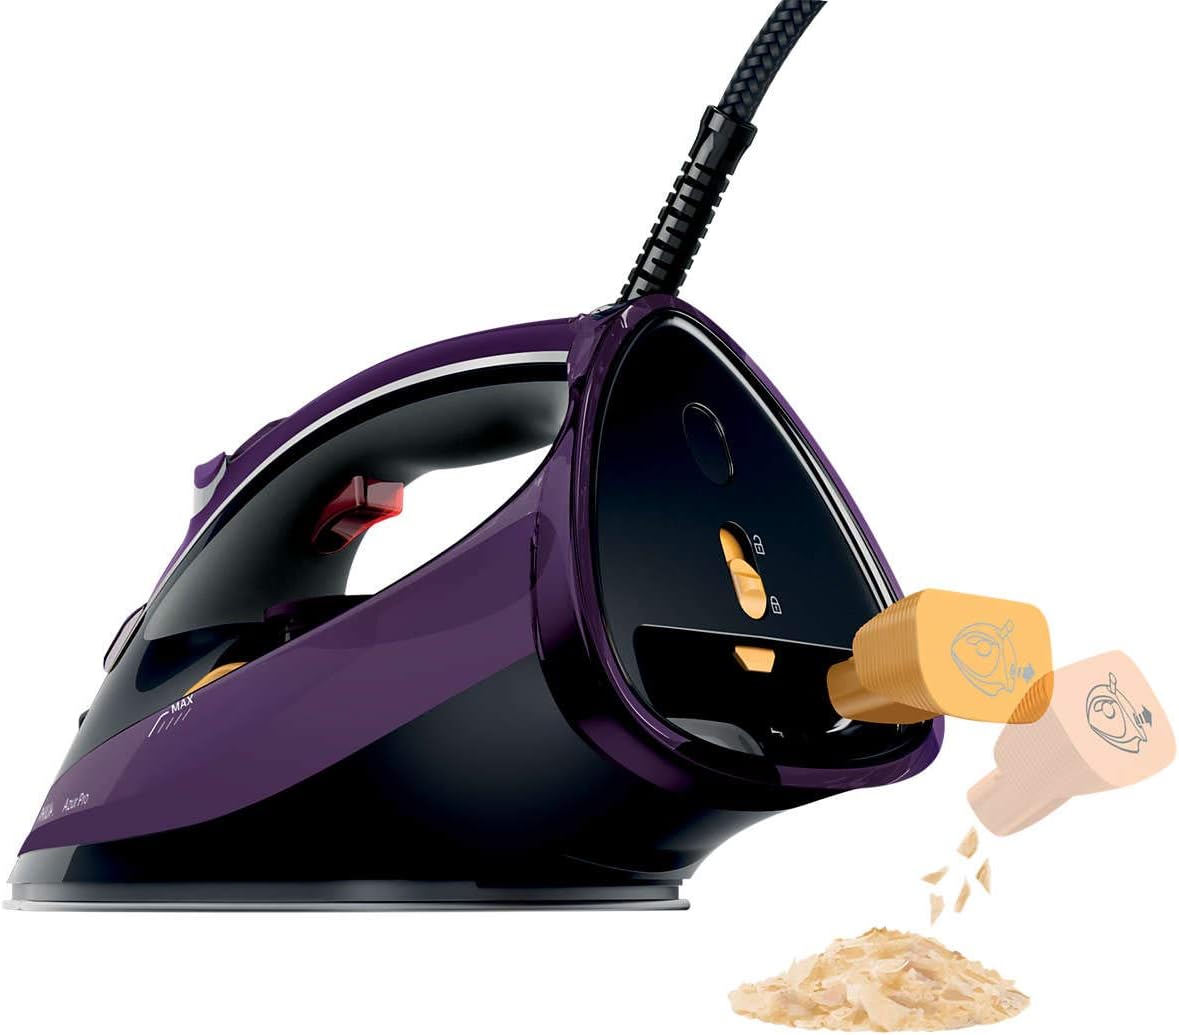
Figure 5.2: Illustration of the Calc-Clean process for the Philips Azur Pro Iron. This image depicts how the iron expels scale particles into a collection container during the self-cleaning cycle.
- Fill the water tank to the MAX level.
- Set the steam control to 'no steam' and the temperature dial to MAX.
- Plug in the iron and wait for the temperature indicator light to go out.
- Unplug the iron.
- Hold the iron over a sink, press and hold the Calc-Clean button/lever. Gently shake the iron back and forth until all water in the tank has been used up.
- Plug in the iron again and let it heat up to dry the soleplate.
Storage:
- Unplug the iron and allow it to cool down completely.
- Empty the water tank after each use to prevent scale build-up.
- Store the iron on its heel rest in a dry, safe place.
6. Troubleshooting
| Problem | Possible Cause | Solution |
|---|---|---|
| Iron does not heat up. | Iron is not plugged in or power outlet is faulty. | Check if the plug is properly inserted. Test the outlet with another appliance. |
| No steam is produced. | Water tank is empty or temperature is too low. | Fill the water tank. Set the temperature dial to the steam zone (e.g., 3 dots). |
| Water leaks from the soleplate. | Temperature is too low for steam or iron is tilted too much. | Ensure the iron has reached the correct temperature for steam. Keep the iron horizontal during use. |
| White flakes come out of the soleplate. | Scale build-up in the iron. | Perform the Calc-Clean function as described in the Maintenance section. |
If the problem persists after trying the solutions above, please contact Philips customer support.
7. Specifications
- Brand: PHILIPS
- Model Number: GC4885/30
- Power / Wattage: 3000 Watts
- Base Plate Type: T-ionic Glide
- Item Weight: 1.86 kg
- Color: Black & Purple
- Special Features: T Ionic Glide, High Power (3000W)
8. Warranty and Support
This Philips appliance comes with a standard manufacturer's warranty. Please refer to the warranty card provided with your product for specific terms and conditions, including the warranty period.
For product support, spare parts, or to register your product, please visit the official Philips website or contact their customer service helpline in your region. Keep your purchase receipt as proof of purchase for warranty claims.
Online Support: www.philips.com/support
Ask a question about this manual
Ask about setup, troubleshooting, compatibility, parts, safety, or missing instructions. Manuals+ will review the question and use this page’s manual context to help answer it.