Introduction
This user manual provides essential information for the safe operation, assembly, maintenance, and troubleshooting of your Greenworks 40V 21" Brushless Cordless Self-Propelled Lawn Mower. Designed for efficiency and ease of use, this mower features a durable 21" poly deck, dual blades, and a versatile 3-in-1 design for rear bagging, mulching, and side discharge. Its brushless motor ensures powerful performance with quiet operation and extended life. The self-propelled function and single-handle height adjustment enhance user comfort and control. Please read this manual thoroughly before first use to ensure optimal performance and safety.
Important Safety Information
Always follow basic safety precautions when operating electrical appliances to reduce the risk of fire, electric shock, and personal injury. Keep children and bystanders away. Wear appropriate personal protective equipment, including eye protection and sturdy footwear. Do not operate the mower in wet conditions. Ensure the area is clear of debris before mowing. Disconnect the battery before performing any maintenance or adjustments.
Package Contents
- Greenworks 40V 21" Self-Propelled Lawn Mower
- 5.0Ah 40V Lithium-Ion Battery
- Battery Charger
- Grass Collection Bag
- Side Discharge Chute
- Mulch Plug
- Operator's Manual

Figure 1: Greenworks 40V 21" Self-Propelled Lawn Mower with included battery and charger.
Setup
1. Handle Assembly
Unfold the handle and secure it in place using the quick-release clamps or knobs provided. Ensure the handle is firmly locked before operation.
2. Battery Installation
Locate the dual battery ports on the mower. Insert the fully charged 40V 5.0Ah battery into one of the ports until it clicks into place. The mower features automatic switchover between batteries if two are installed.
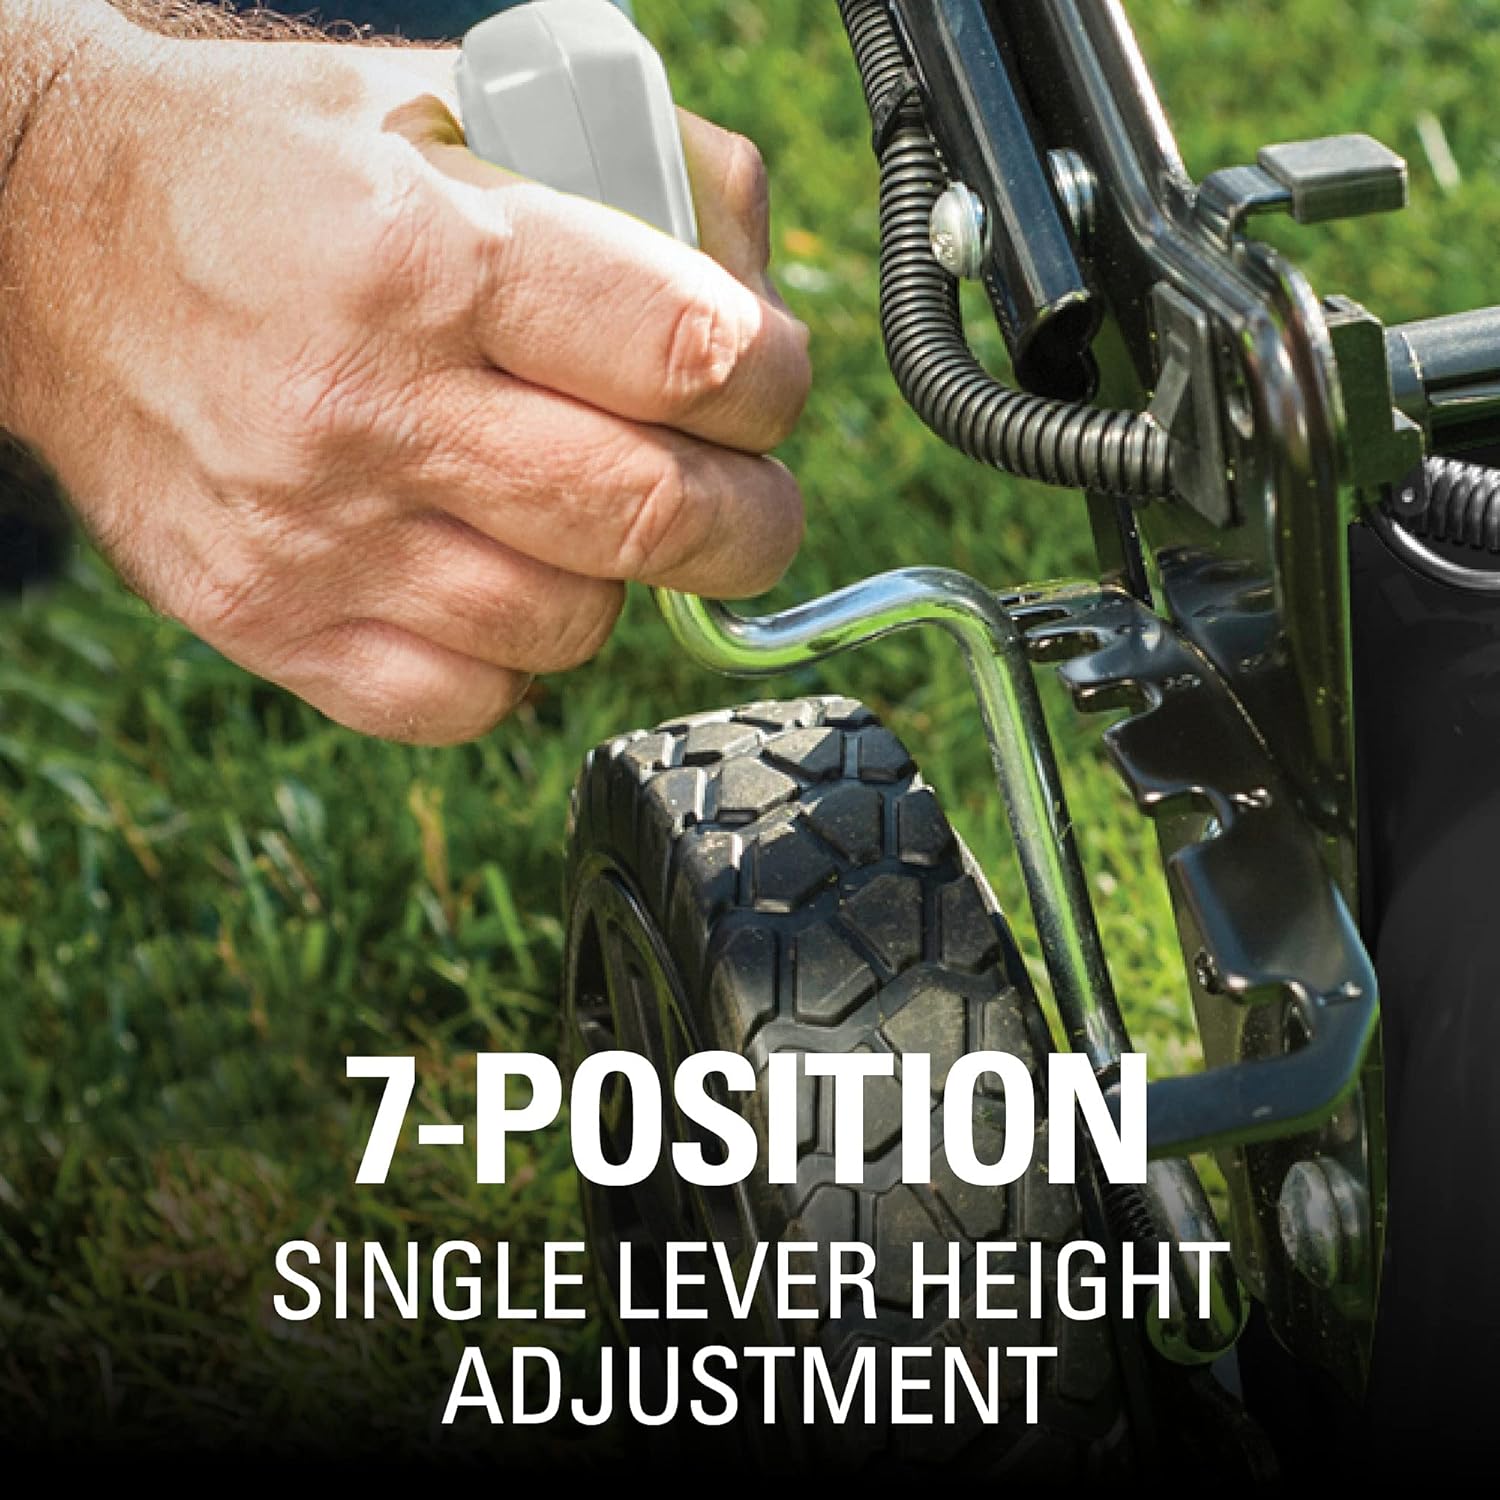
Figure 2: Dual battery port design for extended runtime.
3. Choosing Mowing Mode (3-in-1 Versatility)
Your mower offers three mowing options:
- Rear Bagging: Attach the grass collection bag to collect clippings.
- Mulching: Insert the mulch plug into the rear discharge opening to finely cut and redistribute clippings back onto the lawn.
- Side Discharge: Attach the side discharge chute to direct clippings away from the mower.

Figure 3: Demonstrating the 3-in-1 mowing versatility: Rear Bag, Mulch, and Side Discharge.
Operating Instructions
1. Starting the Mower
To start the mower, press and hold the safety button, then pull the bail lever towards the handle. Release the safety button once the mower starts. To stop, release the bail lever.
2. Self-Propelled Function
Engage the self-propelled function by pressing the self-propel lever. This feature provides rear-wheel drive power, increasing traction and making it easier to navigate inclines and uneven terrain. Adjust the speed as needed for comfortable operation.

Figure 4: The self-propelled feature assists in mowing, especially on inclines.
3. Adjusting Cutting Height
The mower features a 7-position single lever height adjustment. To change the cutting height, pull the lever outwards and move it to the desired position. Ensure all wheels are set to the same height for an even cut.

Figure 5: Single lever for quick and easy cutting height adjustment.
4. Battery Runtime
A fully charged 5.0Ah battery provides up to 45 minutes of runtime. Actual runtime may vary based on grass conditions (e.g., thickness, height) and operator technique. For larger lawns, consider having a second charged battery available.
Maintenance
1. Cleaning the Mower
After each use, disconnect the battery and clean the mower deck and blades. Remove any grass clippings, dirt, or debris. Do not use water directly on electrical components. Use a damp cloth for cleaning the exterior.
2. Blade Care
Regularly inspect the mower blade for sharpness and damage. A dull blade can tear grass, leading to an unhealthy lawn. Sharpen or replace the blade as needed. Always wear heavy-duty gloves when handling the blade.
3. Battery Charging and Storage
Charge the battery fully after each use. Store the battery and charger in a cool, dry place, away from direct sunlight and extreme temperatures. For long-term storage, remove the battery from the mower.
4. Vertical Storage
The Greenworks 40V mower is designed for vertical storage, saving up to 70% more space in your garage or shed. Fold the handle down and stand the mower upright on its rear wheels for compact storage.

Figure 6: The mower can be stored vertically to save space.
Troubleshooting
| Problem | Possible Cause | Solution |
|---|---|---|
| Mower does not start | Battery not charged or improperly installed; Safety button/bail lever not engaged; Blade obstruction. | Ensure battery is fully charged and correctly inserted. Engage safety button and pull bail lever simultaneously. Check for and clear any obstructions around the blade. |
| Reduced cutting performance | Dull blade; Mower deck clogged; Grass too tall/wet. | Sharpen or replace blade. Clean mower deck. Avoid mowing excessively tall or wet grass. Adjust cutting height. |
| Self-propel not engaging | Self-propel lever not fully engaged; Drive belt issue. | Ensure the self-propel lever is fully depressed. Inspect the drive belt for wear or damage (consult service if needed). |
Specifications
| Feature | Detail |
|---|---|
| Brand | Greenworks |
| Model Number | LMF414 |
| Power Source | Battery Powered (40V Lithium-Ion) |
| Cutting Width | 21 Inches |
| Cutting Height Adjustment | 7 Positions (1.38" to 3.75") |
| Operation Mode | Automatic, Self-Propelled |
| Item Weight | 21.6 Pounds |
| Product Dimensions | 65.35"D x 21.65"W x 33.07"H |
| Material | Alloy Steel |
| UPC | 841821048754 |
Warranty & Support
Your Greenworks 40V 21" Brushless Cordless Self-Propelled Lawn Mower is covered by a 4-year tool warranty and a 2-year battery warranty. For detailed warranty information, product support, or to purchase replacement parts, please refer to the official Greenworks website or contact their customer service.
You can also find the official User Manual in PDF format here. For more products and information, visit the Greenworks Store.