
CREA 101418BN
CREA Kitchen Faucet with Pull-Out Sprayer - Model 101418BN User Manual
Comprehensive guide for installation, operation, and maintenance.
1. Introduction
Thank you for choosing the CREA Kitchen Faucet with Pull-Out Sprayer, Model 101418BN. This manual provides detailed instructions for the safe and efficient installation, operation, and maintenance of your new faucet. Please read this manual thoroughly before beginning installation or use, and keep it for future reference.
2. Safety Information
- Always turn off the main water supply before installing or servicing the faucet.
- Wear safety glasses and gloves during installation to prevent injury.
- Ensure all connections are tight to prevent leaks. Do not overtighten.
- If you are unsure about any part of the installation process, consult a qualified plumber.
- Keep small parts away from children.
3. Package Contents
Verify that all components are present before beginning installation:
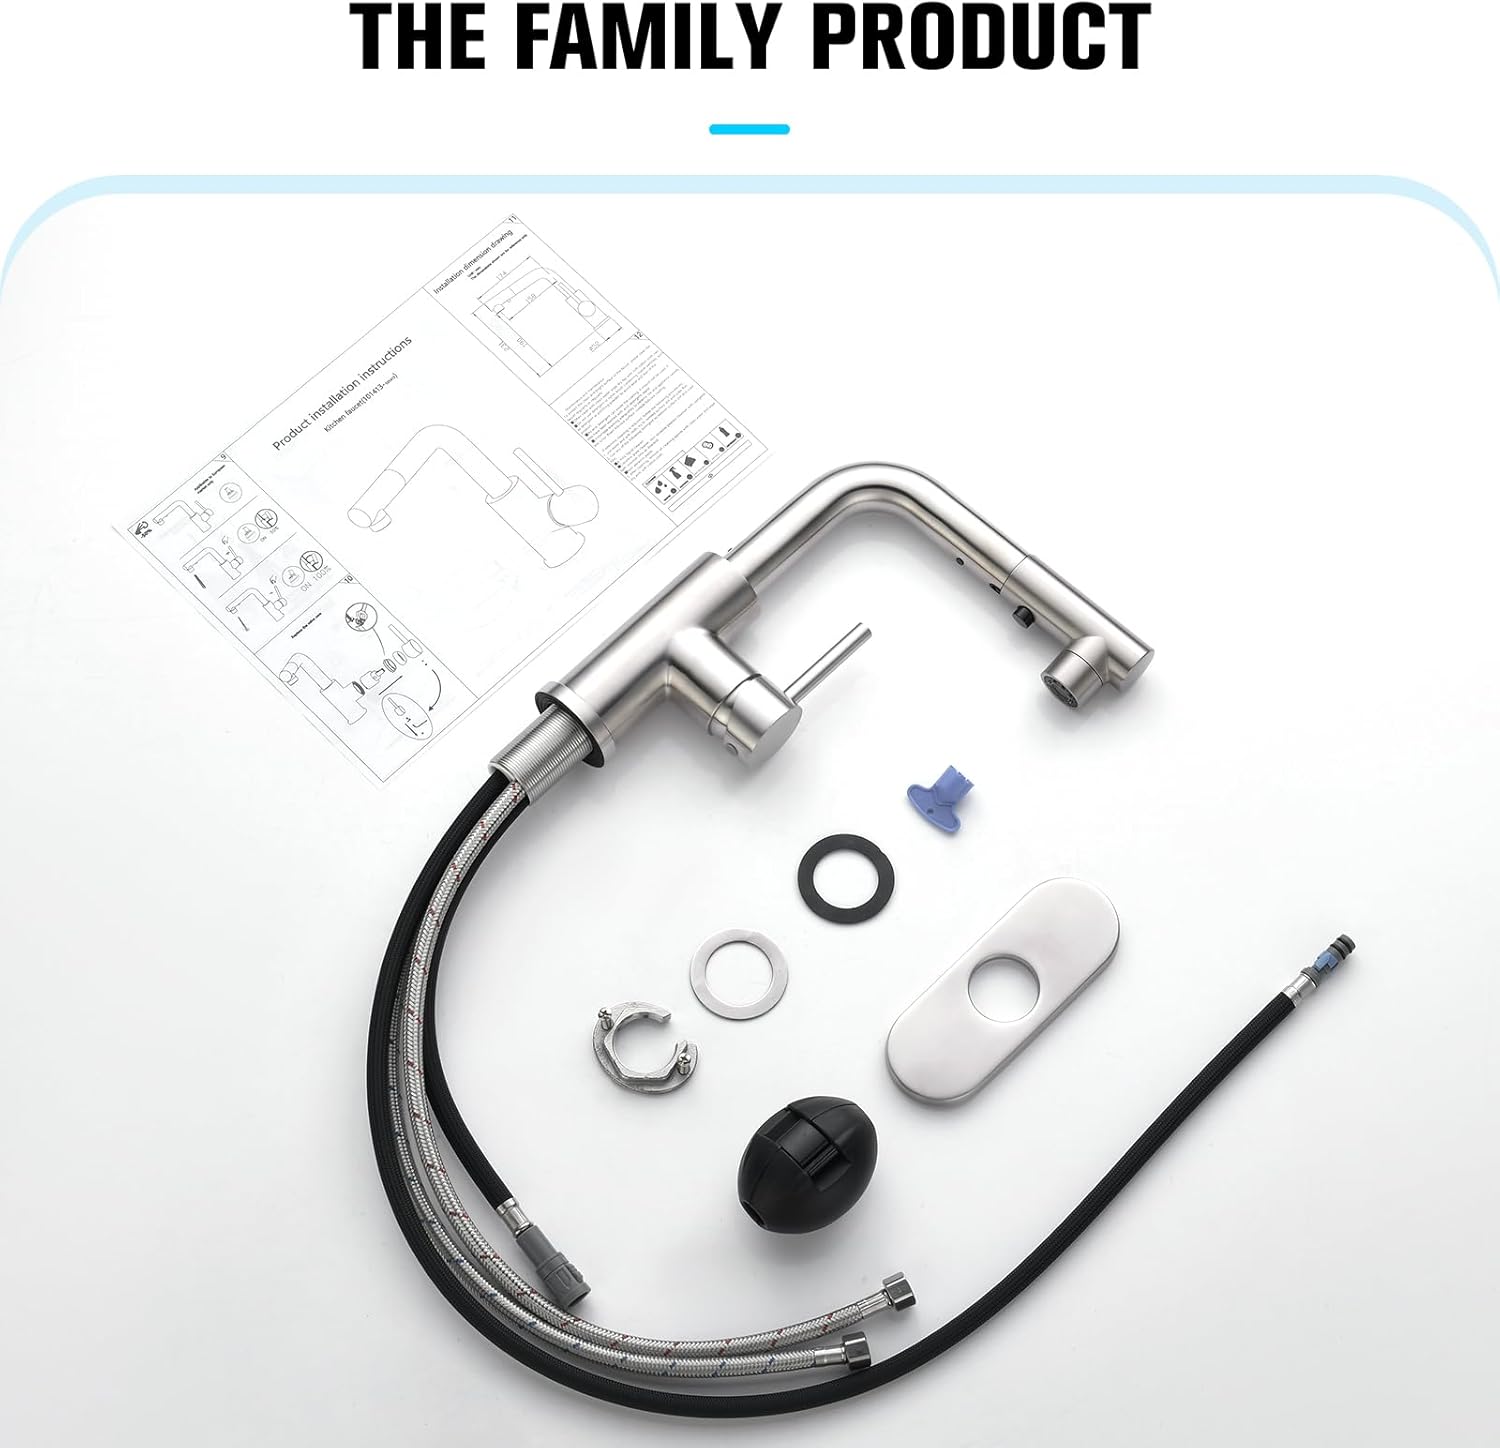
Figure 1: All included components for the faucet installation.
- Faucet Body with Pull-Out Sprayer
- Hot and Cold Water Supply Hoses (pre-installed)
- Mounting Hardware (washers, nuts)
- Hose Weight
- Deck Plate (for 3-hole installations)
- Aerator Removal Tool
4. Specifications
| Feature | Detail |
|---|---|
| Brand | CREA |
| Model Name | 101418BN |
| Finish Type | Brushed Nickel |
| Material | Brass (Faucet Body), Acrylonitrile Butadiene Styrene (ABS) (Handle) |
| Mounting Type | Deck Mount |
| Number of Handles | 1 |
| Hole Count | 3 (Deck Plate included for 3-hole) |
| Maximum Flow Rate | 1.8 Gallons Per Minute |
| Hose Length | 24 Inches (60 cm) |
| Spout Height | 7.8 Inches |
| Spout Reach | 6.8 Inches |
| Special Features | Easy to Install, Lead Free, Pull Down Sprayer |
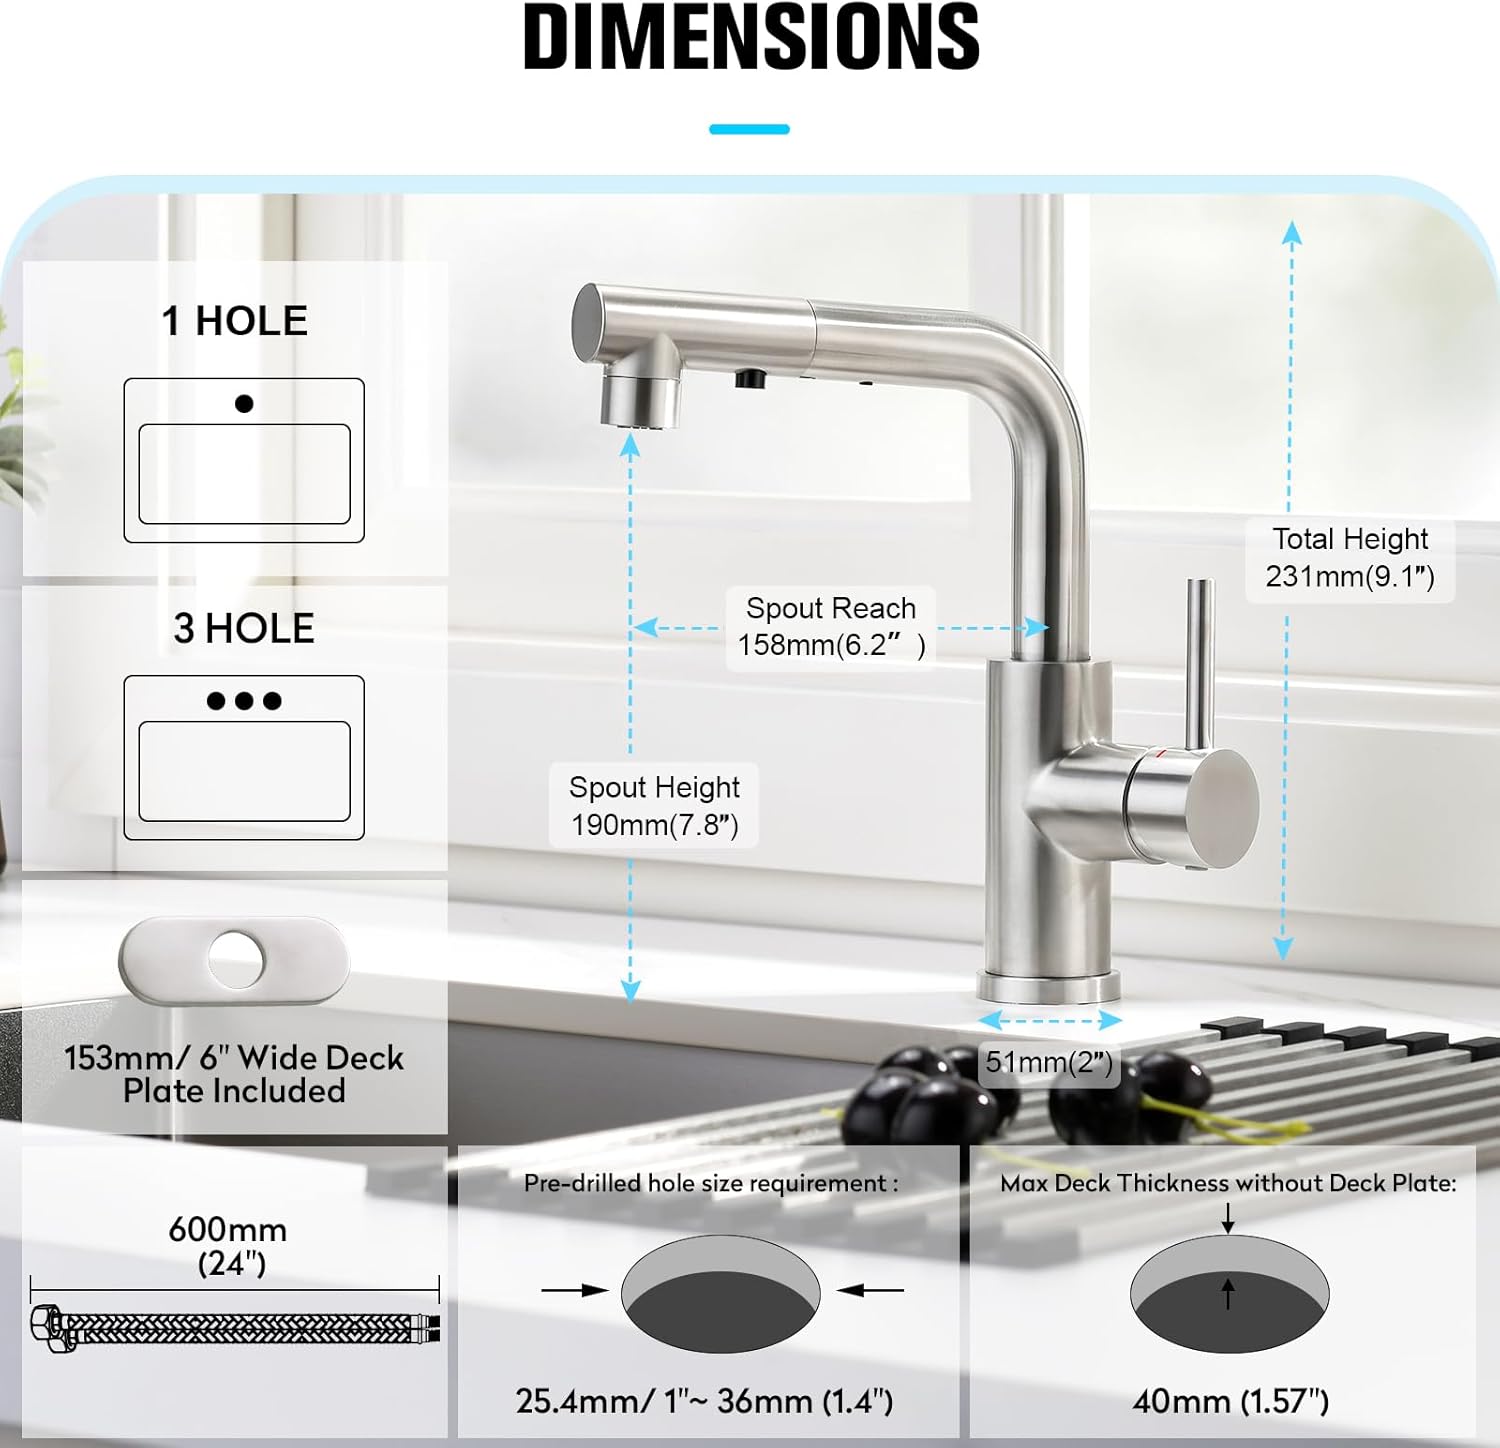
Figure 2: Faucet dimensions and installation hole requirements.
5. Setup and Installation
5.1 Before You Begin
- Turn off the water supply at the main shut-off valves.
- Clear the area under the sink.
- Ensure you have all necessary tools (adjustable wrench, screwdriver, plumber's putty/silicone sealant).
5.2 Installation Steps
- Prepare the Sink Hole: If installing on a 3-hole sink, place the deck plate over the holes. For a single-hole installation, the deck plate is optional. Ensure the hole diameter is between 1 inch (25.4mm) and 1.4 inches (36mm).
- Install the Faucet: Insert the faucet body through the hole in the sink/deck plate. Ensure the faucet is oriented correctly.
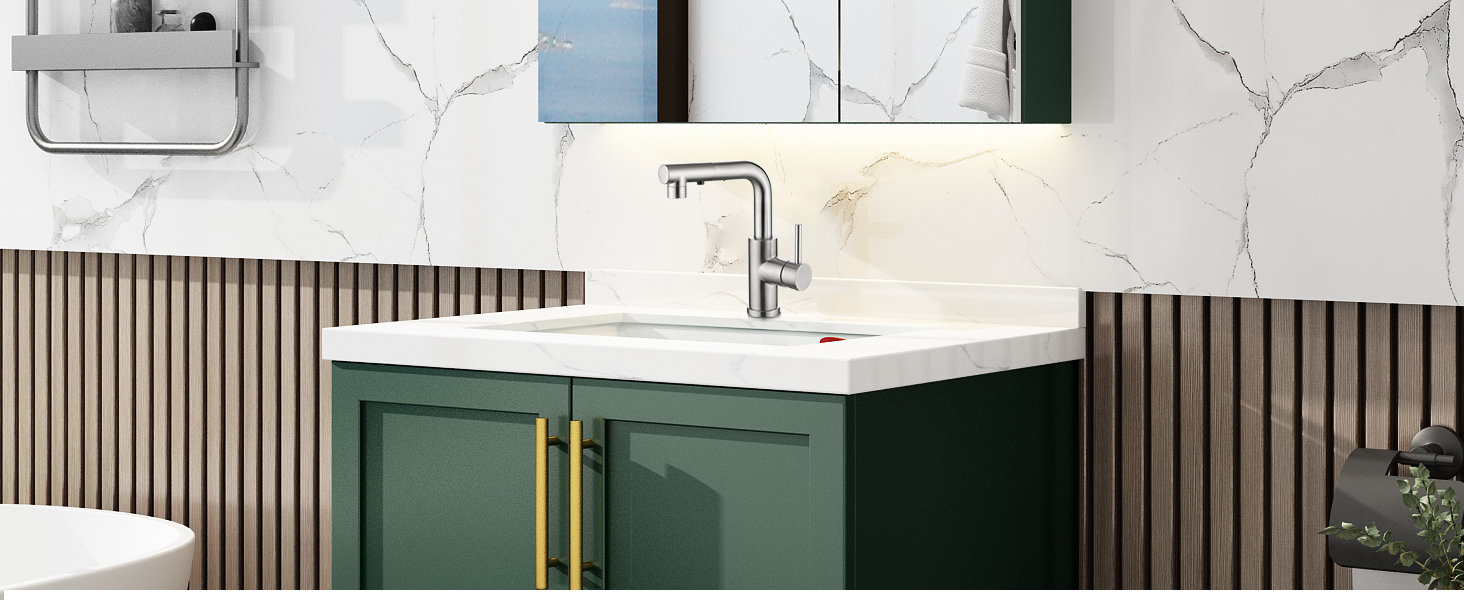
Figure 3: Inserting the faucet into the sink hole.
- Secure the Faucet: From underneath the sink, slide the rubber washer, metal washer, and mounting nut onto the threaded shank. Tighten the mounting nut securely with a wrench.

Figure 4: Securing the faucet with mounting hardware.
- Connect Water Supply Lines: Connect the hot and cold water supply hoses from the faucet to your angle stop valves. Use an adjustable wrench to tighten the connections. Do not overtighten.

Figure 5: Connecting water supply lines.
- Install Hose Weight: Attach the hose weight to the pull-out sprayer hose, approximately 6 inches (15 cm) from the bottom of the faucet body. This ensures the sprayer retracts properly.

Figure 6: Installing the hose weight.
- Test for Leaks: Turn on the main water supply and check all connections for leaks. Run the faucet for a few minutes to flush out any debris.
6. Operating Instructions
6.1 Water Flow and Temperature Control
The single lever handle controls both water flow and temperature:
- Lift the handle to turn on the water and increase flow. Push down to turn off.
- Move the handle left for hot water and right for cold water.
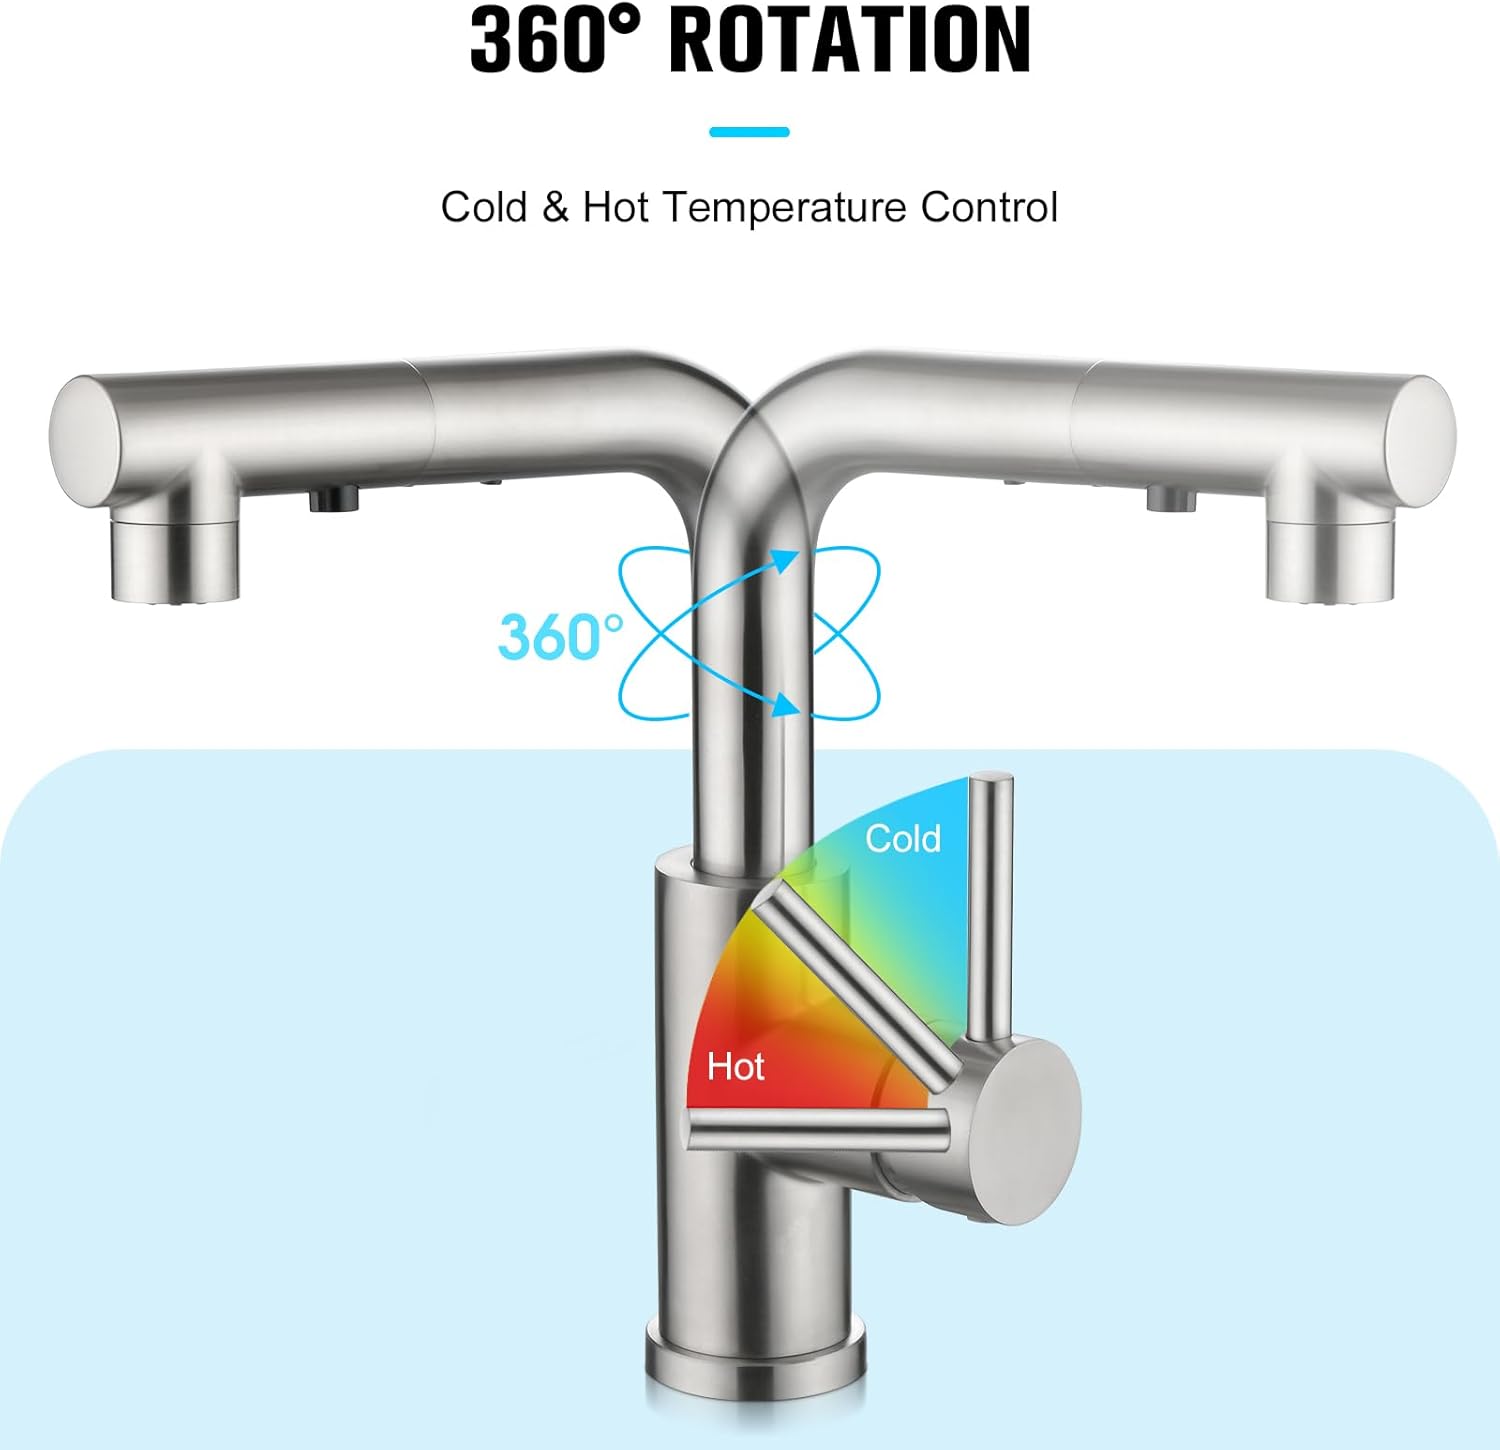
Figure 7: Single lever handle for temperature and flow control.
6.2 Pull-Out Sprayer Functions
The pull-out sprayer offers three distinct modes:
- Stream Mode: For filling pots and general washing.
- Spray Mode: For rinsing dishes and cleaning the sink. Rotate the sprayer nozzle to switch between stream and spray.
- Pause Mode: Press the black button on the underside of the sprayer head to temporarily pause water flow. Release the button to resume.
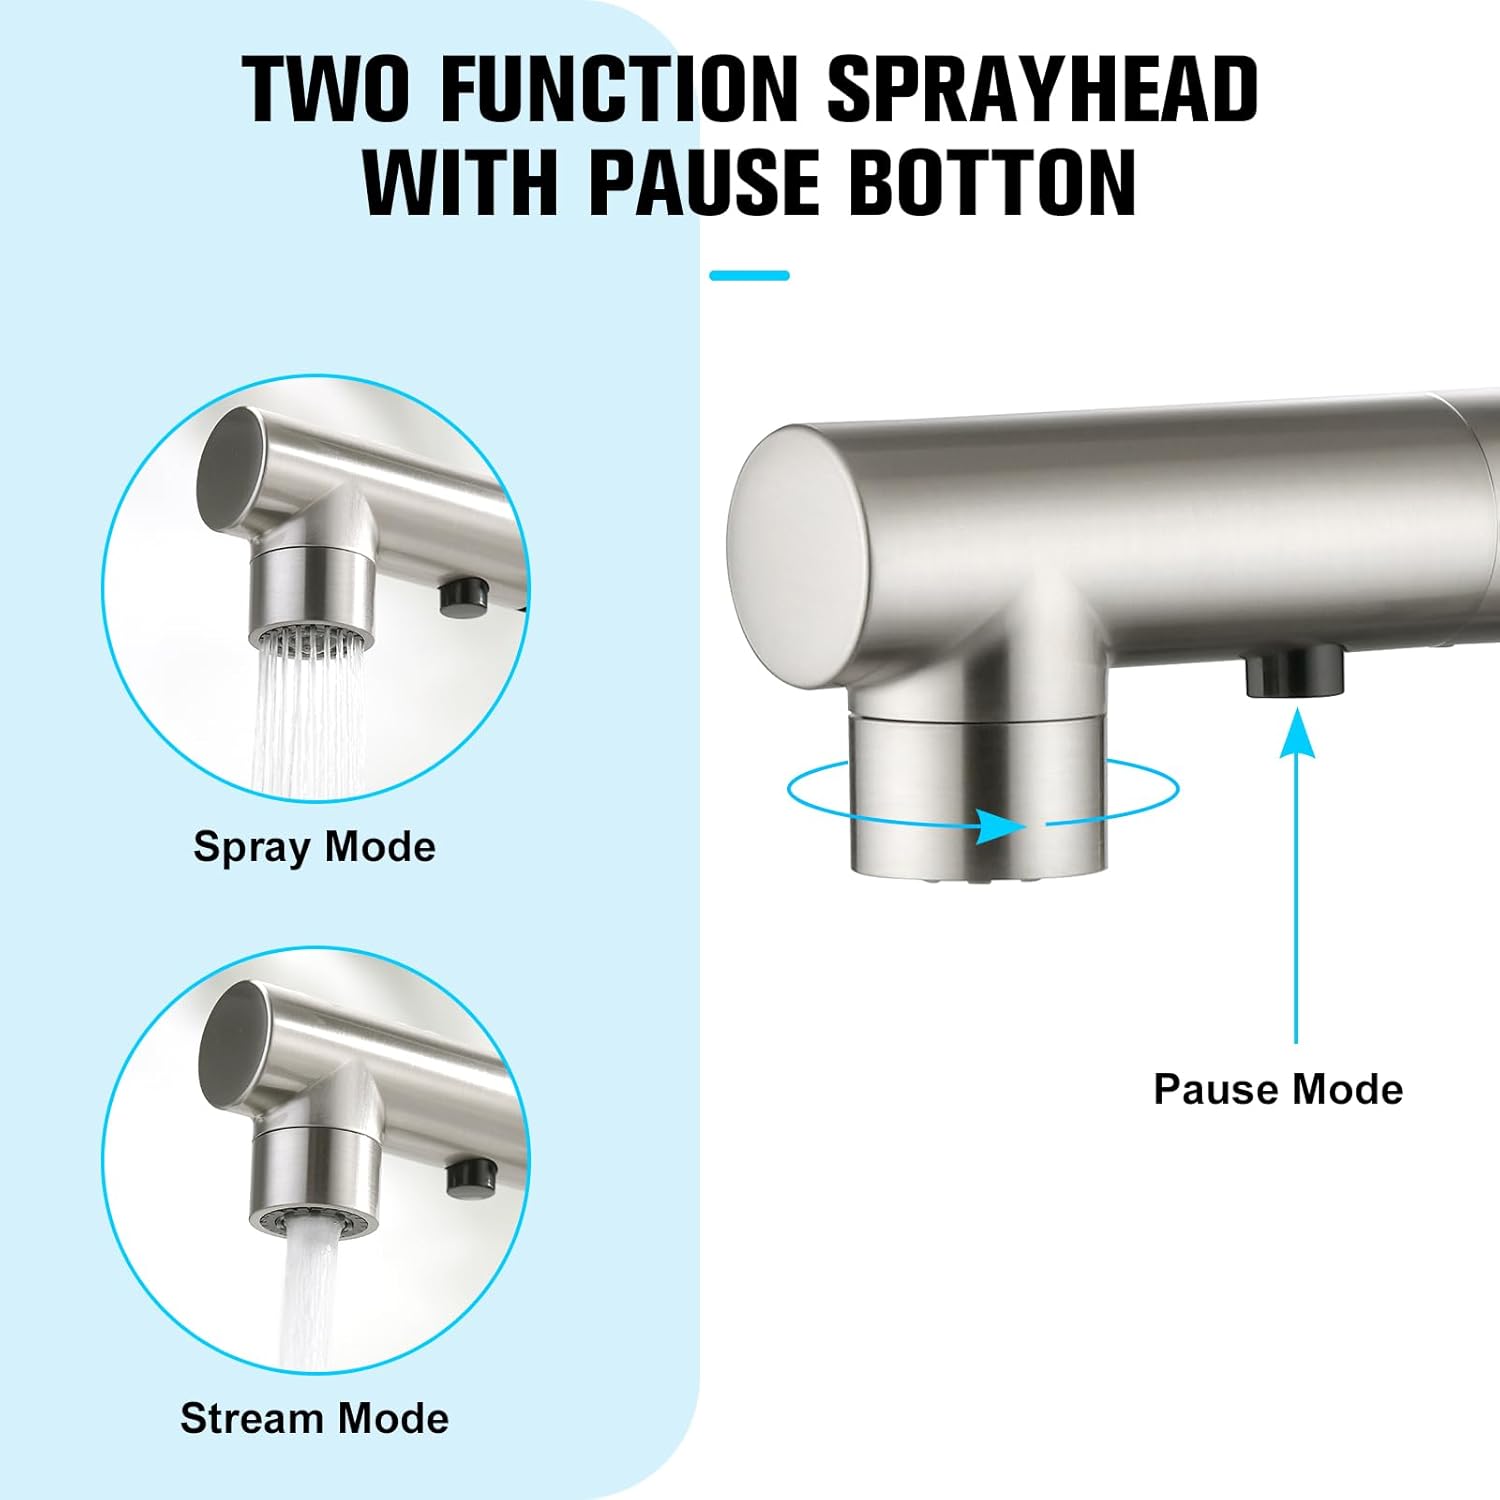
Figure 8: Sprayer modes and pause function.
The sprayer hose extends up to 24 inches (60 cm) for extended reach and flexibility, retracting automatically when released due to the hose weight.

Figure 9: Pull-out sprayer in use.
7. Maintenance
7.1 Cleaning the Faucet
- Clean the faucet regularly with a soft cloth and mild soap.
- Avoid abrasive cleaners, steel wool, or harsh chemicals, as these can damage the finish.
- Rinse thoroughly after cleaning and wipe dry to prevent water spots.
7.2 Cleaning the Aerator
If water flow is reduced or irregular, the aerator may need cleaning:
- Turn off the water supply to the faucet.
- Use the provided aerator removal tool (or a coin) to unscrew the aerator from the sprayer head.
- Rinse the aerator under running water to remove any debris or mineral deposits. You may use a soft brush if necessary.
- Reinstall the aerator by screwing it back into the sprayer head. Do not overtighten.
- Turn on the water supply and check for proper flow.
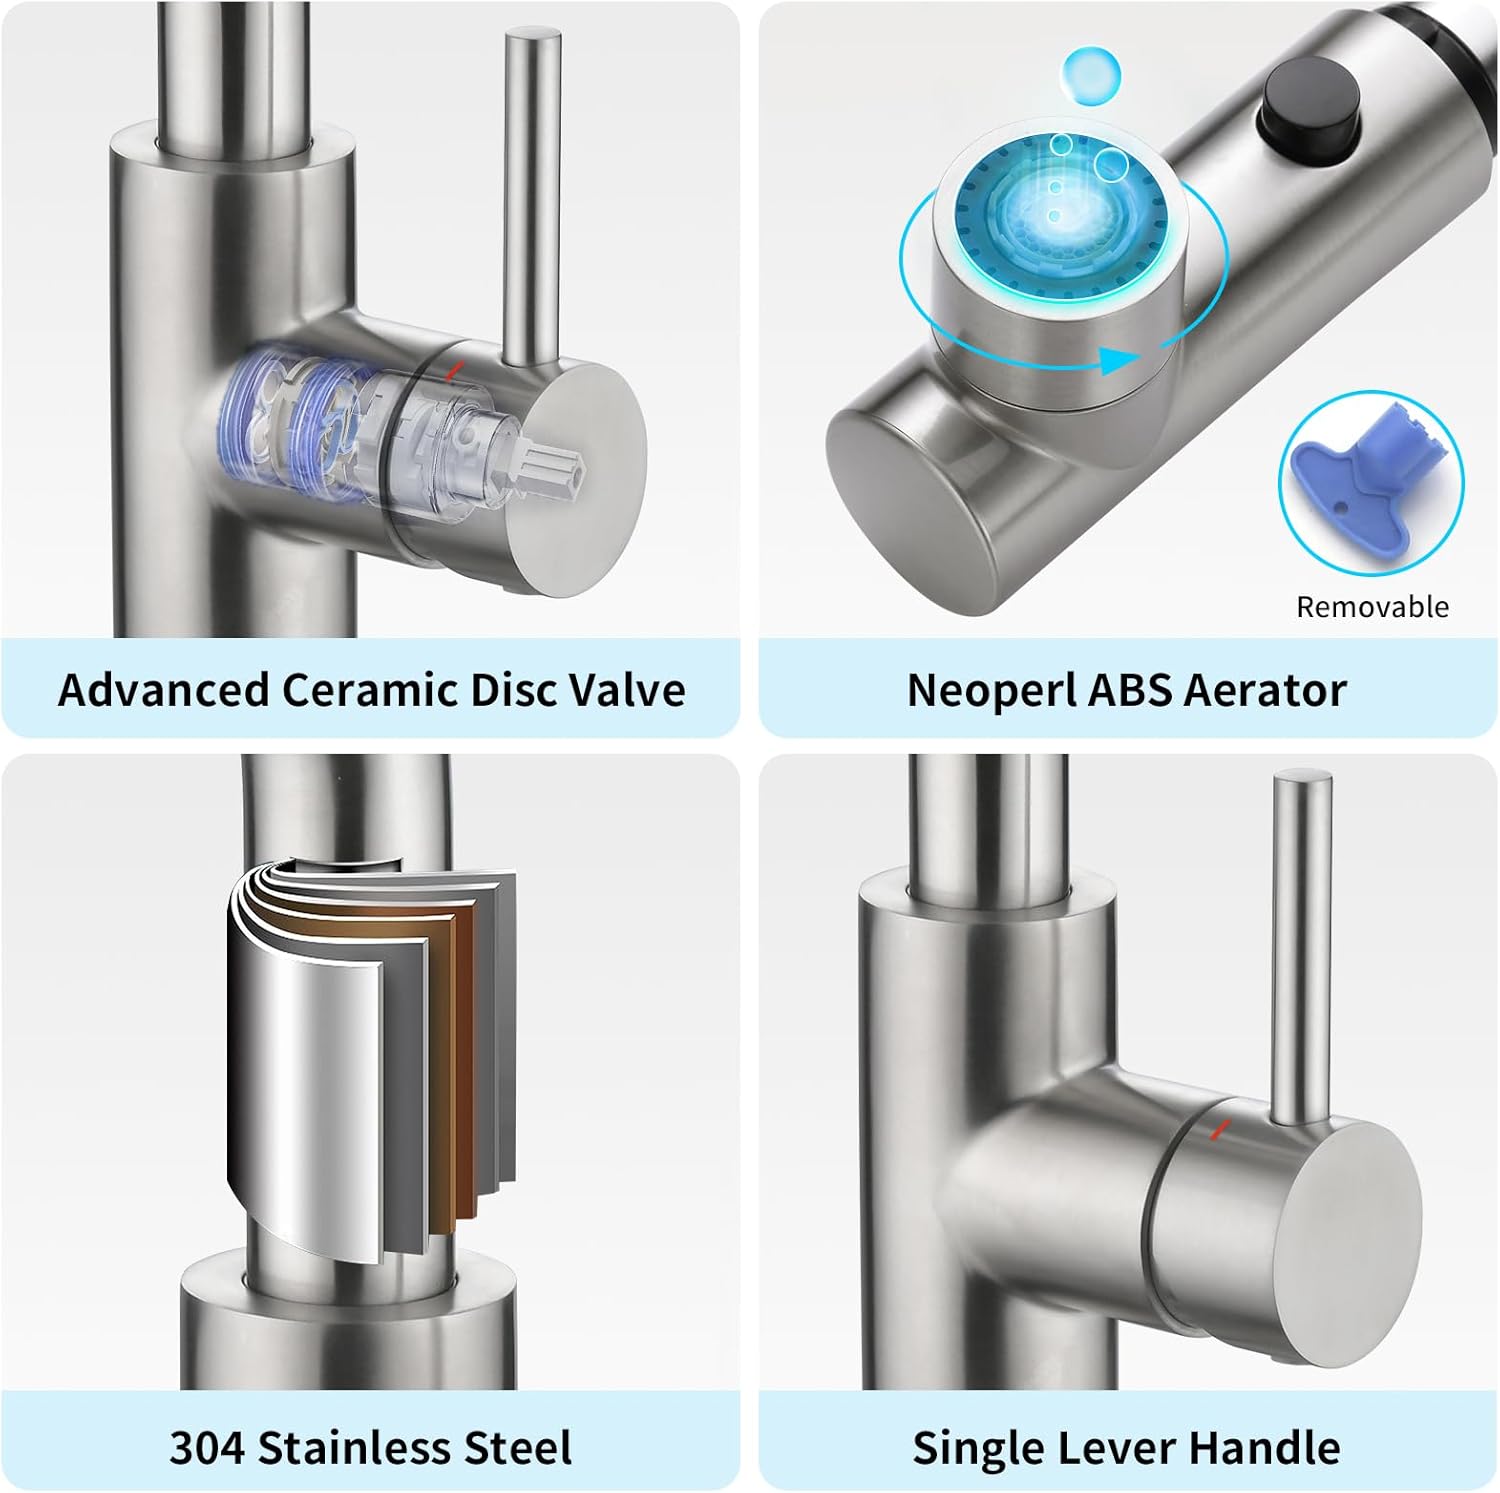
Figure 10: Removable Neoperl ABS Aerator for easy cleaning.
8. Troubleshooting
| Problem | Possible Cause | Solution |
|---|---|---|
| Low water flow | Clogged aerator; partially closed shut-off valve. | Clean the aerator (see Section 7.2); ensure shut-off valves are fully open. |
| Leaks from connections | Loose connections; damaged O-rings. | Tighten connections (do not overtighten); replace damaged O-rings if necessary. |
| Sprayer does not retract fully | Hose weight is misplaced or obstructed. | Adjust the position of the hose weight; ensure no obstructions under the sink. |
| Water temperature inconsistent | Water heater issues; cartridge malfunction. | Check water heater settings; contact support if problem persists. |
9. Warranty and Support
The CREA Kitchen Faucet Model 101418BN comes with a 5-Year Limited Warranty. If you are not satisfied with your sink faucet, you may return it at any time. For any questions or concerns regarding this faucet, please do not hesitate to contact us. All sink faucet accessories are included in the package.
For support, please refer to the contact information provided with your purchase or visit the official CREA website.
Ask a question about this manual
Ask about setup, troubleshooting, compatibility, parts, safety, or missing instructions. Manuals+ will review the question and use this page’s manual context to help answer it.