1. Introduction
This manual provides detailed instructions for the installation, operation, and maintenance of your OCPTY Starter. Please read this manual thoroughly before installation and use to ensure proper function and safety. This starter is designed as a direct replacement for specific Jeep models, offering reliable engine starting performance.
2. Product Overview and Features
The OCPTY Starter is engineered for durability and consistent performance. It features a 1.2kW/12 Volt motor with a CW (clockwise) rotation and a 10-tooth pinion. This unit is a 100% new replacement, designed to meet or exceed OEM specifications.
Key Features:
- High Performance: 1.2kW/12 Volt, CW, 10-Tooth Pinion, Mitsubishi PMGR type.
- Durability: Designed to withstand harsh conditions, providing balanced high-speed torque for maximum performance and dependability.
- Quality Construction: Armature/commutator remachined to tough concentricity standards, increasing brush life and maximizing starting power. Solenoids include 100% new high-temperature caps, copper windings, and terminal hardware.
- Efficiency: Less battery draw results in faster starts with maximum voltage.
- OEM Standard: Meets or exceeds OE manufacturers' torque, amperage draw, and RPM standards. Undergoes 100% full-load inspection.
- Easy Installation: OE quality, installs the same as the factory unit with identical dimensions and gauge material, requiring no modifications.

Image 1: OCPTY Starter showing key specifications and fitment details. This image highlights the 1.2kW/12 Volt, CW, 10-Tooth Pinion specification, OEM part numbers (17879N, 56041012AE, M0T91082), and compatibility for Jeep Cherokee TJ Wrangler.

Image 2: Illustration of the copper rotor within the OCPTY Starter. The copper rotor is designed to facilitate quick starts and efficiently drive the flywheel at high speeds.
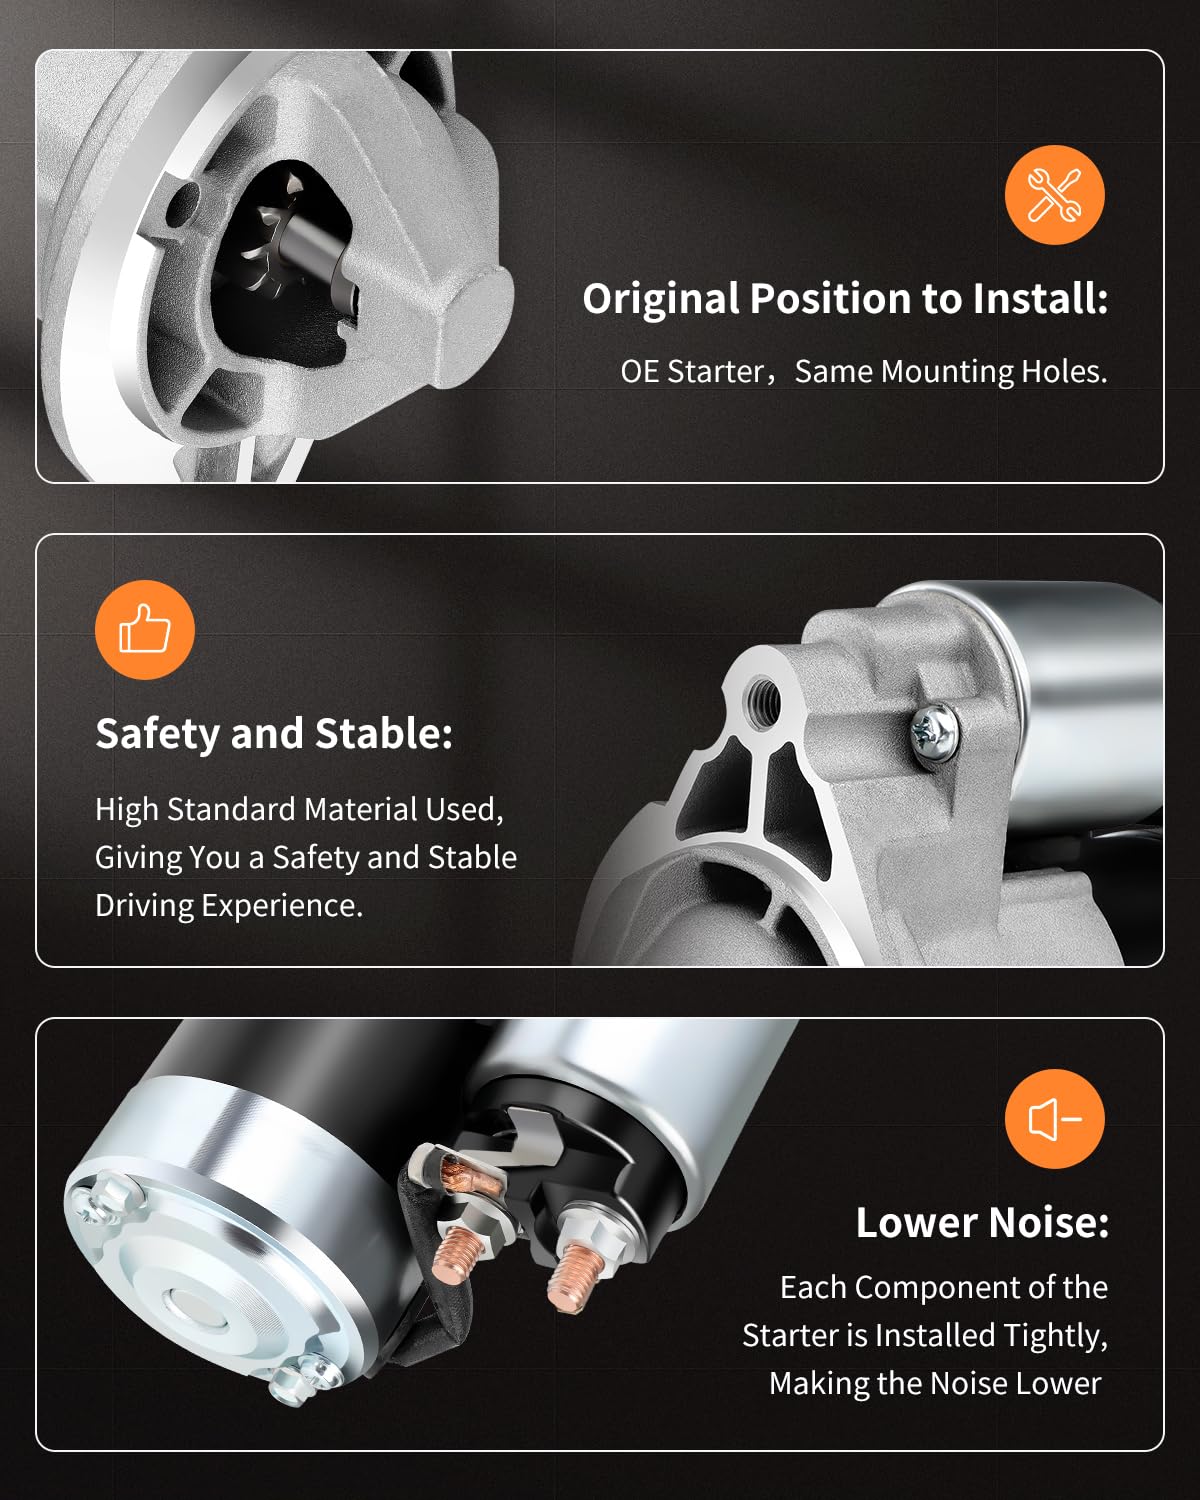
Image 3: Details on installation and quality. This image shows the starter's design for original position installation with OE starter mounting holes, highlights the use of high-standard materials for safety and stability, and emphasizes the lower noise operation due to tightly installed components.
3. Compatibility (Fitment)
This OCPTY Starter is compatible with the following vehicle models:
- 2003-2004 Grand Cherokee 4.0L (242) L6 ALL
- 2003-2006 TJ Series 4.0L (242) L6 M/T
- 2003-2006 Wrangler 4.0L (242) L6 M/T
Detailed Fitment:
- 2003 Jeep Grand Cherokee Laredo Sport Utility 4-Door 4.0L 242Cu. In. I6 GAS OHV Naturally Aspirated
- 2003 Jeep Grand Cherokee Limited Sport Utility 4-Door 4.0L 242Cu. In. I6 GAS OHV Naturally Aspirated
- 2003 Jeep TJ Rubicon Sport Utility 2-Door 4.0L 242Cu. In. I6 GAS OHV Naturally Aspirated
- 2003 Jeep TJ Sahara Sport Utility 2-Door 4.0L 242Cu. In. I6 GAS OHV Naturally Aspirated

Image 4: A visual representation of the OCPTY Starter's compatibility, listing specific Jeep Grand Cherokee and TJ models for which the starter is designed.
4. Specifications
| Specification | Value |
|---|---|
| Part Number | 110107-5209-1526443561 |
| Item Weight | 3.18 kg |
| Product Dimensions (L x W x H) | 27.99 x 18.01 x 14 cm |
| Horsepower | 1.2 Kilowatts |
| Item Package Quantity | 1 |
| Special Features | 1.2kW/12 Volt, CW, 10-Tooth Pinion |
| Batteries Included? | No |
| Batteries Required? | No |
| Material | Copper |
| Amperage | 1.6 Amps |
| Voltage | 12 Volts |
| Wattage | 1.2 KW |
5. Setup and Installation
Replacing your starter motor or solenoid can be a straightforward task if appropriate safety procedures are followed and the correct tools are used. The starter is typically located at the bottom of the engine on either the driver's or passenger's side.
Required Tools:
- Wrench set
- Socket set
- Jack and jack stands (if lifting the vehicle is necessary)
- Safety glasses and gloves
Installation Steps:
- Disconnect the Battery: Always disconnect the vehicle's battery before working on electrical components. Disconnect the negative terminal first, then the positive terminal.
- Locate the Starter: Identify the starter motor's position. Depending on your vehicle, you may need to lift the car for better access. Ensure your working surface is level and secure the vehicle on jack stands if lifted.
- Disconnect Wiring: Get under the vehicle and disconnect the lead wire from the starter solenoid. Note the position of all wires for correct re-installation.
- Remove Mounting Bolts: Unbolt the starter from its mounting bracket or engine block. There are typically two or three bolts.
- Remove Old Starter: Carefully remove the old starter motor from its position.
- Install New Starter: Position the new OCPTY Starter in place. Ensure it aligns correctly with the mounting holes.
- Secure Mounting Bolts: Bolt the new starter to the mounting bracket or engine block. Tighten bolts to manufacturer specifications.
- Reconnect Wiring: Reconnect the lead wire to the starter solenoid. Ensure all connections are secure.
- Reconnect Battery: Reconnect the positive battery terminal first, then the negative terminal.
- Test Functionality: Start the vehicle to confirm the new starter is functioning correctly.
If only the solenoid is faulty, it can often be removed from the motor and replaced independently. For re-installation, follow these steps in reverse order.

Image 5: Depiction of the starter's durability, indicating it is designed for regular starting cycles exceeding 35,000 operations, ensuring long-term reliability.
6. Operating Instructions
The starter motor is an electrical device used to rotate the engine to initiate its internal combustion process. When you turn the ignition key or press the start button, the starter motor engages the engine's flywheel, causing the crankshaft to turn and the engine to begin running.
Normal Operation:
- Ensure the vehicle is in Park (P) or Neutral (N) for automatic transmissions, or Neutral with the clutch depressed for manual transmissions.
- Turn the ignition key to the 'START' position or press the engine start button.
- The starter motor will engage, cranking the engine. Release the key/button once the engine starts.
- Avoid prolonged cranking (more than 10-15 seconds) to prevent overheating the starter motor. If the engine does not start, wait a minute or two before attempting again.
7. Maintenance
While the OCPTY Starter is designed for minimal maintenance, periodic checks can help ensure its longevity and reliable performance.
Maintenance Tips:
- Battery Health: Ensure your vehicle's battery is in good condition and fully charged. A weak battery can strain the starter motor.
- Cable Connections: Periodically inspect the battery cables and starter motor connections for corrosion or looseness. Clean and tighten as necessary.
- Avoid Excessive Cranking: Do not continuously crank the engine for extended periods. This can overheat the starter and reduce its lifespan.
- Engine Tune-up: A well-maintained engine starts more easily, reducing the workload on the starter. Ensure your engine is regularly serviced.

Image 6: Illustrates OCPTY's commitment to quality through cycling inspection and adherence to OEM standards, ensuring accurate gear engagement and a reliable starter.

Image 7: Shows the OCPTY manufacturing process, emphasizing the use of high-quality materials, strict production requirements, and the goal to produce excellent starters.
8. Troubleshooting
If you experience issues with your vehicle's starting system, consider the following common troubleshooting steps:
Common Issues and Solutions:
- Engine Does Not Crank or Cranks Slowly:
- Check Battery: Ensure the battery is fully charged and its terminals are clean and tight. A weak battery is a common cause of starting problems.
- Check Battery Cables: Inspect battery cables for corrosion, damage, or loose connections at both the battery and the starter motor.
- Check Starter Solenoid: Listen for a clicking sound when attempting to start. A single click might indicate a faulty solenoid or insufficient power reaching it.
- Check Fuses/Relays: Consult your vehicle's owner's manual for the location of starter-related fuses and relays and check if they are intact.
- Starter Engages but Engine Does Not Start:
- This often indicates an issue with the engine itself (e.g., fuel delivery, ignition system) rather than the starter. Consult a qualified mechanic.
- Grinding Noise During Start:
- This could indicate an issue with the starter's pinion gear or the engine's flywheel. Ensure the starter is properly mounted and aligned.
If these steps do not resolve the issue, it is recommended to consult a certified automotive technician for further diagnosis and repair.
9. Warranty and Support
For warranty information or technical support regarding your OCPTY Starter, please refer to the documentation included with your purchase or contact OCPTY customer service directly. Keep your purchase receipt as proof of purchase for any warranty claims.