1. Introduction
This manual provides comprehensive instructions for the setup, operation, maintenance, and troubleshooting of your Easytry123 Universal Remote Control. This remote is designed as a replacement for various Optoma DLP 3D Projector models, ensuring seamless control over your device.
Compatible Optoma Projector Models include: TW635-3D, DW326, S311, W311, W501, WX31, X302, X303, X31, X501, W556-3D, DS339, DX339, DW339, TX635-3D.
2. Product Overview
2.1 Remote Control Layout

Image: Front view of the remote control, displaying all buttons and their labels. Key buttons include Power, Source, Menu, Volume, Keystone, Zoom, and input selections like HDMI1, HDMI2, VGA1, VGA2, Video, 3D.
2.2 Button Functions
- Power: Turns the projector on or off.
- Source: Cycles through available input sources (e.g., HDMI, VGA, Video).
- Menu: Opens the projector's on-screen display (OSD) menu.
- Navigation (Up, Down, Left, Right, Enter): Used to navigate through menus and confirm selections.
- Volume (+/-): Adjusts the audio output level.
- Page (+/-): Used for presentation control or specific menu navigation.
- Keystone: Adjusts the image's vertical keystone correction.
- Zoom (+/-): Adjusts the digital zoom level of the projected image.
- Input Selectors (HDMI1, HDMI2, VGA1, VGA2, Video, 3D): Directly selects the corresponding input source or activates 3D mode.
- Freeze: Pauses the current image display.
- AV Mute: Temporarily mutes audio and blanks the screen.
- Re-Sync: Resynchronizes the input signal.
- Switch: Toggles between different display modes or functions.
- Brightness (+/-): Adjusts the image brightness.
3. Setup
3.1 Battery Installation
The remote control requires two AAA batteries (not included) for operation. Follow these steps to install the batteries:
- Locate the battery compartment on the back of the remote control.
- Press down on the latch and slide the battery compartment cover downwards to remove it.
- Insert two AAA batteries, ensuring the positive (+) and negative (-) terminals align correctly with the markings inside the compartment.
- Slide the battery compartment cover back into place until it clicks securely.

Image: Rear view of the remote control, highlighting the battery compartment cover at the bottom.
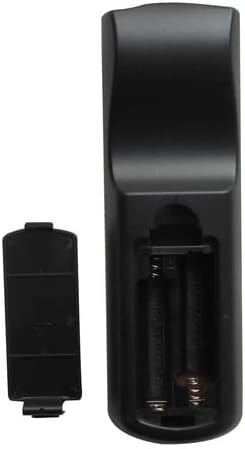
Image: The remote control's battery compartment with the cover removed, revealing two empty slots for AAA batteries and the positive/negative terminals.

Image: An angled view of the remote control with the battery cover detached, illustrating the correct orientation for inserting AAA batteries into the compartment.
4. Operating Instructions
Point the remote control directly at the projector's IR receiver for optimal performance.
4.1 Power On/Off
Press the Power button once to turn the projector on. Press it again to turn the projector off. Confirm any power-off prompts on the projector screen if applicable.
4.2 Selecting Input Source
Press the Source button repeatedly to cycle through available input sources (e.g., HDMI1, HDMI2, VGA1, VGA2, Video). Alternatively, use the dedicated input buttons (e.g., HDMI1, VGA1) for direct selection.
4.3 Adjusting Volume
Use the Volume + button to increase the audio volume and the Volume - button to decrease it.
4.4 Navigating Menus
Press the Menu button to open the projector's on-screen display (OSD). Use the Up, Down, Left, Right arrow buttons to navigate through menu options. Press Enter to confirm a selection or access a sub-menu. Press Menu again to exit the OSD.
4.5 Keystone Correction
Use the Keystone buttons to correct trapezoidal distortion in the projected image, ensuring a rectangular display.
4.6 Zoom Function
Press the Zoom + button to digitally enlarge the image or Zoom - to reduce it.
4.7 3D Mode Activation
If your projector and content support 3D, press the 3D button to activate or deactivate 3D display mode.
5. Maintenance
5.1 Cleaning the Remote
To clean the remote control, gently wipe its surface with a soft, dry cloth. For stubborn dirt, slightly dampen the cloth with water. Avoid using harsh chemicals or abrasive cleaners, as these can damage the remote's finish or internal components.
5.2 Battery Replacement
Replace batteries when the remote's response becomes sluggish or stops functioning. Always replace both batteries simultaneously with new AAA batteries. Do not mix old and new batteries, or different types of batteries. Dispose of used batteries responsibly according to local regulations.
6. Troubleshooting
- Remote not responding:
- Ensure fresh AAA batteries are correctly installed.
- Check for any obstructions between the remote and the projector's IR receiver.
- Verify that you are within the effective range of the projector's IR receiver.
- Limited functionality:
- While this remote is compatible with listed Optoma models, some advanced or specific functions of your original projector remote may not be replicated. Refer to your projector's original manual for specific features.
- Ensure the projector is powered on and not in a standby mode that restricts remote commands.
7. Specifications
- Power Source: 2 x AAA Batteries (not included)
- Connectivity Technology: Infrared (IR)
- Compatible Devices: Optoma DLP 3D Projectors (specific models listed in Introduction)
- Max Number of Supported Devices: 1 (dedicated to the paired projector)
8. Warranty and Support
For any issues not covered in this manual or for further assistance, please contact the manufacturer, Easytry123, through your purchase platform. Keep your purchase receipt as proof of purchase for any warranty claims.


