1. Introduction
This manual provides detailed instructions for the installation, programming, operation, and maintenance of your Sears Garage Door Opener Visor Remote Control. Please read this manual thoroughly before use to ensure proper function and safety. This remote control is designed to operate specific Sears garage door openers, identified by part numbers 41A3066, 41A3625, and 41D2737.
2. Safety Information
Always prioritize safety when operating or maintaining your garage door opener system. Failure to follow these instructions could result in serious injury or property damage.
- Keep remote controls out of reach of children.
- Do not allow children to operate the garage door opener.
- Ensure the garage door is visible and clear of obstructions before operating.
- Never walk or run under a moving garage door.
- Test the safety reverse system of your garage door opener monthly.
3. Package Contents
Verify that all items are present in your package:
- Sears Garage Door Opener Visor Remote Control
- Visor Clip
- Instruction Manual (this document)
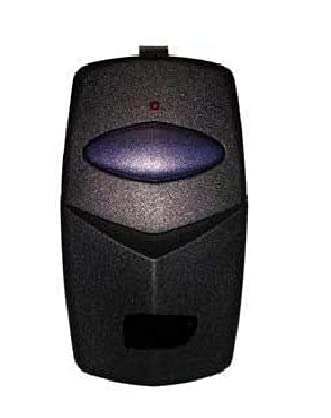
Image showing the Sears Garage Door Opener Visor Remote Control, a compact device designed for easy attachment to a vehicle's sun visor.
4. Setup and Programming
4.1 Battery Installation
The remote control typically uses a 12V A23 battery. If batteries are not pre-installed or need replacement:
- Locate the battery compartment cover on the back of the remote.
- Slide the cover off or remove any small screws holding it in place.
- Insert the new battery, ensuring the positive (+) and negative (-) terminals align correctly with the markings inside the compartment.
- Replace the battery compartment cover.
4.2 Programming Instructions
Programming methods vary depending on your garage door opener model. Refer to your garage door opener's manual for specific instructions. Common methods include:
- Dip Switch Matching: If your existing remote or opener has a series of small switches (dip switches), open the remote's casing and match the switch positions (ON/OFF or +/0/-) to those on your opener or existing remote.
- Learn Button: Most modern openers have a 'Learn' button on the motor unit.
- Press and release the 'Learn' button on your garage door opener motor unit. The indicator light will illuminate.
- Within 30 seconds, press and hold the button on your new remote control that you wish to program.
- Release the remote button when the opener's light flashes or clicks, indicating successful programming.
- Test the remote by pressing the programmed button.
Illustration of a typical garage door remote, showing the location of the battery compartment and potential internal dip switches (if applicable to your model).
5. Operating the Remote
Once programmed, operating your remote control is straightforward:
- Point the remote control towards the garage door.
- Press and release the programmed button.
- The garage door will begin to open or close. Pressing the button again while the door is in motion will stop it.
6. Maintenance
To ensure the longevity and reliable performance of your remote control:
- Battery Replacement: Replace the battery when the remote's range decreases significantly or the indicator light (if present) dims. Refer to Section 4.1 for battery installation.
- Cleaning: Clean the remote with a soft, dry cloth. Avoid using harsh chemicals or abrasive cleaners.
- Storage: Store the remote in a dry place, away from extreme temperatures and direct sunlight.
7. Troubleshooting
If you encounter issues with your remote control, try the following solutions:
- Remote not working:
- Check and replace the battery.
- Reprogram the remote control (refer to Section 4.2).
- Ensure you are within range of the garage door opener.
- Reduced range:
- Replace the battery.
- Check for sources of interference (e.g., other electronic devices).
- Door opens/closes unexpectedly:
- Reprogram the remote and clear all other remote codes from the opener's memory, then reprogram only your desired remotes.
- Ensure no other remotes are accidentally being pressed.
If problems persist, consult your garage door opener's main manual or contact a qualified service technician.
8. Specifications
| Manufacturer | 5666 |
| Item Weight | 1.44 pounds |
| Package Dimensions | 5.35 x 3.74 x 1.1 inches |
| ASIN | B07MBTCZJM |
| Date First Available | January 4, 2019 |
| Batteries Included | No |
| Batteries Required | No |
9. Warranty and Support
This product is typically covered by a limited warranty against defects in materials and workmanship. For specific warranty details, including duration and terms, please refer to the documentation provided with your original garage door opener or contact the manufacturer directly. For technical support or further assistance, please refer to the contact information provided by your product retailer or the original manufacturer of your garage door opener system.