1. Introduction
Welcome to the user manual for your ASHATA G1/4 90-Degree Rotary Elbow Water Cooling Adapter. This adapter is designed to provide a reliable and flexible connection within your computer's liquid cooling loop, specifically for 10x14mm hard tubes. Please read this manual carefully before installation and use to ensure proper function and longevity of your water cooling system.
2. Product Overview
Key Features
- Thread: Standard G1/4 2-inch thread for broad compatibility.
- Material: Constructed from durable copper-nickel plated material for long-term use and corrosion resistance.
- Workmanship: Fine craftsmanship ensures a perfect fit and secure connection.
- Compatibility: Specifically designed for standard 10x14mm PETG acrylic hard tubes.
- Functionality: A 90-degree rotary elbow design allows for flexible tube routing and precise alignment within your water cooling system.
Components
The ASHATA G1/4 90-Degree Rotary Elbow Water Cooling Adapter consists of a G1/4 threaded male end, a 90-degree elbow body, and a compression fitting designed for 10x14mm hard tubes. It features an internal O-ring for sealing and a rotary mechanism for directional adjustment.
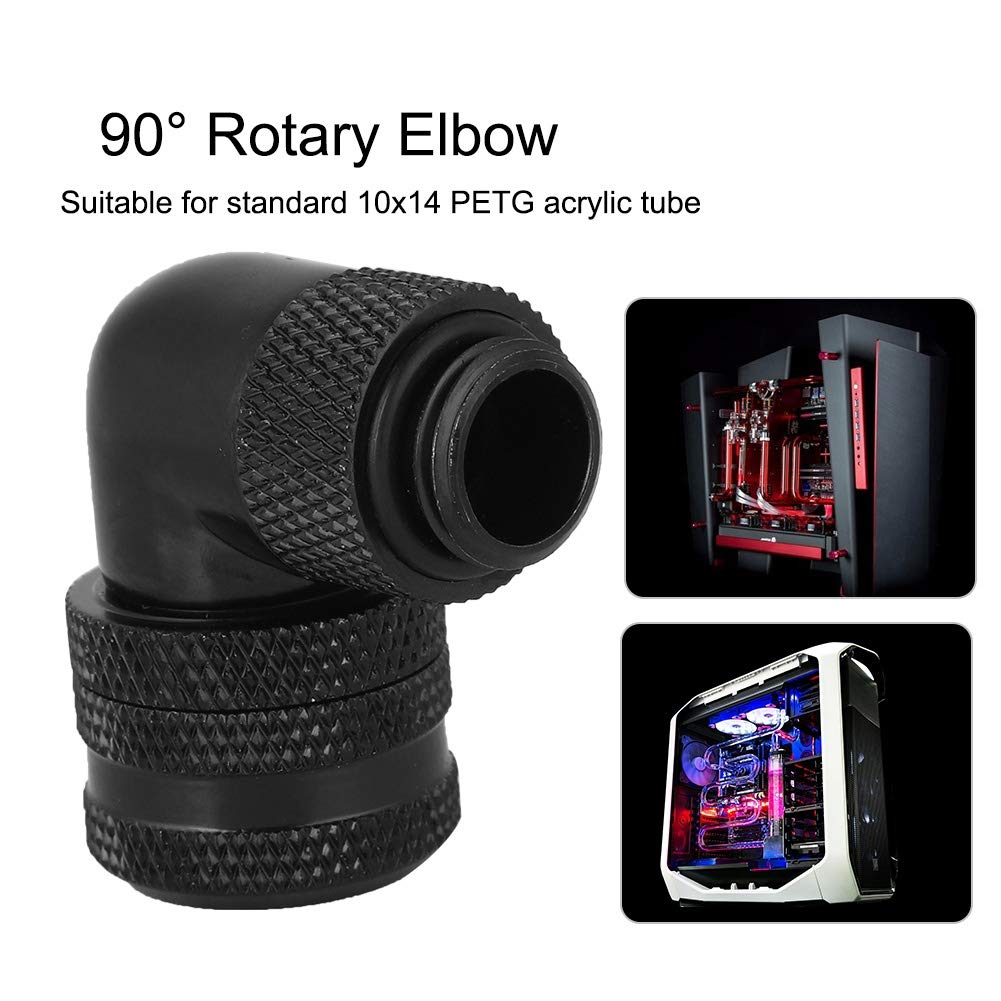
Image 1: The ASHATA G1/4 90-Degree Rotary Elbow Water Cooling Adapter, highlighting its compatibility with 10x14mm PETG acrylic tubes.

Image 2: Close-up view emphasizing the high-quality copper-nickel plated material used in the adapter's construction.
3. Specifications
| Type | 90° Rotary Elbow for 10x14 Hard Tubes |
| Material | Copper-Nickel Plated |
| Thread | G1/4 2-inch |
| Compatible Tube | Standard 10x14mm PETG Acrylic Tube |
| Dimensions (Approx.) | 3.7 cm (Height) x 3.1 cm (Width) x 2.1 cm (Depth) |
| Weight (Approx.) | 63 grams |
| Manufacturer | ASHATA |
| ASIN | B07MB22VV9 |
| GTIN/UPC | 736077966979 |
4. Installation Guide
Before You Begin
- Ensure your water cooling system is completely drained and powered off.
- Gather necessary tools, which may include appropriate wrenches (if needed for final tightening) and your 10x14mm PETG hard tubing.
- Inspect the fitting for any manufacturing defects, damage, or debris before installation.
Step-by-Step Installation
- Prepare the Hard Tube: Cut your 10x14mm PETG hard tube to the desired length. Ensure the ends are clean, smooth, and free of any burrs or sharp edges.
- Disassemble the Fitting: Unscrew the compression ring from the main body of the 90-degree rotary elbow fitting.
- Slide Compression Ring: Slide the compression ring onto the prepared hard tube. Ensure the internal O-ring is correctly seated within the compression ring.
- Insert Tube into Fitting: Carefully insert the hard tube into the main body of the 90-degree elbow until it reaches the internal O-ring and is fully seated.
- Secure the Compression Ring: Screw the compression ring back onto the main body of the fitting. Hand-tighten until snug. Do not overtighten, as this can damage the O-ring or the fitting itself.
- Connect to System: Screw the G1/4 threaded end of the assembled fitting into the desired port on your radiator, pump, reservoir, or water block. Hand-tighten, then use a wrench if necessary for a final snug fit, but avoid excessive force.
- Verify Rotation: The 90-degree elbow allows for rotation. Ensure it can rotate freely to achieve the desired tube alignment without leaking.

Image 3: The fitting designed for easy installation and a perfect match with hard tubes.

Image 4: A detailed view of the ASHATA G1/4 90-degree rotary elbow fitting, showing its construction.
5. Operation
Once installed, the ASHATA G1/4 90-Degree Rotary Elbow Water Cooling Adapter operates passively as an integral part of your liquid cooling loop. Its primary function is to provide a secure, leak-free, and flexible 90-degree turn for your 10x14mm hard tubing. The rotary feature allows for precise alignment of your tubing runs, optimizing flow and aesthetics.
Leak Testing
Before powering on your computer, it is crucial to perform a thorough leak test. Fill your cooling loop with distilled water or a dedicated coolant and run the pump for an extended period (e.g., 12-24 hours) without powering on other computer components. Carefully inspect all fittings, including this 90-degree elbow, for any signs of leaks. Address any leaks immediately by re-tightening or re-seating the tube/fitting as necessary.
6. Maintenance
- Regular Inspection: Periodically inspect all fittings and tubing for signs of wear, corrosion, or potential leaks.
- Cleaning: If disassembling for cleaning, use only distilled water or a mild, non-abrasive cleaning solution specifically designed for water cooling components. Avoid harsh chemicals that could damage the nickel plating or O-rings.
- O-Ring Care: Ensure O-rings are clean, properly lubricated (if recommended by O-ring manufacturer), and correctly seated during reassembly. Replace O-rings if they appear cracked, flattened, or otherwise damaged.
- Coolant Replacement: Follow the recommendations of your coolant manufacturer for regular coolant replacement to prevent buildup, maintain system efficiency, and prolong component life.
7. Troubleshooting
Leaks
- Cause: Improperly seated tube, loose compression ring, damaged O-ring, or insufficient tightening of the G1/4 thread.
- Solution:
- Ensure the hard tube is fully inserted into the fitting until it bottoms out.
- Hand-tighten the compression ring until snug. Avoid overtightening.
- Check the O-rings for any signs of damage and replace if necessary.
- Ensure the G1/4 threaded end is securely tightened into the component port.
Difficulty Inserting Tube
- Cause: Burrs on the tube end, incorrect tube size, or misaligned O-ring.
- Solution:
- Ensure tube ends are perfectly smooth and deburred using a reaming tool.
- Verify you are using the correct 10x14mm PETG hard tubing.
- Check that the internal O-ring within the fitting is correctly seated and not pinched.
8. Warranty and Support
This ASHATA product is covered by the standard manufacturer's warranty. For specific warranty details, including duration and terms, please refer to the ASHATA official website or contact your retailer directly. For technical support, installation assistance, or any other inquiries, please contact ASHATA customer service through their official channels.
