1. Important Safety Instructions
When using an electrical appliance, basic safety precautions should always be followed, including the following:
- Read all instructions before using this sewing machine.
- Keep these instructions in a convenient place near the machine.
- Always unplug the machine from the electrical outlet immediately after using and before cleaning, making any adjustments, or removing covers.
- Do not allow to be used as a toy. Close attention is necessary when this appliance is used by or near children.
- Use this appliance only for its intended use as described in this manual. Use only attachments recommended by the manufacturer.
- Never operate this appliance if it has a damaged cord or plug, if it is not working properly, if it has been dropped or damaged, or dropped into water.
- Never operate the appliance with any air openings blocked. Keep air openings free of lint, dust, and loose cloth.
- Never drop or insert any object into any opening.
- Do not use outdoors.
- Do not operate where aerosol (spray) products are being used or where oxygen is being administered.
- To disconnect, turn all controls to the off position, then remove plug from outlet.
- Do not unplug by pulling on cord. To unplug, grasp the plug, not the cord.
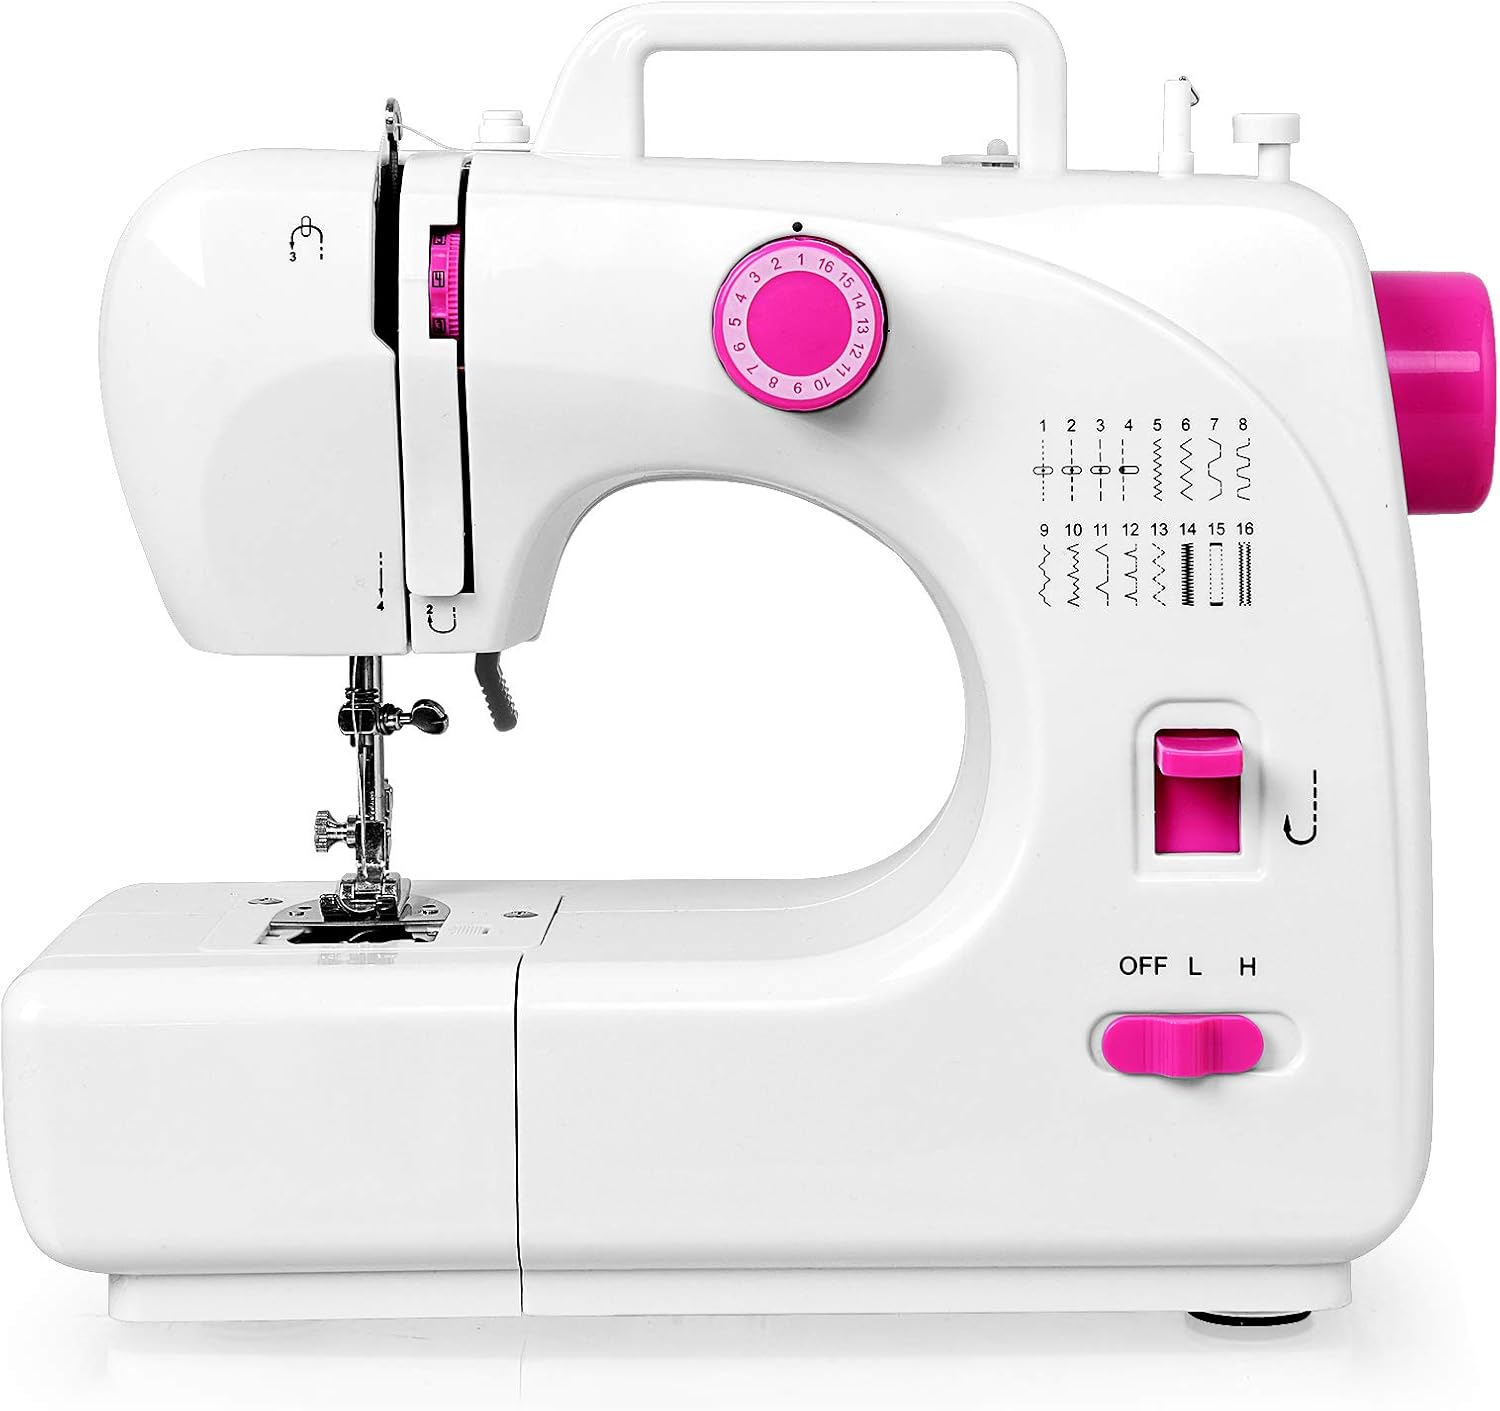
2. Product Overview
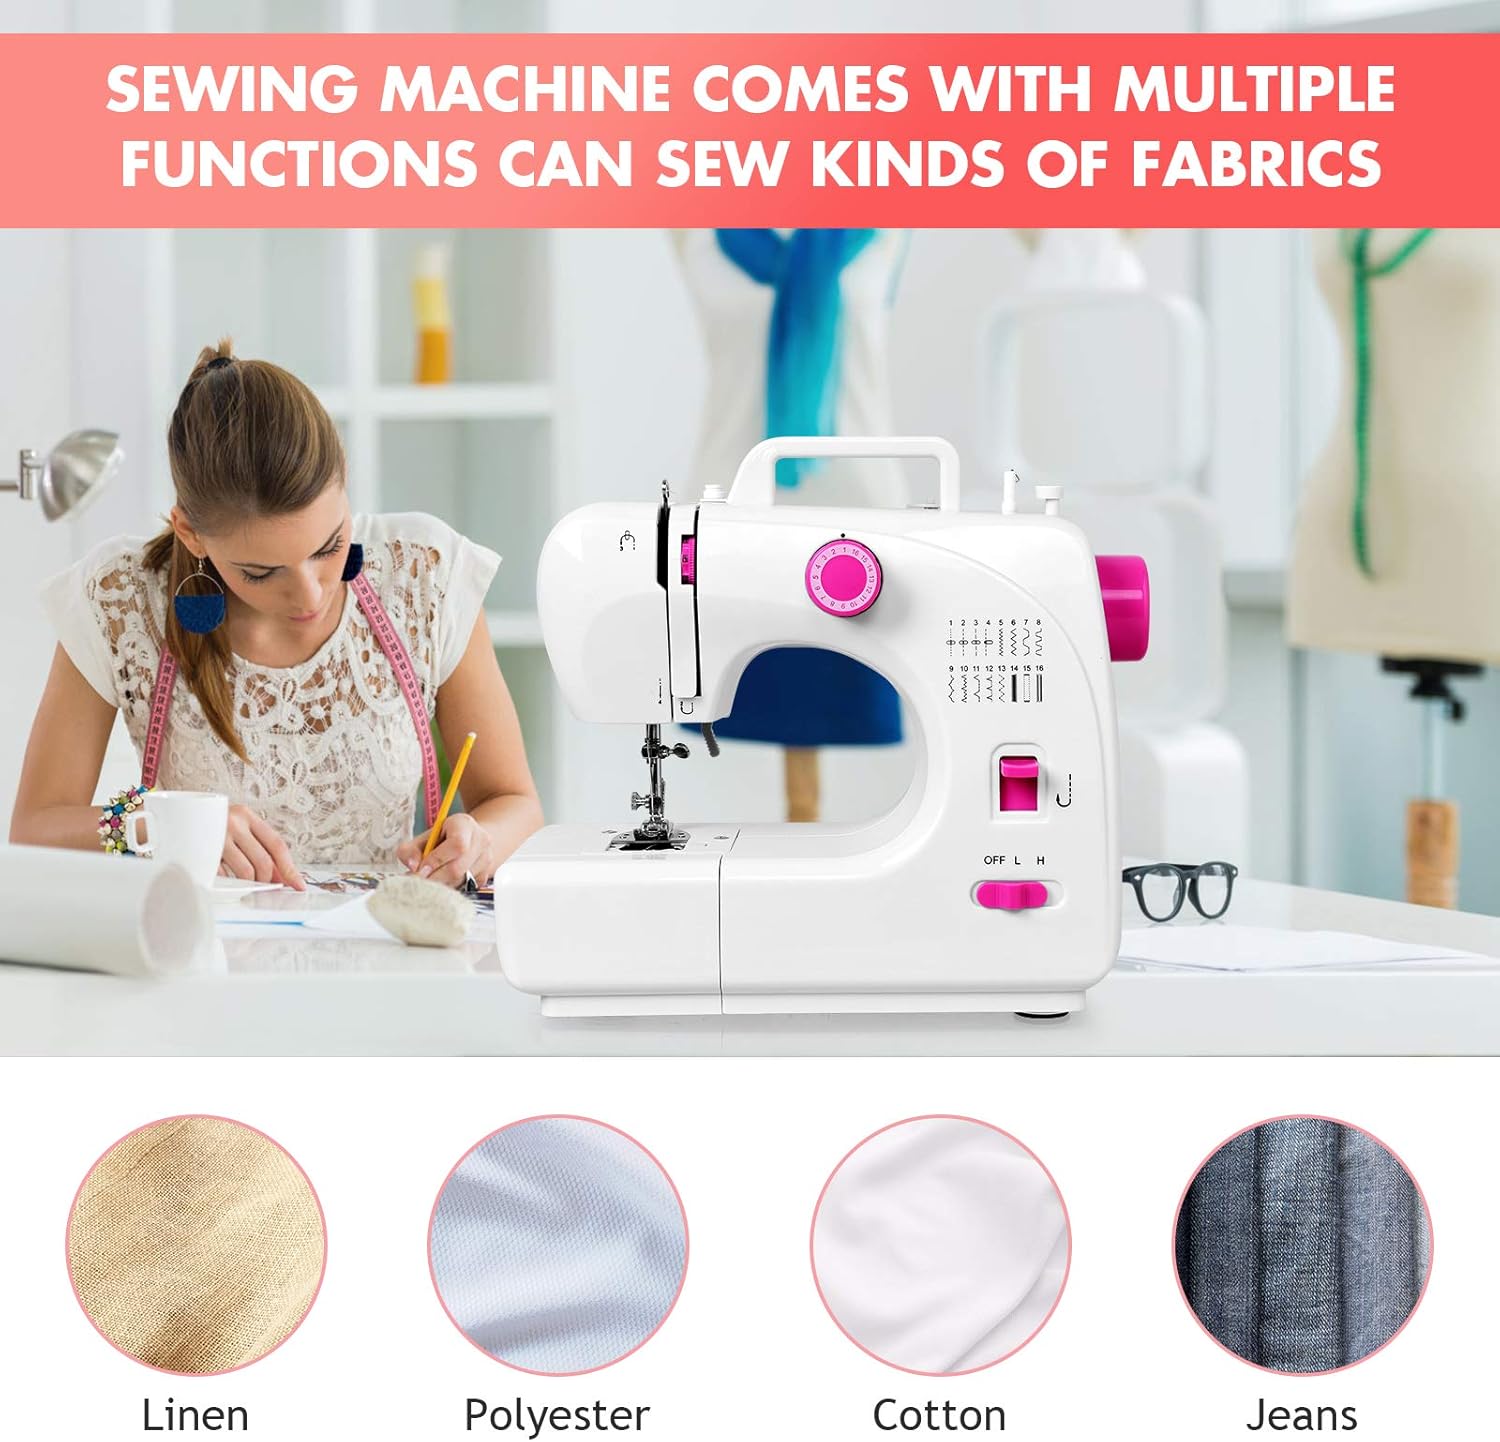
The Costway Portable Multifunctional Sewing Machine (Model 23469-CYPE-CS) is designed for various sewing tasks, offering convenience and versatility. It features a compact design, making it suitable for small spaces and easy transport.
Key Features:
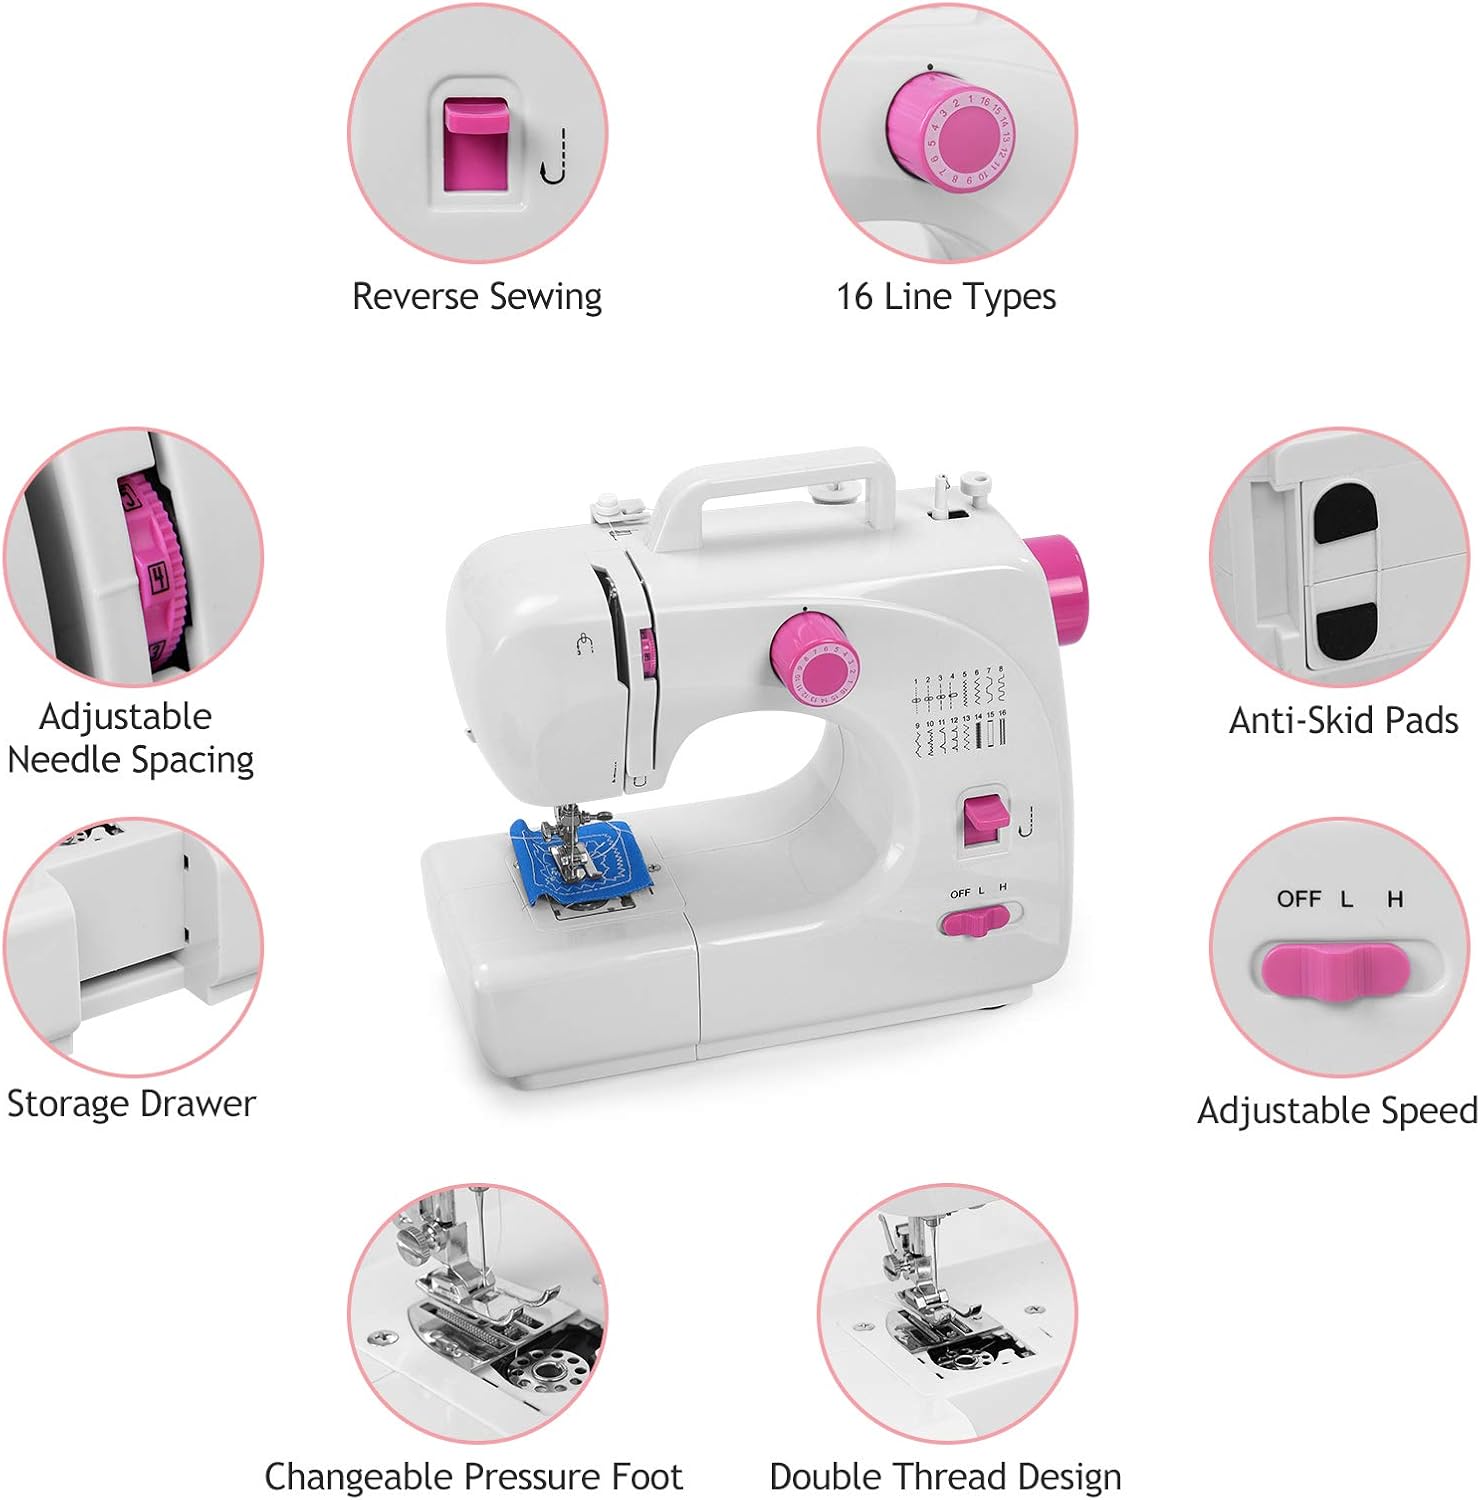
- 16 Built-In Stitch Patterns: Offers a variety of stitch options for different fabric types and sewing projects.
- Automatic Thread Rewind: Simplifies bobbin preparation.
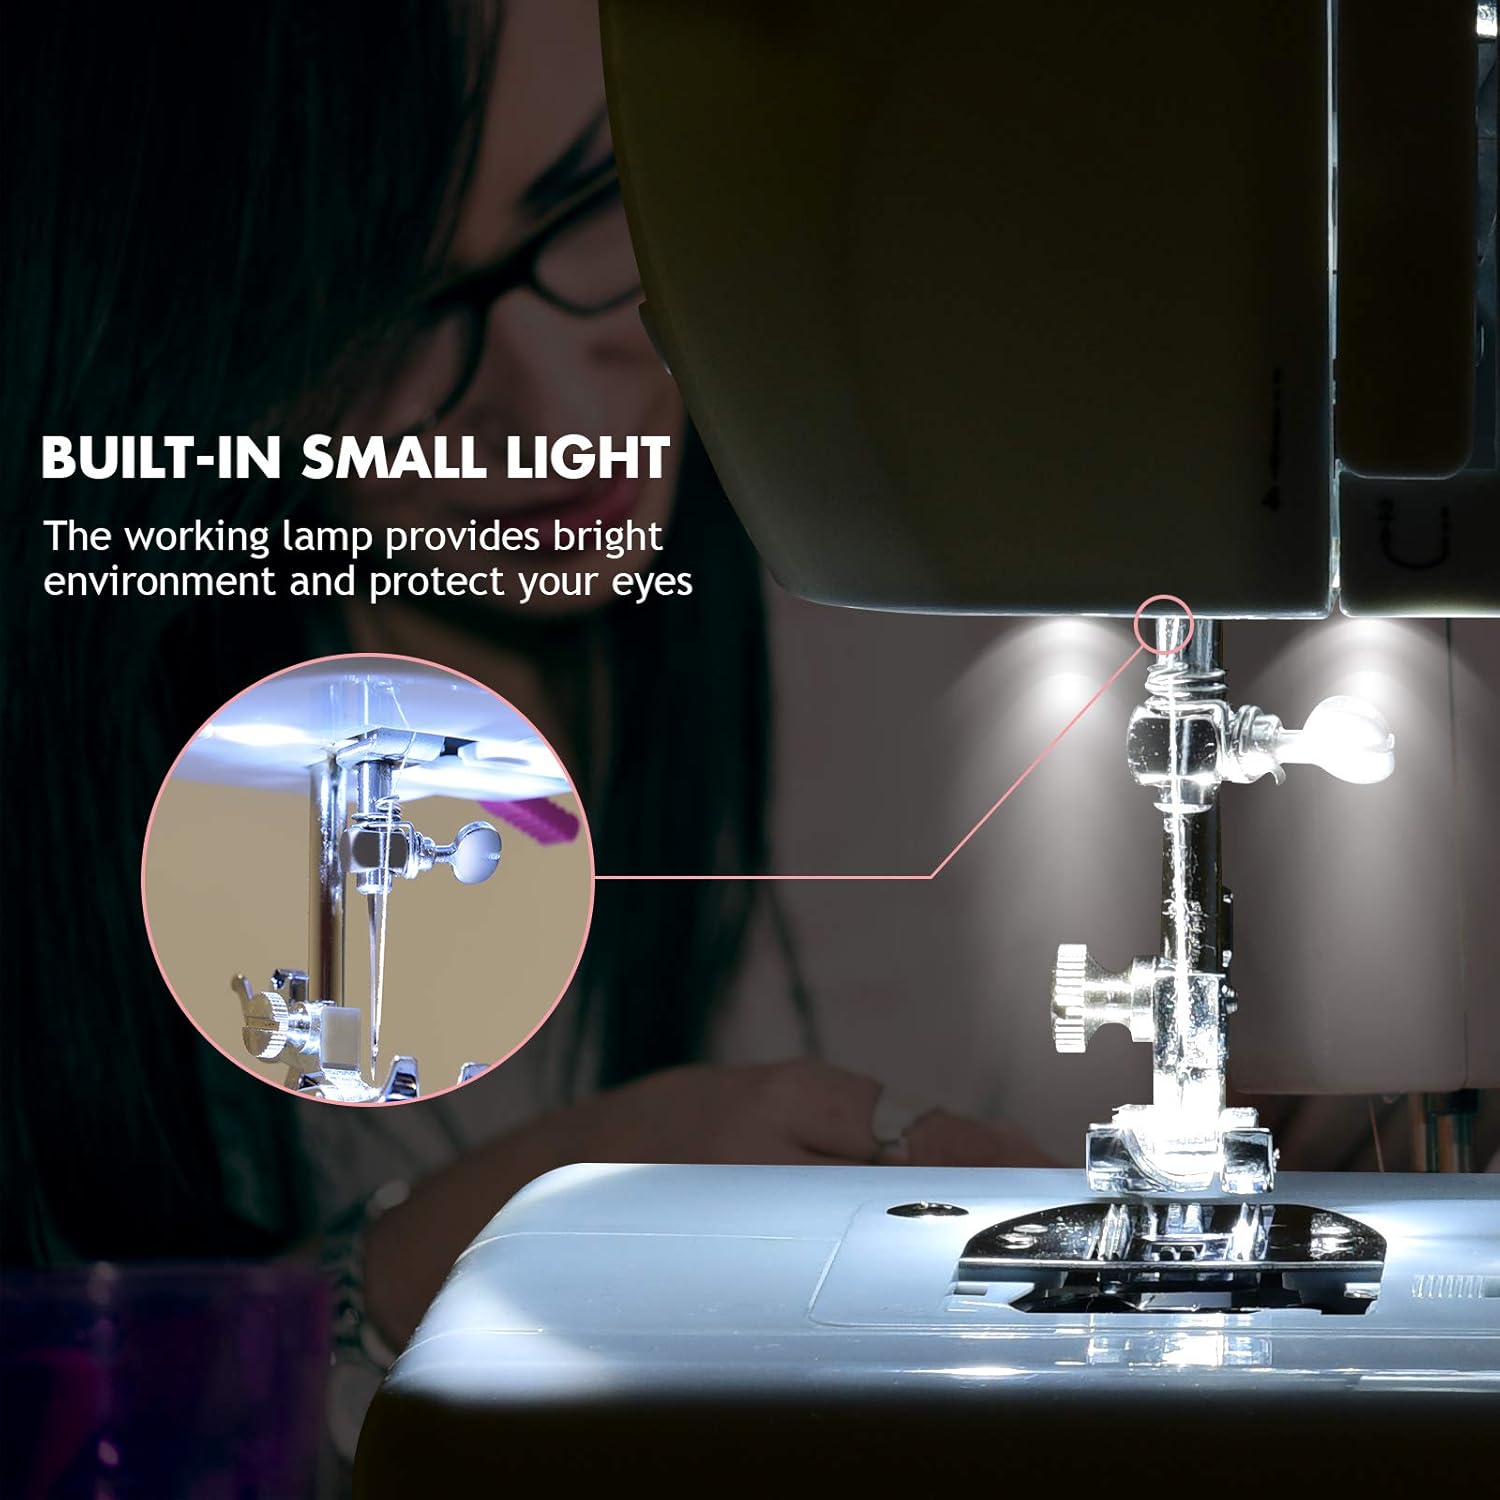
- Built-in Lighting: Provides illumination for the sewing area, enhancing visibility.
- Foot Pedal Control: Allows for hands-free speed control.
- Reverse Sewing Function: For reinforcing stitches at the beginning and end of seams.
- Adjustable Stitch Density: Control over stitch length and width.
- One-Step Button Sewing: Facilitates easy buttonhole creation.
- Two Speed Settings: Low and high speed options for different sewing needs.
- Dual Control Switches: Operate via foot pedal or machine button.
- Lightweight and Portable Design: Easy to move and store.
- Anti-Skid Pads: Ensures stability during operation.
- Built-in Storage Drawer: Conveniently stores small accessories.
Included Accessories:
The sewing machine comes with a comprehensive set of accessories to get you started:
- 64 windings (various colored threads)
- 1 Foot Pedal
- 2 Thread Spools
- 2 Bobbins
- Power Adapter
- Scissors
- Seam Ripper
- Other small sewing tools

3. Setup and Initial Use
3.1 Unpacking and Placement
- Carefully remove the sewing machine and all accessories from the packaging.
- Place the machine on a stable, flat surface. Ensure there is adequate space for sewing and fabric handling.
- Connect the power adapter to the machine's DC 6V input and then to a suitable electrical outlet.
- If using the foot pedal, plug it into the designated port on the machine.
3.2 Bobbin Winding
- Place a spool of thread on the spool pin.
- Guide the thread through the upper thread guide.
- Place an empty bobbin onto the bobbin winder spindle.
- Wrap the thread around the bobbin a few times clockwise.
- Push the bobbin winder spindle to the right.
- Turn on the machine (or press the foot pedal) to start winding. The machine will automatically stop when the bobbin is full.
- Cut the thread and push the bobbin winder spindle back to the left. Remove the wound bobbin.

3.3 Inserting the Bobbin
- Open the bobbin cover plate located on the sewing bed.
- Insert the wound bobbin into the bobbin case, ensuring the thread unwinds in the correct direction (usually counter-clockwise).
- Guide the bobbin thread through the tension spring and out through the small opening.
- Close the bobbin cover plate.
3.4 Upper Threading
- Raise the needle to its highest position using the handwheel.
- Place a spool of thread on the spool pin.
- Guide the thread through the first upper thread guide.
- Follow the threading path indicated by the arrows on the machine, ensuring the thread passes through the tension discs and the take-up lever.
- Thread the needle from front to back.
- Pull the upper thread under the presser foot and towards the back of the machine.
3.5 Bringing Up the Bobbin Thread
- Hold the upper thread lightly with your left hand.
- Turn the handwheel towards you (counter-clockwise) to lower the needle, then raise it again.
- The needle thread will catch the bobbin thread, forming a loop.
- Pull the loop up through the needle plate opening with the upper thread.
- Pull both threads (upper and bobbin) under the presser foot and towards the back of the machine, about 6 inches long.
4. Operating Instructions
4.1 Selecting a Stitch Pattern
The machine offers 16 built-in stitch patterns. To select a stitch, rotate the stitch selection dial on the front of the machine until the desired stitch number aligns with the indicator mark.
4.2 Adjusting Stitch Density
The stitch density (length/width) can be adjusted using the dedicated dial or lever, if available, to suit your fabric and project requirements. Refer to the machine's markings for specific adjustments.
4.3 Starting to Sew
- Place the fabric under the presser foot.
- Lower the presser foot lever.
- Select your desired speed using the L/H switch (Low/High).
- Start sewing by pressing the ON/OFF button or by pressing the foot pedal.
- Guide the fabric gently as it feeds through the machine. Do not pull or push the fabric forcefully.
4.4 Reverse Sewing
To reinforce a seam, press and hold the reverse sewing button/lever. The machine will sew backward. Release the button/lever to resume forward sewing.
4.5 Built-in Light
The built-in light illuminates the sewing area. It can be turned on or off independently of the machine's operation, providing better visibility for intricate work.
4.6 Finishing a Seam
- Sew a few reverse stitches to secure the seam.
- Raise the needle to its highest position.
- Lift the presser foot lever.
- Pull the fabric gently towards the back of the machine.
- Use the thread cutter (if available) or scissors to cut the threads, leaving about 4-6 inches of thread.
5. Maintenance
5.1 Cleaning the Machine
- Always unplug the machine before cleaning.
- Use a soft brush to remove lint and dust from the bobbin area, feed dogs, and around the needle plate.
- Wipe the exterior of the machine with a soft, damp cloth. Do not use harsh chemicals or abrasive cleaners.
5.2 Needle Replacement
- Ensure the machine is unplugged.
- Raise the needle to its highest position.
- Loosen the needle clamp screw.
- Remove the old needle and insert a new needle with the flat side facing the back of the machine.
- Push the needle up as far as it will go, then tighten the needle clamp screw securely.
6. Troubleshooting
This section addresses common issues you might encounter with your sewing machine. For problems not listed here, please contact customer support.
| Problem | Possible Cause | Solution |
|---|---|---|
| Machine does not start |
|
|
| Thread breaks frequently |
|
|
| Skipped stitches |
|
|
| Fabric not feeding smoothly |
|
|
7. Specifications
| Feature | Detail |
|---|---|
| Brand | COSTWAY |
| Model Number | 23469-CYPE-CS |
| Product Dimensions | 5"D x 12"W x 10"H |
| Item Weight | 9.49 pounds |
| Package Dimensions | 16 x 13 x 9 inches |
| Color | White |
| Manufacturer | COSTWAY |
| Built-in Stitches | 16 |
| Power Source | Electric (DC 6V adapter) |

8. Warranty and Support
For warranty information, please refer to the documentation included with your purchase or contact COSTWAY customer support directly. Keep your proof of purchase for any warranty claims.
If you require technical assistance or have questions regarding the operation or maintenance of your Costway Portable Multifunctional Sewing Machine, please visit the official COSTWAY website or contact their customer service department.
Manufacturer: COSTWAY
Brand Store: Visit the COSTWAY Store on Amazon