Introduction
This manual provides essential instructions for the safe installation, operation, and maintenance of your PWS JS3-1.8-80 Solar Water Pump Kit. Please read this manual thoroughly before installation and retain it for future reference. This kit is designed for efficient water pumping in ponds and borehole wells using solar power.
Safety Information
- Ensure all electrical connections are made by a qualified professional.
- Always disconnect power before performing any maintenance or installation.
- Do not operate the pump dry. The system includes sensors to prevent dry running.
- Handle solar panels with care to avoid damage.
- Ensure proper grounding for all electrical components.
Package Contents
Verify that all components listed below are present in your package:
- 1x 210-watt Submersible Pump with 6ft Cable
- 1x MPPT Controller
- 1x Spare Screw Impeller
- Waterproof Heatshrink Wire Covers
- 2x Water Level Sensors
- 1x Float Switch
- 1x 20ft Cable for Solar Panel with MC4 Plug
- 1x Installation Manual (this document)

Figure 1: All components included in the PWS JS3-1.8-80 Solar Water Pump Kit. This image displays the submersible pump, MPPT controller, various cables, sensors, and connectors.
Specifications
| Model | JS3-1.8-80 |
| Brand | PWS pump with solar |
| Voltage | 24V DC |
| Power | 210 Watts (0.3 HP) |
| Impeller Style | Screw |
| Impeller Material | Stainless Steel |
| Max Flow Rate | 7.7 Gallons Per Minute (GPM) |
| Max Total Head (Lifting Height) | 260 Feet |
| Outlet Size | 3/4 inch |
| Material | Stainless Steel (316) |
| Item Weight | 9.84 Kilograms (21.7 pounds) |
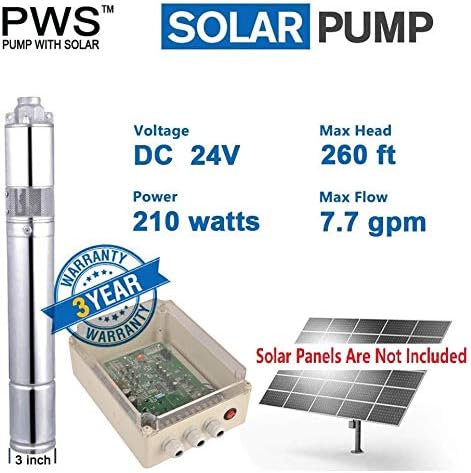
Figure 2: Visual summary of the PWS Solar Pump's key specifications, including voltage, power, max head, and max flow rate.
Setup and Installation
1. System Overview
The PWS solar water pump system consists of a solar panel array, a solar controller (MPPT), water sensors, and the submersible water pump. The system is designed to pump water from a source (well or pond) to a storage tank.

Figure 3: Diagram illustrating the complete solar water pump system setup, showing connections between the solar panel array, controller, water sensors, and the submersible pump in a well, leading to a water tank.
2. Solar Panel Requirements
For optimal performance, the system requires 4x 100-watt solar panels. These panels should be connected as follows: two panels in series, creating two such strings, and then these two strings connected in parallel. This configuration ensures the correct voltage and current for the 24V DC pump system.
3. MPPT Controller Installation
The MPPT controller is the brain of your solar pumping system. It optimizes power extraction from the solar panels and protects the pump. Mount the controller in a dry, shaded, and well-ventilated area.

Figure 4: Detailed view of the MPPT controller, highlighting its features and an explanation of its LED indicator lights for system status and error codes.
MPPT Controller Features:
- High efficiency with Maximum Power Point Tracking (MPPT).
- 24-hour automatic operation.
- Waterproof and leak-proof design.
- High/Low voltage protection.
- Over-current/Over-load protection.
- 24V-48V controllers can connect to a battery bank (optional).
LED Light Indicators:
| Mark | Name | Explanation |
|---|---|---|
| SYS | Power | Green color, the power is OK. |
| Pump | Running | Green color, it turns on 20 seconds after the power is connected. |
| MPPT | Max Power Point | Green color, the system is calculating the max power point. |
| ERR_I | Erroneous Current | Red color, over current. |
| Low Power | Erroneous Voltage | Yellow color, under voltage. |
| Tank_F | Tank Water Level Alarm | Red color, the tank is full. |
| Well_L | Well Water Level Alarm | Red color, the water in well is unavailable. |
4. Water Sensor Installation
The kit includes two water level sensors and one float switch for automated operation. Install one water level sensor in the well (Well_L) above the pump intake to prevent dry running. Install the other water level sensor or the float switch in your storage tank (Tank_F) to stop the pump when the tank is full. Connect these sensors to the designated ports on the MPPT controller as per the wiring diagram (Figure 3).
5. Pump Placement
Lower the submersible pump into the well or pond, ensuring it is suspended at a depth where it will always be submerged during operation, but not resting on the bottom to avoid drawing sediment. Secure the pump with a safety rope or cable, independent of the power cable.
Operating Instructions
Once all connections are securely made and verified, the system is ready for operation.
- Automatic Operation: The MPPT controller will automatically start the pump when sufficient solar power is available and the water levels in both the well and the tank are within operational limits (Well_L not active, Tank_F not active).
- Water Shortage Protection: If the water level in the well drops below the intake sensor (Well_L activates), the pump will automatically shut off to prevent dry running. It will restart once the water level recovers.
- Tank Full Protection: If the storage tank becomes full (Tank_F activates), the pump will automatically shut off to prevent overflow. It will restart when the tank level drops.
- Battery Support (Optional): The deep well submersible pump can be supported by batteries if you require pumping flexibility at any time, including during periods of low sunlight or at night. Ensure your battery bank is compatible with the controller's voltage range (24V-48V).
Maintenance
Regular maintenance ensures the longevity and efficient operation of your PWS solar water pump system.
- Solar Panels: Periodically clean solar panels to remove dust, dirt, and debris that can reduce efficiency.
- Connections: Annually inspect all electrical connections for corrosion or looseness. Ensure waterproof heatshrink covers are intact.
- Pump: If the pump's performance degrades, it may be necessary to retrieve it and inspect the impeller for blockages or wear. The kit includes a spare screw impeller for replacement.
- Sensors: Ensure water level sensors are clean and free from debris that could obstruct their function.
Troubleshooting
Refer to the MPPT controller's LED indicators (Figure 4) for initial diagnosis. Below are common issues and their potential solutions:
| Problem | Possible Cause | Solution |
|---|---|---|
| Pump not running (SYS green, Pump not green) | Insufficient solar power; Well_L or Tank_F active; pump fault. | Check solar panel exposure; verify water levels in well and tank; inspect pump for blockages. |
| Pump runs, but no water output | Well_L sensor active (dry well); pump airlocked; impeller damaged/blocked; pipe leakage. | Wait for well water level to rise; check for air in the system; inspect/replace impeller; check pipe integrity. |
| ERR_I (Red) indicator on controller | Over current condition. | Check pump for blockages or damage; verify wiring for shorts; ensure pump is not overloaded. |
| Low Power (Yellow) indicator on controller | Under voltage condition. | Check solar panel connections and cleanliness; ensure adequate sunlight; verify battery charge if using batteries. |
| Tank_F (Red) indicator on controller | Storage tank is full. | This is normal operation. Pump will restart when tank level drops. |
| Well_L (Red) indicator on controller | Water in well is unavailable. | This is normal operation. Pump will restart when well water level rises. |
Warranty and Support
Warranty
This PWS Solar Water Pump Kit comes with a 3-Year Warranty. Please retain your proof of purchase for warranty claims.
Customer Support
PWS pump with solar is committed to customer satisfaction. If you encounter any issues or have questions regarding your deep well pump, please contact our customer service. We aim to process all requests within 24 hours, and replacements for quality issues will be covered by us.
For support, please refer to the contact information provided at the point of purchase or on the official PWS pump with solar website.