Introduction
This manual provides detailed instructions for the installation, operation, and maintenance of your SMARTSTANDARD 8 Feet Brushed Nickel Sliding Barn Door Hardware Kit. Please read all instructions carefully before beginning installation to ensure safe and correct assembly and use. This kit is designed for a single door panel up to 48 inches wide and weighing between 150-220 lbs.
Safety Information
- Always wear appropriate safety gear, including safety glasses and gloves, during installation.
- Ensure the mounting surface (wall) is structurally sound and capable of supporting the weight of the door and hardware. Reinforce if necessary.
- Use a stud finder to locate wall studs for secure mounting. This kit is designed for 16-inch stud spacing.
- Keep children and pets away from the work area during installation.
- Do not exceed the maximum door weight capacity of 220 lbs.
- Ensure proper clearance above the door frame (minimum 5 inches) and around the door opening.
- Periodically check all fasteners for tightness and re-tighten if necessary.
Package Contents
Verify that all components listed below are present and undamaged before beginning installation. If any parts are missing or damaged, please contact SMARTSTANDARD customer service.

Image: Overview of all hardware components included in the kit, such as rails, hangers, stoppers, and fasteners.

Image: Close-up of the I-shape hangers with premium nylon wheels for smooth and quiet operation.

Image: Detail of the rubber-cushioned door stoppers designed to prevent the door from sliding off the track.

Image: The floor guide component, which helps stabilize the bottom of the barn door.
List of Components:
- 2 x 4ft Rails (total 8ft when connected)
- 6 x Rail Spacers
- 2 x Rollers (I Shape Hangers)
- 2 x Door Stoppers
- 2 x End Caps
- 1 x Floor Guide
- 1 x Hex Key
- 1 x Rail Connector
- All necessary mounting hardware (screws, anchors for 16-inch stud spacing)
Note: Door panel is NOT included with this hardware kit.
Specifications
| Feature | Detail |
|---|---|
| Brand | SMARTSTANDARD |
| Model Number | SDH0080ISHAPE01NL |
| Hardware Color | Brushed Nickel |
| Material | Metal |
| Style | Modern |
| Assembly Required | Yes |
| Item Weight | Approximately 18.66 pounds |
| Package Dimensions | Approximately 49.4 x 6.5 x 3 inches |
| Track Length | 8 Feet (2 x 4ft sections) |
| Door Weight Capacity | 150 lbs - 220 lbs |
| Fit Door Panel Width | Up to 48 inches |
| Fit Door Panel Thickness | 1 3/8 inches to 1 3/4 inches |
| Required Clearance Above Door | Minimum 5 inches |
Setup and Installation
Careful measurement and preparation are key to a successful installation. Ensure you have all necessary tools before starting.
Tools Recommended:
- Pencil
- Measuring Tape
- Level
- Stud Finder
- Drill with appropriate bits
- Wrench or Socket Set
- Hex Key (included)
Installation Steps:
- Prepare the Wall:
Locate wall studs using a stud finder. Mark the center of each stud. The mounting holes on the rail are typically spaced for 16-inch studs. If your studs do not align, a header board (not included) must be installed securely into studs to provide a solid mounting surface for the track.

Image: Illustration showing the required 5-inch clearance above the door and the maximum door panel width of 48 inches. Also indicates door thickness compatibility.
- Determine Track Height:
Measure the height of your door panel. Add at least 5 inches to this measurement to determine the ideal height for the top of the track. Mark this height on the wall, ensuring it is level.
- Assemble the Track:
Connect the two 4ft rail sections using the provided rail connector. Ensure the connection is secure and the track is straight. Place rail spacers at each mounting point.
- Mount the Track:
Align the pre-drilled holes on the track with your marked stud locations (or header board). Drill pilot holes if necessary. Secure the track to the wall using the provided lag bolts and washers. Ensure the track is perfectly level and firmly attached.

Image: Detailed view of the brushed nickel track securely mounted to the wall with rail spacers, and an I-shape hanger attached to the door.
- Attach Hangers to Door:
Measure and mark the positions for the hangers on the top edge of your door panel. Ensure they are evenly spaced and allow for smooth operation. Drill holes through the door panel and attach the I-shape hangers using the provided bolts, washers, and nuts. The door thickness should be between 1 3/8" and 1 3/4".
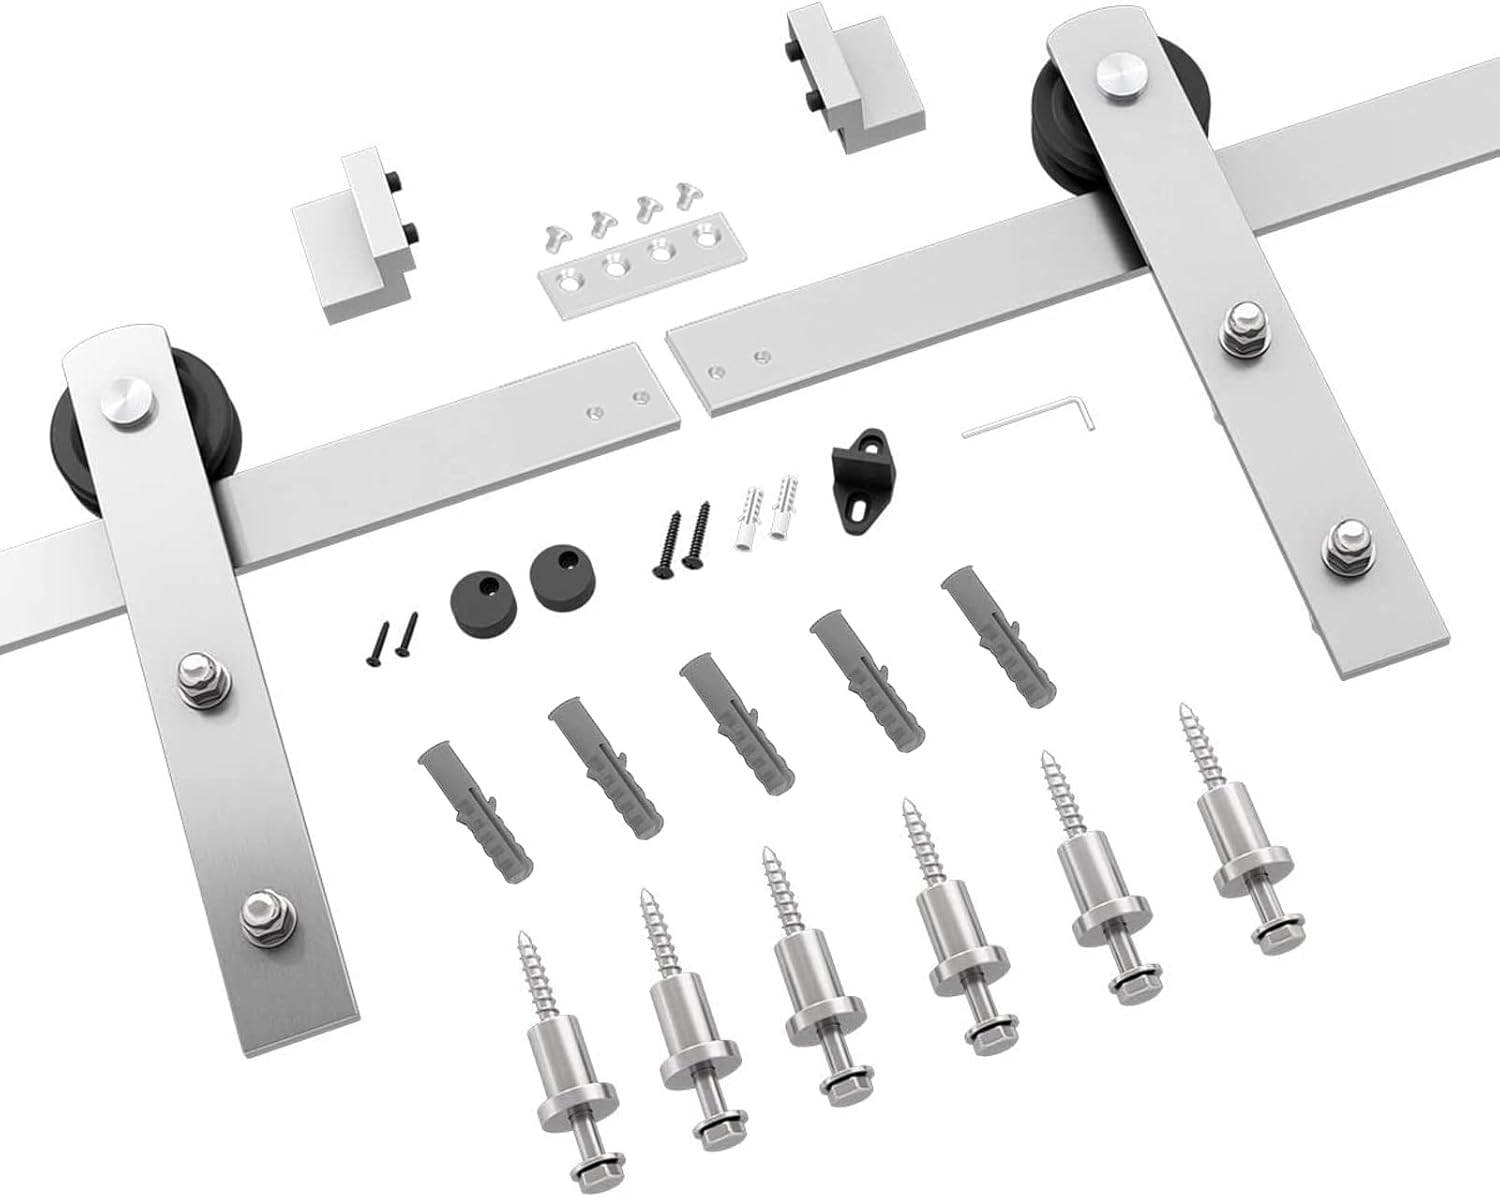
Image: The I-shape hangers with rollers securely bolted to the top edge of a barn door panel.
- Install Door Stoppers:
Slide the door stoppers onto the track, one at each end. These stoppers prevent the door from rolling off the track. Adjust their positions to control the door's travel distance and tighten them with the hex key.
Image: Close-up of a door stopper on the track, showing its rubber cushioning.
- Hang the Door:
Carefully lift the door panel and hook the rollers onto the track. Ensure both rollers are properly seated on the track.
- Install Floor Guide:
With the door hanging, position the floor guide on the floor directly beneath the door. Mark its location. You may need to cut a groove into the bottom edge of the door panel for the floor guide to slide into, depending on the type of floor guide provided. Secure the floor guide to the floor using screws. This prevents the bottom of the door from swinging out.
Image: The floor guide component, typically installed at the base of the door opening to keep the door aligned.
- Final Adjustments:
Slide the door back and forth to check for smooth operation. Adjust the door stoppers as needed to achieve the desired open and closed positions. Ensure all bolts and screws are tightened securely.
Operating Instructions
To operate your SMARTSTANDARD sliding barn door, simply grasp the door handle (if installed) and gently slide the door along the track. The premium nylon wheels ensure smooth and quiet movement. The door stoppers will prevent the door from exceeding its intended travel limits.
- Avoid forcing the door if it encounters resistance. Inspect the track and rollers for obstructions.
- Do not allow children to hang on the door or hardware.
Maintenance
Regular maintenance will ensure the longevity and smooth operation of your barn door hardware.
- Cleaning: Wipe the track and hardware components with a soft, damp cloth to remove dust and debris. Avoid abrasive cleaners that could damage the finish.
- Lubrication: Periodically apply a silicone-based lubricant to the roller wheels and track to maintain smooth and quiet operation. Do not use oil-based lubricants as they can attract dust.
- Fastener Check: Every few months, inspect all mounting bolts and screws for tightness. Re-tighten any loose fasteners to prevent sagging or instability.
- Track Inspection: Check the track for any signs of damage, bending, or obstructions. Ensure the track is free of debris that could impede the rollers.
Troubleshooting
| Problem | Possible Cause | Solution |
|---|---|---|
| Door does not slide smoothly or makes noise. |
|
|
| Door hits the wall or door frame. |
|
|
| Door swings out at the bottom. |
|
|
| Door feels unstable or wobbly. |
|
|
Warranty and Support
SMARTSTANDARD products are manufactured with quality and durability in mind. This product comes with a standard manufacturer's warranty against defects in materials and workmanship. For specific warranty details, claims, or technical support, please contact SMARTSTANDARD customer service directly.
You can typically find contact information on the SMARTSTANDARD official website or through your original point of purchase. Please have your model number (SDH0080ISHAPE01NL) and purchase date ready when contacting support.