
fryic VSN-10WF
Fryic VSN-10WF Ratchet Crimping Plier Instruction Manual
Model: VSN-10WF
1. Introduction
This instruction manual provides detailed guidance for the safe and effective use of the Fryic VSN-10WF Ratchet Crimping Plier. This tool is designed for crimping insulated and non-insulated ferrules within the 23-7 AWG (0.25-10 mm²) range. Please read this manual thoroughly before operation to ensure proper usage and to prevent damage to the tool or injury.
2. Safety Instructions
- Always wear appropriate personal protective equipment, including safety glasses, when operating this tool.
- Ensure the work area is clean, well-lit, and free from obstructions.
- Do not use the tool for purposes other than its intended use (crimping ferrules).
- Keep hands and fingers clear of the crimping jaws during operation.
- Inspect the tool for any damage or wear before each use. Do not use a damaged tool.
- Store the tool in a dry, secure place, out of reach of children.
- Avoid applying excessive force beyond the tool's design limits.
3. Product Overview
The Fryic VSN-10WF is a high-quality ratchet crimping plier designed for reliable electrical connections. Its ergonomic design and robust construction ensure efficient and consistent crimps.
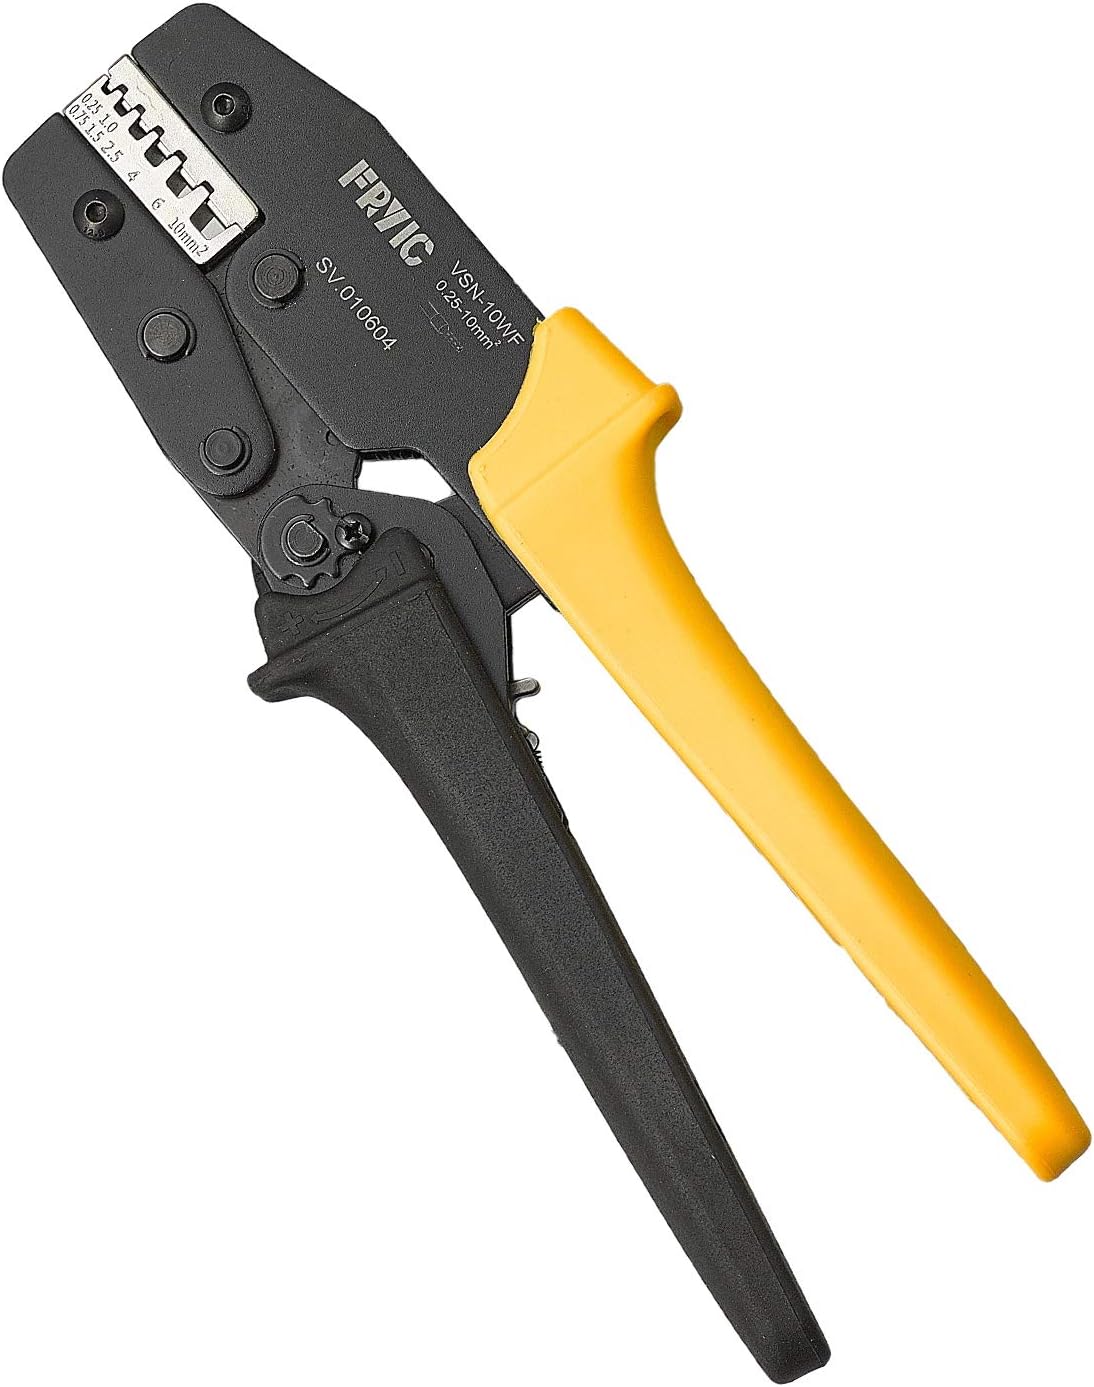
Figure 3.1: Fryic VSN-10WF Ratchet Crimping Plier. This image displays the overall appearance of the crimping tool with its yellow and black handles.
3.1. Key Components

Figure 3.2: Labeled components of the Fryic VSN-10WF Crimping Plier. This diagram highlights the pressure interface, logo, product model, pressure regulator, lever saving mechanism, and comfort handle.
- Pressure Interface: The crimping jaws where the ferrule and wire are compressed.
- Pressure Regulator: Adjusts the crimping force for different ferrule sizes.
- Lever Saving Mechanism: Reduces the effort required for crimping.
- Comfort Handle: Ergonomically designed with TPR elastic plastic for a secure grip.
- Ratchet Mechanism: Ensures a complete crimp cycle before releasing.
3.2. Material and Design Features

Figure 3.3: Material and design features. This diagram illustrates the construction details of the Fryic VSN-10WF crimping plier, highlighting the precision of the pressing die (powder injection MM process, 0.02mm accuracy, Fe8Ni material, HRC48-52 hardness), the Teflon spraying for rust prevention, and the ergonomic TPR elastic plastic handle designed for comfort.
4. Specifications

Figure 4.1: Product Information and Dimensions. This image provides a summary of the tool's specifications, including its length and height.
| Feature | Detail |
|---|---|
| Model | VSN-10WF |
| Crimping Capacity | 0.25-10 mm² (23-7 AWG) |
| Applicable Ferrules | Insulated and Non-Insulated |
| Material | High quality carbon steel plate (Fe8Ni) |
| Hardness (Pressing Die) | HRC48-52 |
| Handle Material | TPR elastic plastic |
| Surface Treatment | Teflon Spraying |
| Dimensions | 8.7 x 3.2 x 1 inches (220mm Length) |
| Weight | 1.2 pounds (0.52 Kg) |
| UPC | 765673909493 |
5. Setup
The Fryic VSN-10WF crimping plier is ready for use out of the box. No assembly is required. Before first use, familiarize yourself with the tool's components and ensure it operates smoothly.
- Inspection: Visually inspect the crimper for any signs of damage from shipping.
- Functionality Check: Open and close the handles a few times to ensure the ratchet mechanism engages and releases correctly.
- Die Selection: The VSN-10WF has fixed dies suitable for 0.25-10 mm² ferrules. Ensure the correct crimp slot is selected for your specific ferrule size. The die is marked with sizes (e.g., 0.25, 0.5, 1.0, 1.5, 2.5, 4, 6, 10 mm²).
6. Operating Instructions
Follow these steps for proper crimping:

Figure 6.1: Step-by-step crimping process. This image illustrates the three main steps: inserting the terminal, inserting the stripped wire, and completing the crimp.
- Step 1: Prepare the Ferrule
Select the appropriate ferrule size for your wire. Insert the ferrule into the correct crimping slot on the plier's jaws. Ensure the ferrule is seated properly and held in place by the plier's initial grip. - Step 2: Prepare the Wire
Strip the insulation from the end of the wire to the appropriate length, ensuring no stray strands. The stripped length should match the metal barrel length of the ferrule. - Step 3: Insert the Wire
Insert the stripped end of the wire completely into the ferrule. Ensure all wire strands are inside the ferrule and none are bent back or exposed outside the ferrule's barrel. - Step 4: Perform the Crimp
With the ferrule and wire correctly positioned, squeeze the handles of the crimping plier firmly. The ratchet mechanism will engage, ensuring a complete crimp cycle. Continue squeezing until the handles release automatically. - Step 5: Inspect the Crimp
Remove the crimped ferrule from the plier. Visually inspect the crimp for uniformity and tightness. Gently tug on the wire to ensure it is securely held within the ferrule. A proper crimp should be square or hexagonal, depending on the die, and the wire should not pull out.

Figure 6.2: Hands performing a crimp. This image shows the crimping plier in action, demonstrating how to hold and operate the tool during the crimping process.
7. Maintenance
- Cleaning: After each use, wipe the crimping jaws and other metal parts with a clean, dry cloth to remove any debris or residue.
- Lubrication: Periodically apply a light machine oil to the pivot points and ratchet mechanism to ensure smooth operation and prevent rust.
- Storage: Store the tool in a dry environment to prevent corrosion. The Teflon spraying on the clamp body surface is designed to ensure ten years of rust-free performance under normal conditions.
- Inspection: Regularly check the crimping dies for wear or damage. Worn dies can result in poor crimps.
8. Troubleshooting
| Problem | Possible Cause | Solution |
|---|---|---|
| Poor Crimp Quality (loose or deformed) | Incorrect ferrule size for wire; improper wire stripping length; worn crimping dies; insufficient pressure. | Ensure ferrule and wire size match the selected die slot. Verify wire is stripped to the correct length. Check dies for wear. Adjust pressure regulator if available (this model has a pressure regulator). Ensure full crimp cycle is completed. |
| Tool Jams / Does Not Release | Over-crimping; debris in mechanism; defective ratchet. | Do not force the handles. Locate the emergency release lever (if present) or gently pry open the jaws. Clean the mechanism. If the issue persists, contact support. |
| Handles are Stiff / Squeaky | Lack of lubrication; dirt/rust. | Apply light machine oil to pivot points and the ratchet mechanism. Clean any visible dirt or rust. |
9. Warranty and Support
Fryic products are designed for reliability and consistency. If you encounter any problems or require assistance with your VSN-10WF Ratchet Crimping Plier, please do not hesitate to contact Fryic customer support. Refer to the product packaging or the official Fryic website for the most current contact information.
For more information, visit the official Fryic store: Fryic Store on Amazon
Ask a question about this manual
Ask about setup, troubleshooting, compatibility, parts, safety, or missing instructions. Manuals+ will review the question and use this page’s manual context to help answer it.