1. Introduction
This manual provides detailed instructions for the safe installation, operation, and maintenance of your Hunter Minimus 59453 44-inch Indoor Ceiling Fan. Designed for indoor comfort, this low-profile fan features an ultra-quiet WhisperWind motor, an energy-efficient LED light kit, and convenient remote control operation. Please read all instructions carefully before beginning installation or use.
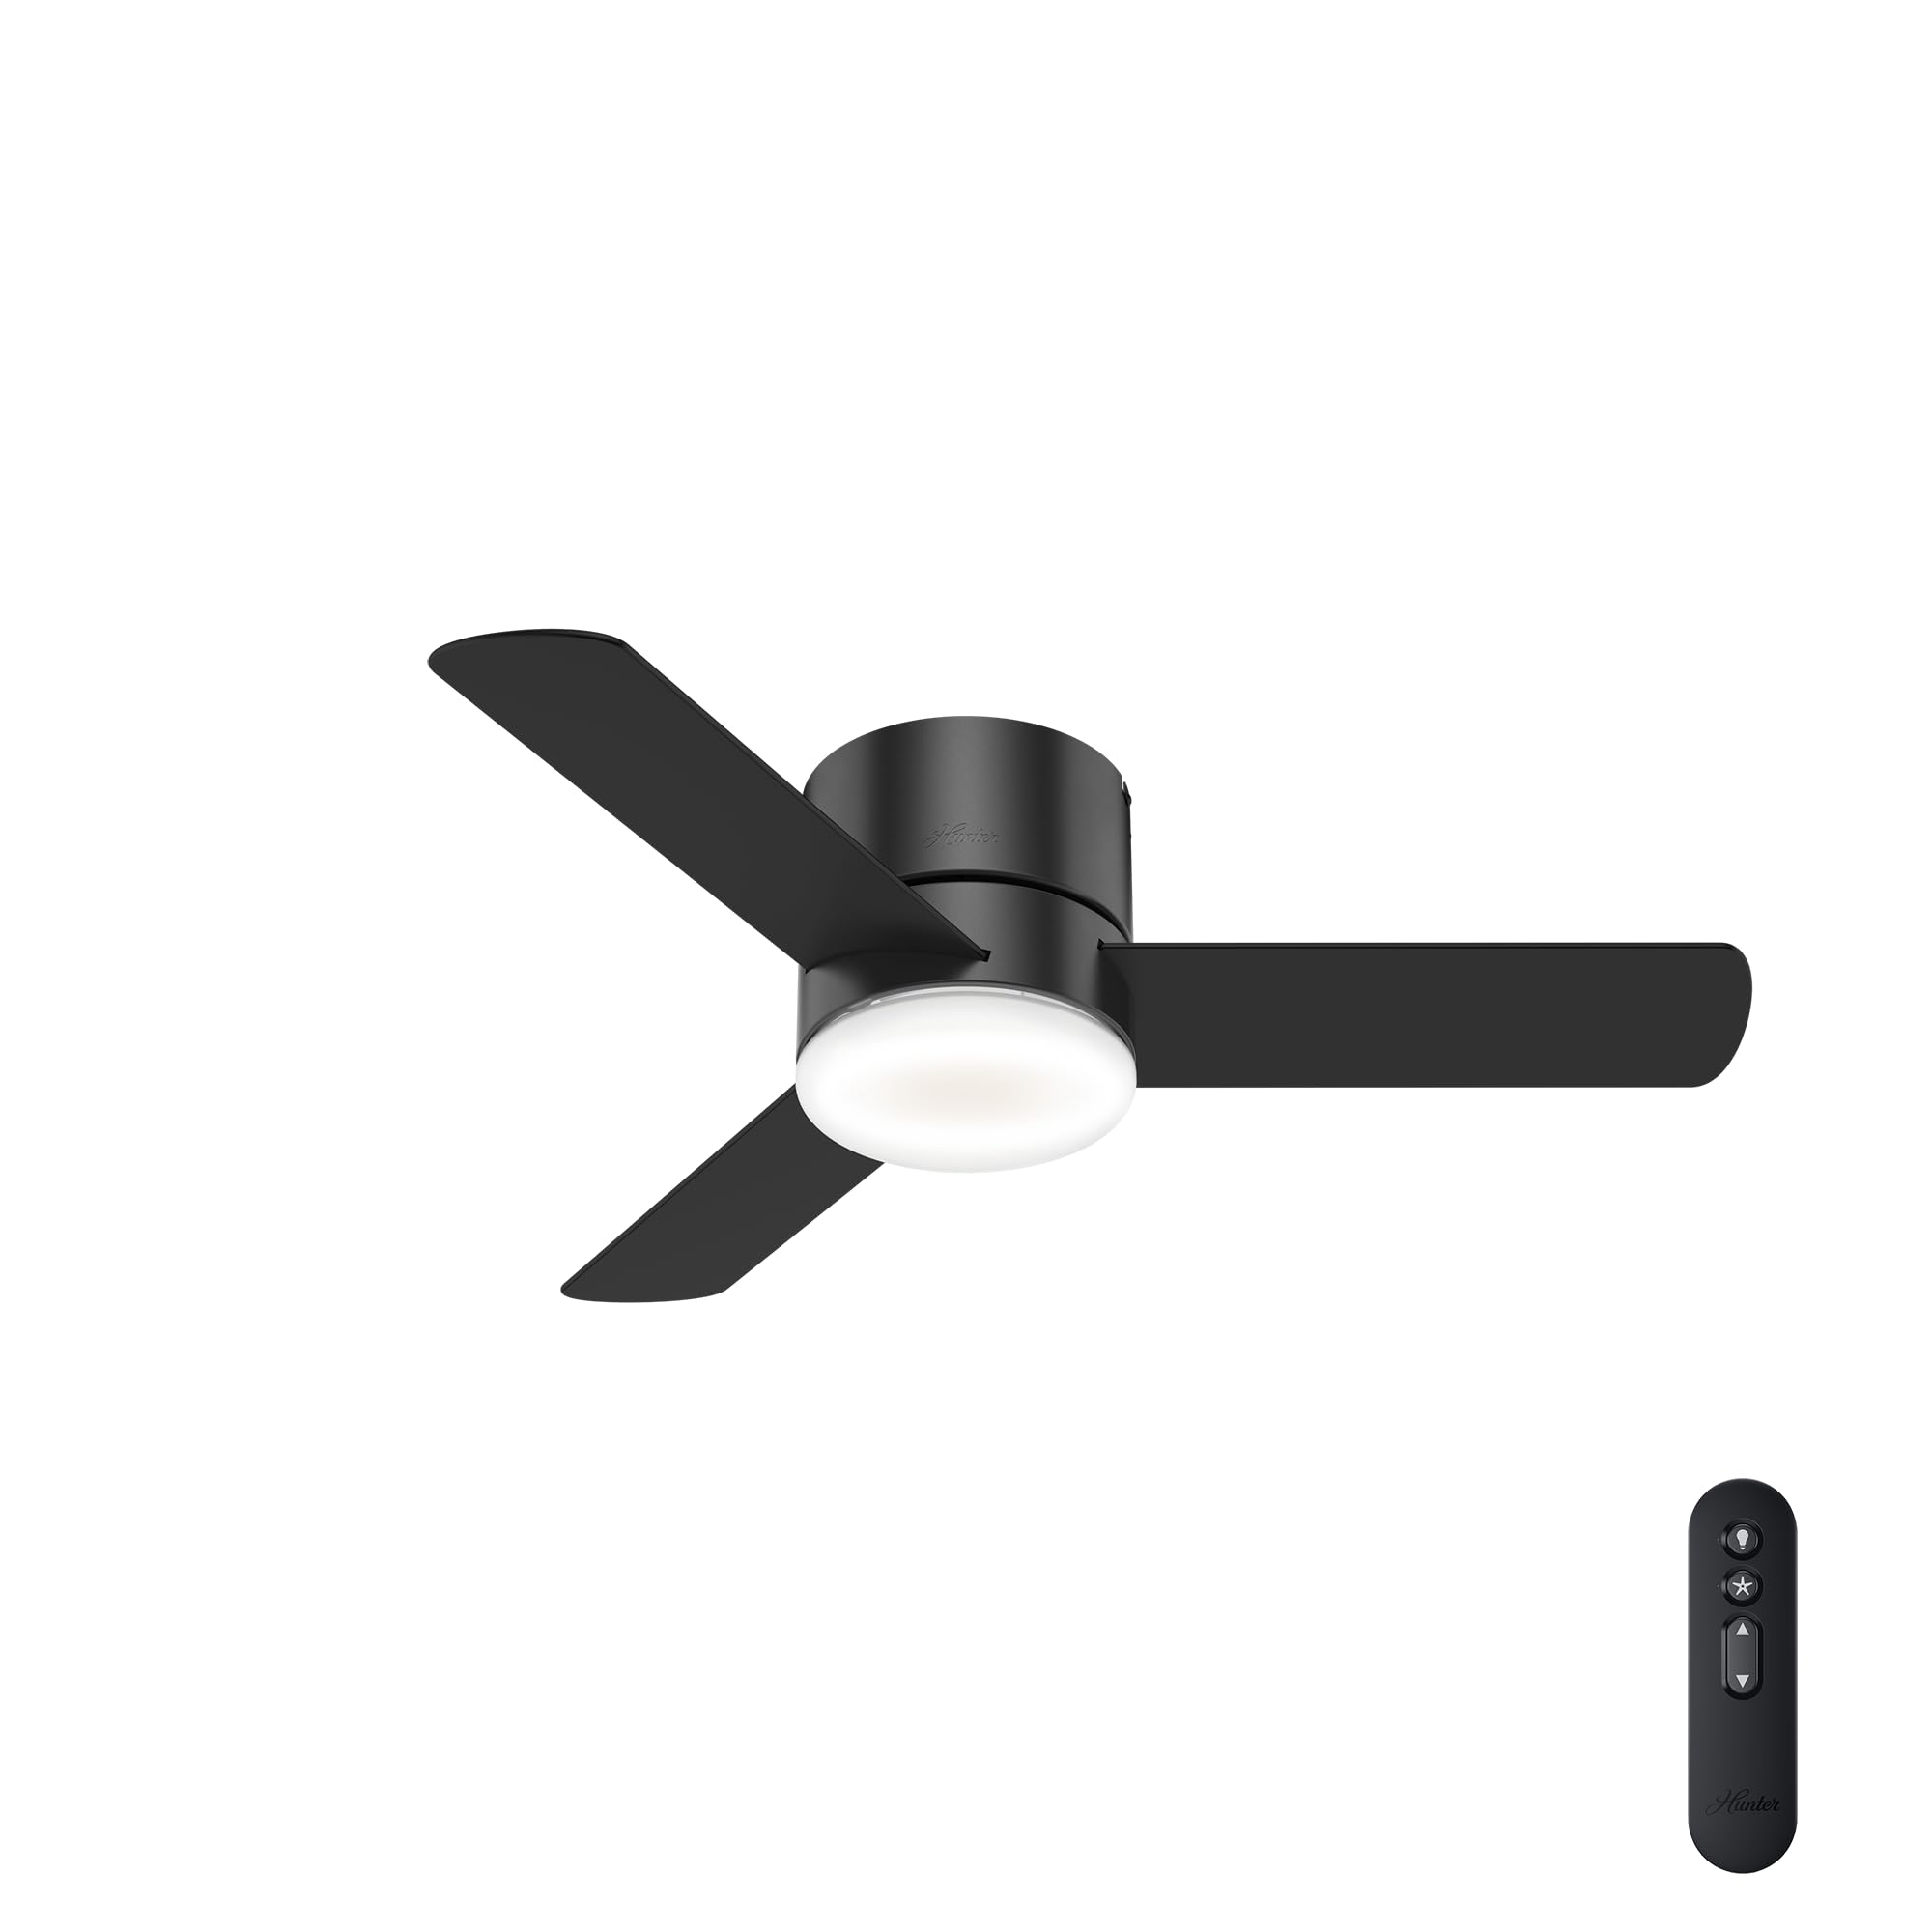
Image 1: Hunter Minimus 44-inch Matte Black Ceiling Fan with LED Light.
2. Safety Information
Always prioritize safety during installation and operation. Failure to follow these instructions may result in electric shock, fire, or personal injury.
- Turn off electrical breaker before installing. Ensure power is completely disconnected at the main circuit breaker or fuse box to prevent electrical shock.
- All wiring must be in accordance with national and local electrical codes. If you are unfamiliar with wiring, consult a qualified electrician.
- Mount the fan only to an outlet box marked 'Acceptable for Fan Support of 35 lbs (15.9 kg) or less' and use the mounting screws provided with the outlet box.
- Do not bend the blade holders during installation, balancing, or cleaning.
- Do not operate the fan with damaged blades.
3. Package Contents
Verify that all components are present before beginning installation. If any parts are missing or damaged, contact Hunter customer service.

Image 2: Included components of Hunter Minimus 44-inch Ceiling Fan: LED Bulb, 3 Reversible Blades, Handheld Remote.
- LED Bulb
- 3 Reversible Blades
- Handheld Remote Control
- Motor Housing
- Mounting Hardware
4. Setup and Installation
The Hunter Minimus 59453 is designed for straightforward installation, featuring a low-profile flush mount suitable for ceilings under 9 feet. For detailed visual guidance, refer to the 'Hunter Brand Video - Since 1886' and 'The Minimus Ceiling Fan by Hunter - Overview' videos.
Video 1: Hunter Brand Video - Since 1886. This video provides an overview of Hunter's commitment to quality and innovation, including features like SureSpeed and Hunter Express for easier installation.
Video 2: The Minimus Ceiling Fan by Hunter - Overview. This video offers a brief look at the Minimus fan's design and features.
4.1. Pre-Installation Steps
- Power Disconnection: Before starting, ensure the power is turned off at the circuit breaker.
- Unpack Components: Carefully remove all parts from the packaging and lay them out to ensure nothing is missing.
- Review Fan Dimensions: Confirm the fan's dimensions are suitable for your space.
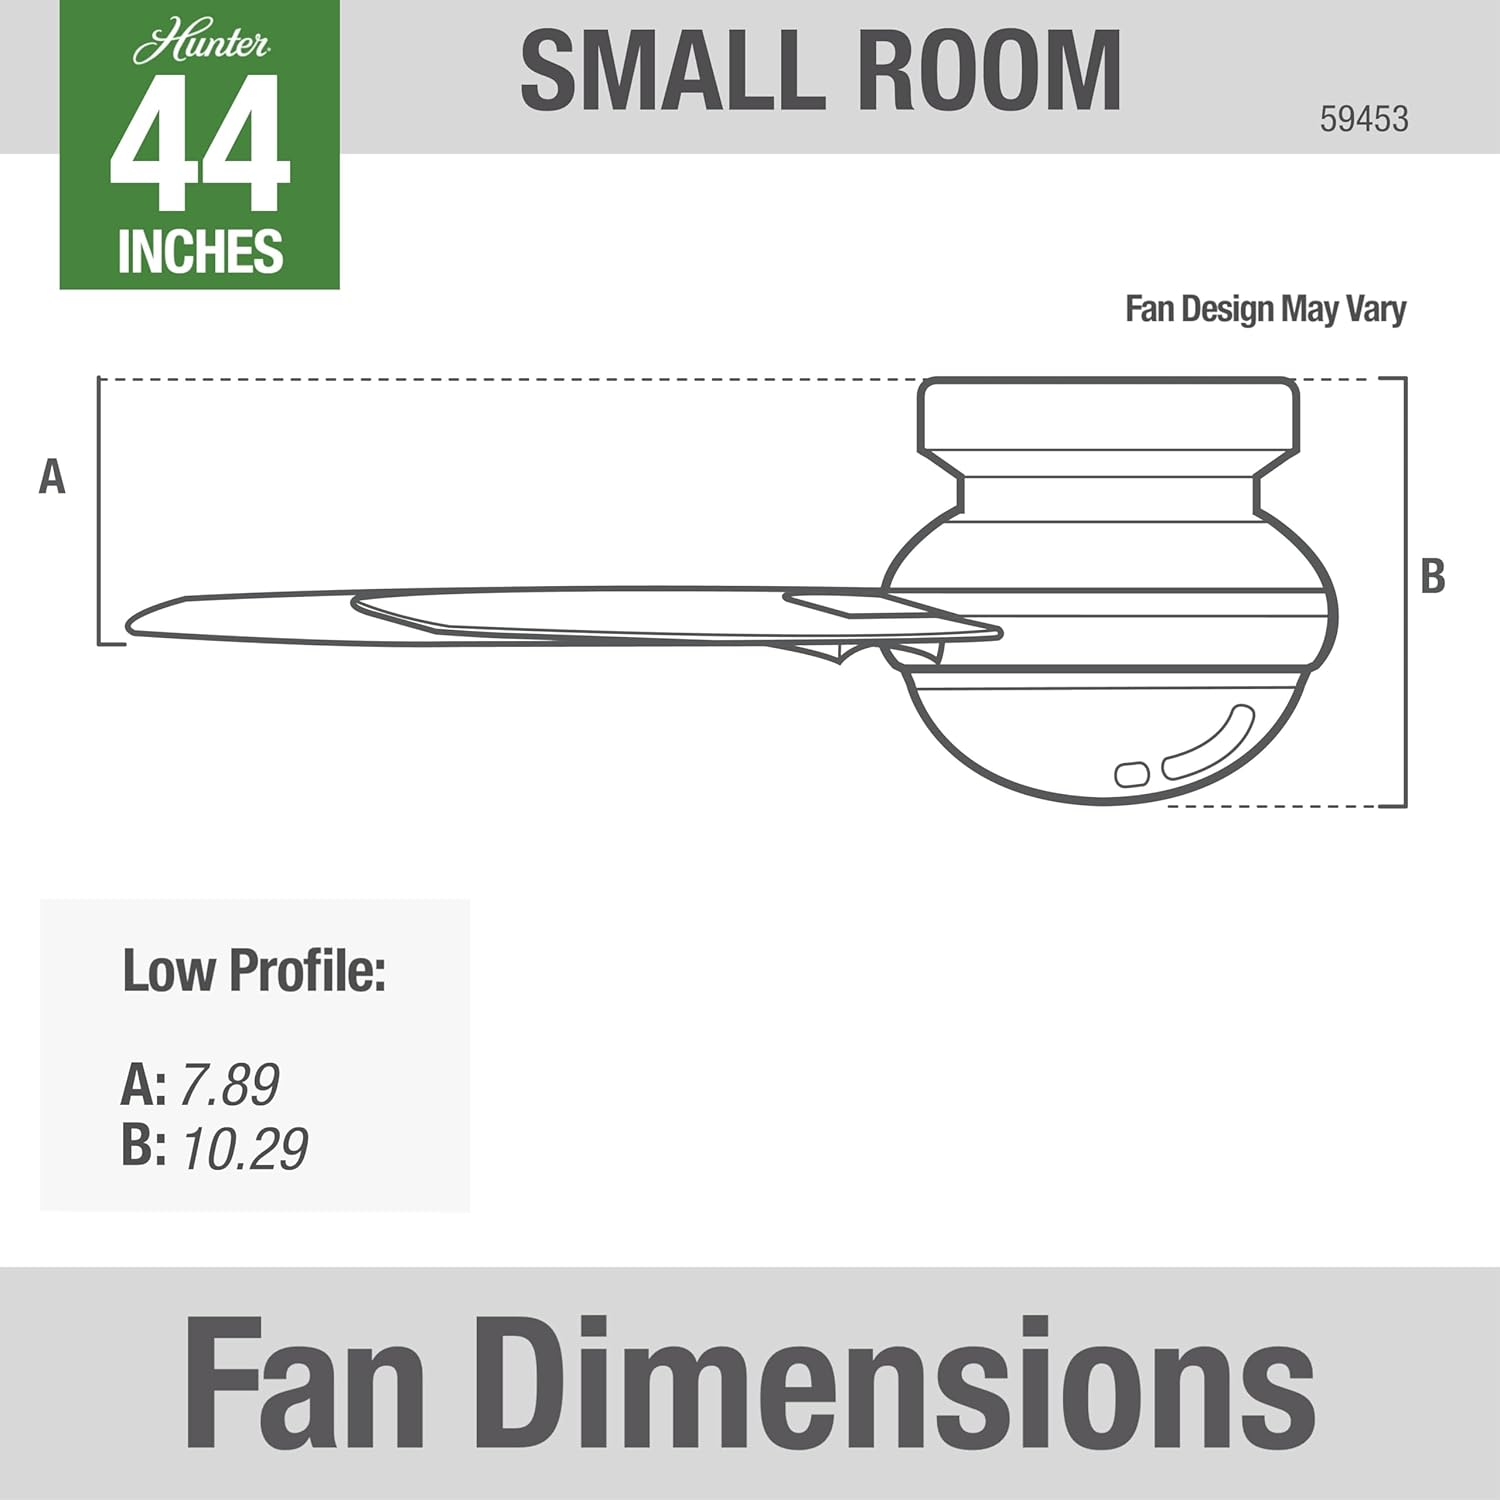
Image 3: Fan Dimensions for low profile installation. A: 7.89 inches, B: 10.29 inches.
4.2. Mounting the Fan
Follow the detailed instructions provided in your fan's installation guide for mounting the bracket, wiring, and attaching the fan body and blades. The pre-installed control receiver simplifies the wiring process.

Image 4: Hunter Minimus 44-inch Ceiling Fan installed in a modern home office setting.
5. Operating Instructions
Your Hunter Minimus 59453 fan is operated using the included handheld remote control. This remote allows you to control the fan speed, light on/off, dimming, and fan direction.

Image 5: Hunter Minimus Remote Control with buttons for light, fan on/off, speed adjustment, and direction change.
Video 3: How to Use a Hunter Remote. This video demonstrates the functions of the Hunter remote control for light, fan speed, and direction.
5.1. Light Control
- Light On/Off: Quick press the light bulb button to turn the light on or off.
- Dimming: Press and hold the light bulb button to dim or brighten the light.
- Dimming Mode ON/OFF: Press and hold both the up and down fan speed arrows simultaneously to toggle dimming mode on or off.
5.2. Fan Control
- Fan On/Off: Quick press the fan button (star icon) to turn the fan on or off.
- Raise Fan Speed: Quick press the up arrow button to increase fan speed.
- Lower Fan Speed: Quick press the down arrow button to decrease fan speed.
- Fan Reverse (Seasonal Modes): Press and hold the fan button (star icon) to reverse the fan direction. This feature is typically used to switch between Summer and Winter modes. (Excludes fans with a physical reverse switch on the housing).
Video 4: Hunter Fan Company 59453 44". This short video provides a quick visual of the fan in operation.
6. Seasonal Modes
Adjust your fan's direction to optimize comfort and energy efficiency throughout the year.
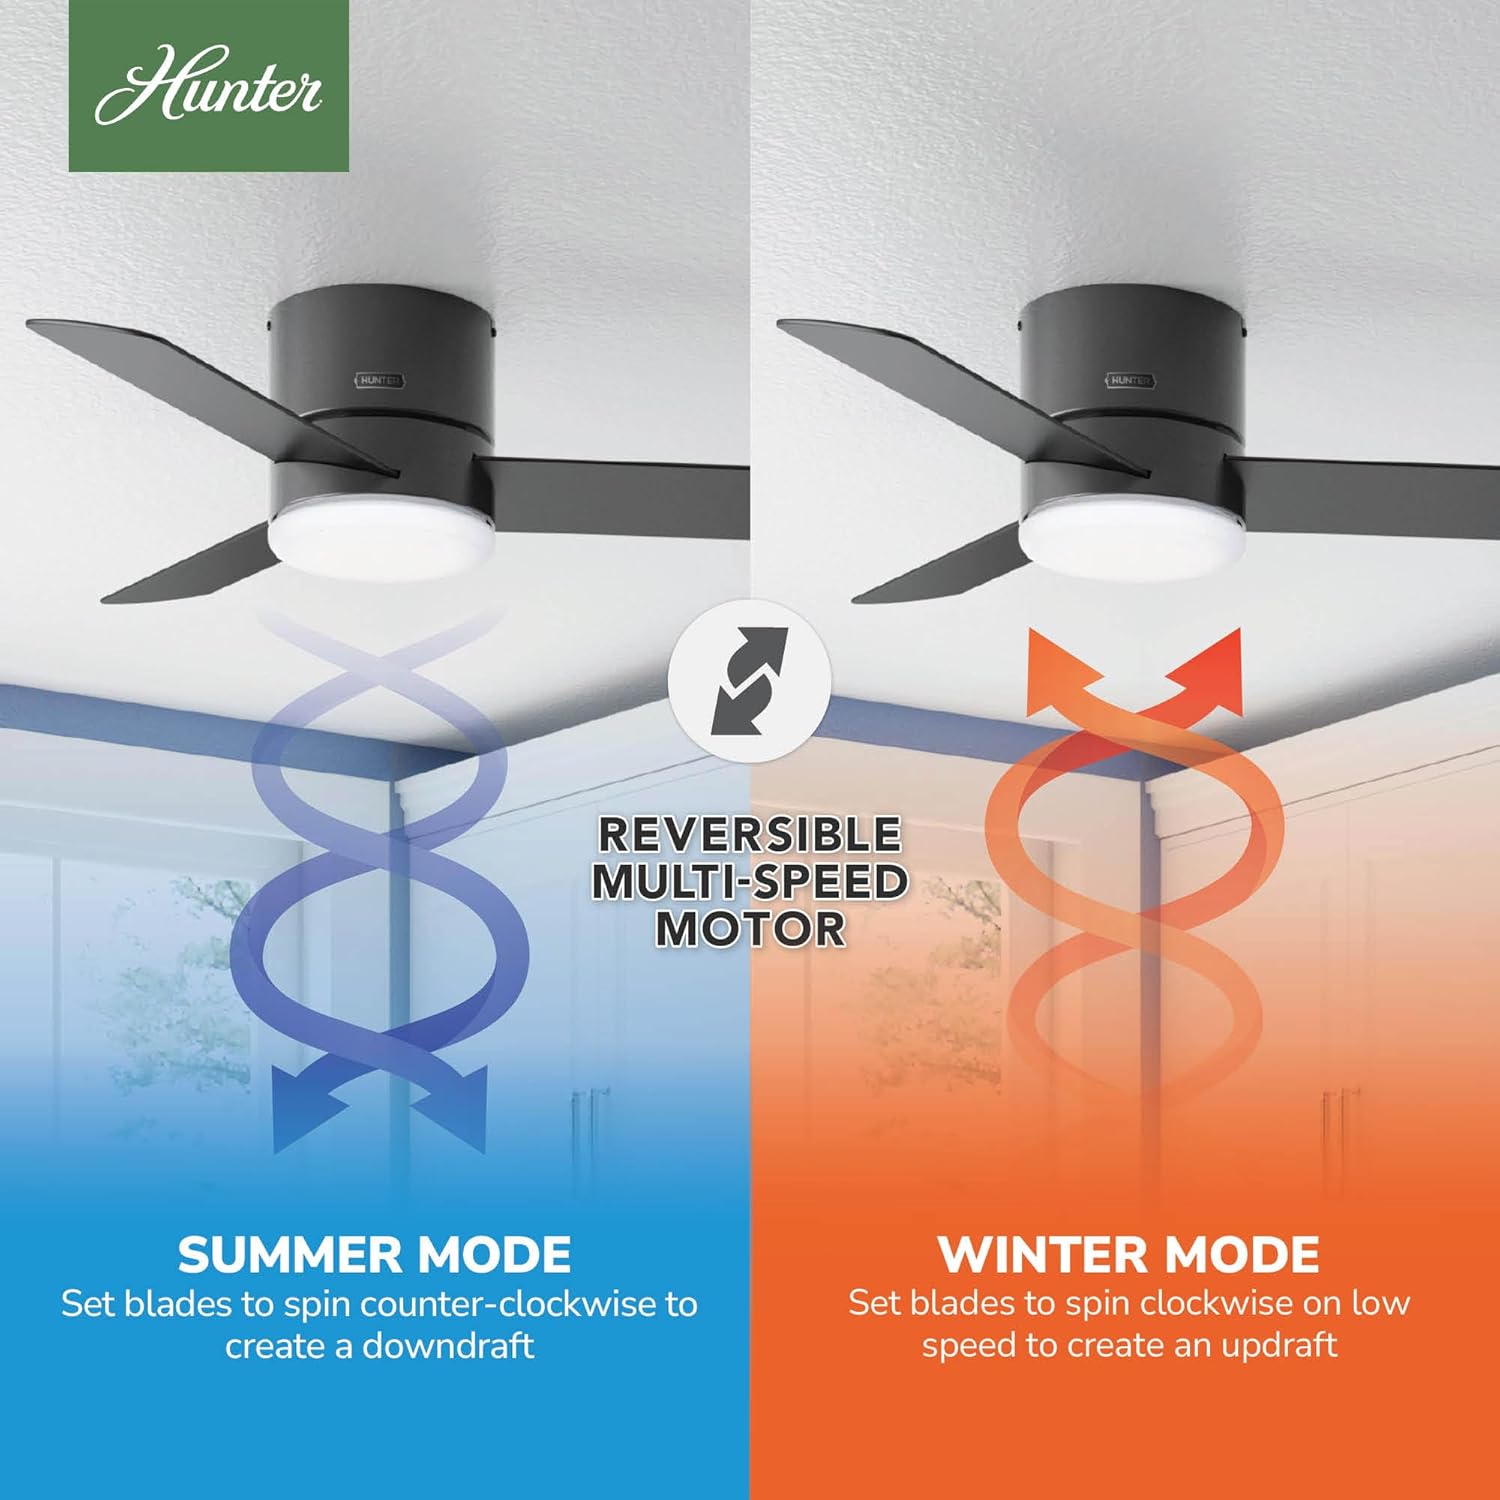
Image 6: Reversible Multi-Speed Motor showing Summer Mode (downdraft) and Winter Mode (updraft).
- Summer Mode (Counter-Clockwise): Set blades to spin counter-clockwise to create a downdraft, providing a cooling breeze.
- Winter Mode (Clockwise): Set blades to spin clockwise on low speed to create an updraft, circulating warm air near the ceiling without creating a direct draft.

Image 7: Using a ceiling fan can save energy and money by allowing you to adjust thermostat settings.
7. Maintenance
Regular maintenance ensures optimal performance and longevity of your ceiling fan.
- Cleaning: Dust the fan blades and motor housing periodically with a soft, damp cloth. Avoid using abrasive cleaners that could damage the finish.
- Tighten Fasteners: Check all screws and fasteners on the fan and mounting assembly at least twice a year to ensure they are secure.
- Blade Inspection: Inspect blades for any cracks or damage. Replace damaged blades immediately.
8. Troubleshooting
If you experience issues with your fan, consult the following common troubleshooting tips:
- Fan Does Not Start: Check that the circuit breaker is on and the wall switch (if applicable) is in the ON position. Ensure all wiring connections are secure. Verify the remote control battery is functional.
- Light Does Not Work: Check the light bulb connection. Ensure the light is not in dimming mode if you expect full brightness.
- Fan Wobbles: Ensure all blade screws are tightened. Check that the mounting bracket is securely fastened to the ceiling outlet box.
- Noisy Operation: Verify all screws are tight. Check for proper blade alignment. Ensure the fan is not rubbing against any part of the ceiling or mounting.
9. Specifications
| Feature | Specification |
|---|---|
| Brand | Hunter |
| Model Number | 59453 |
| Color | Matte Black |
| Product Dimensions | 44"D x 44"W x 10.3"H |
| Room Type | Bedroom, Living Room, Kitchen, Home Office |
| Mounting Type | Flush Mount |
| Controller Type | Remote Control |
| Number of Speeds | 3 |
| Noise Level | 44 Decibels |
| Wattage | 42 watts |
| Number of Blades | 3 |
| Air Flow Capacity | 2238 Cubic Feet Per Minute |
| Voltage | 120V |
| Light Type | LED |
| Blade Material | Plastic |
| Specification Met | ETL, UL |
| UPC | 049694594532 |
10. Warranty and Support
Your Hunter Minimus 59453 Ceiling Fan comes with a Limited Lifetime Motor Warranty. For specific details regarding warranty coverage, claims, or technical support, please refer to the warranty documentation included with your product or visit the official Hunter Fan Company website. You can also contact Hunter customer service directly for assistance.