Introduction
This manual provides detailed instructions for the safe and effective use of your Phoncoo SQ8 Mini DV Camera. Please read this manual thoroughly before operating the device and retain it for future reference. The SQ8 Mini DV Camera is a compact, portable device designed for high-definition video recording and photography, featuring infrared night vision capabilities.
Package Contents
Verify that all items listed below are present in your package:
- 1 x SQ8 Mini DV Camera
- 1 x USB / TV Out 2-in-1 Cable
- 1 x Wristband
- 1 x User Manual (this document)
- 1 x Clip
- Note: A TF (MicroSD) card is required for operation and is not included.
Product Overview
Familiarize yourself with the components of your SQ8 Mini DV Camera.

Figure 1: Front view of the SQ8 Mini DV Camera attached to its mounting bracket. This image displays the compact size and the adjustable bracket for versatile positioning.
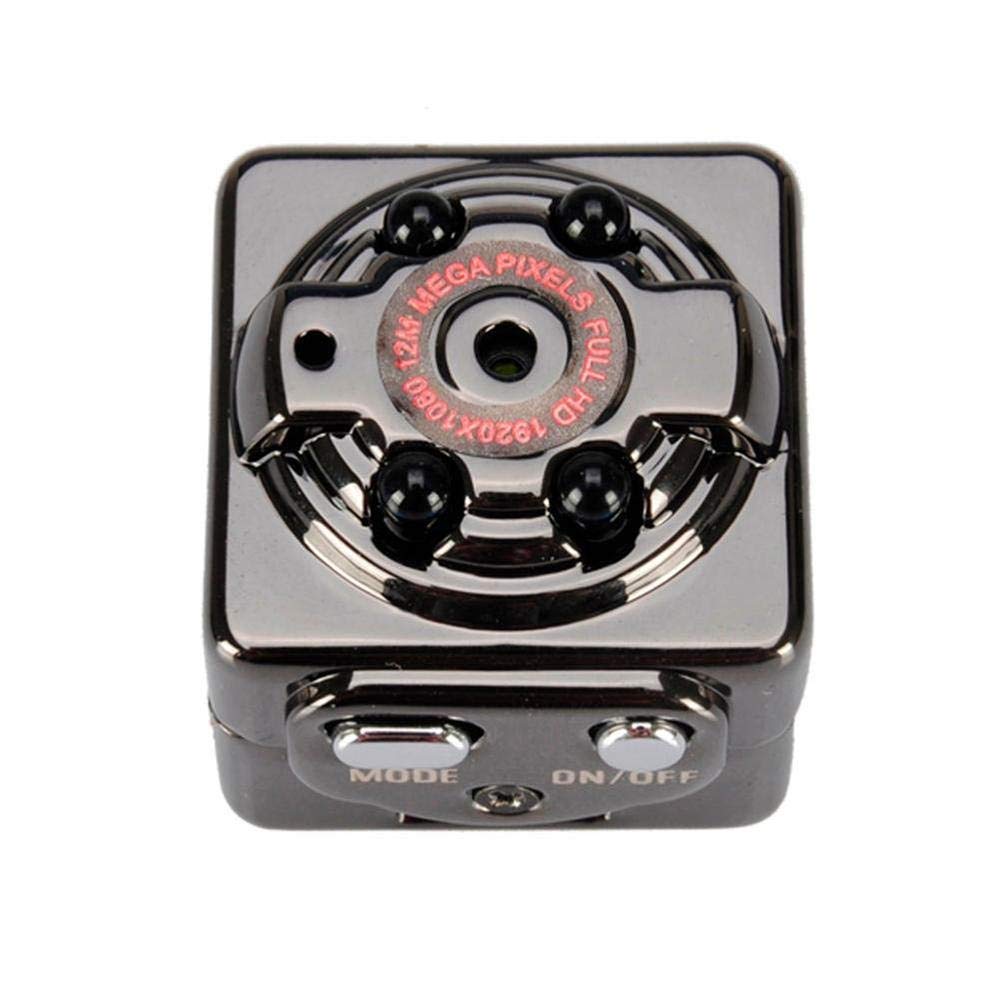
Figure 2: Top view of the SQ8 Mini DV Camera, highlighting the lens, indicator lights, and control buttons (MODE, ON/OFF).

Figure 3: Side view of the SQ8 Mini DV Camera, illustrating the TF card slot and the Mini 8-pin USB port for charging and data transfer.
The camera features a compact cube design, a high-definition lens, and integrated infrared LEDs for night vision. Control buttons are located on the top surface, while the TF card slot and USB port are on the side.
Setup
- Charge the Camera: Before first use, fully charge the camera. Connect the camera to a USB power source (e.g., computer USB port or USB wall adapter) using the provided USB / TV Out 2-in-1 Cable. The indicator light will illuminate during charging and turn off when fully charged. Charging typically takes 2-3 hours.
- Insert TF Card: Open the TF card slot cover and carefully insert a TF (MicroSD) card (up to 32GB, not included) with the gold contacts facing the back of the camera. Push until it clicks into place. To remove, push the card in again until it springs out.
- Mounting (Optional): Attach the camera to the provided clip or bracket for desired positioning.
Operating Instructions
Power On/Off
- Power On: Press and hold the ON/OFF button for approximately 2 seconds. The indicator light will illuminate, indicating the camera is powered on.
- Power Off: Press and hold the ON/OFF button for approximately 5 seconds. The indicator light will turn off, and the camera will power down.
Video Recording (1080P)
- Ensure the camera is powered on.
- Press the MODE button once to enter 1080P video recording mode. The indicator light will change to reflect this mode.
- Press the ON/OFF button once to start recording. The indicator light will flash, indicating recording is in progress.
- To stop recording, press the ON/OFF button again. The indicator light will stop flashing and remain solid, saving the video file.
Photo Mode
- Ensure the camera is powered on.
- Press the MODE button repeatedly until the camera enters photo mode. The indicator light will show a specific pattern for photo mode.
- Press the ON/OFF button once to take a photo. The indicator light will flash briefly, indicating a photo has been captured and saved.
Infrared (IR) Night Vision
- The SQ8 camera features automatic IR night vision. In low-light conditions, the camera will automatically activate its infrared LEDs to enhance visibility.
- No manual activation is required for night vision.
Connecting to a Computer
- Connect the camera to your computer using the provided USB cable.
- The camera will be recognized as a removable disk. You can then access and transfer your video and photo files.
- The camera supports Windows ME / 2000 / XP / 2003 / Vista, Mac OS, and Linux operating systems.
TV Out Connection
- Use the provided USB / TV Out 2-in-1 Cable to connect the camera to a TV or monitor.
- This allows for real-time monitoring or playback of recorded content directly on a larger screen.
Maintenance
- Cleaning: Use a soft, dry cloth to clean the camera body and lens. Avoid using liquid cleaners or abrasive materials.
- Storage: Store the camera in a cool, dry place away from direct sunlight and extreme temperatures.
- Battery Care: To prolong battery life, avoid fully discharging the battery frequently. Charge the camera regularly, even if not in use for extended periods.
- TF Card: Periodically format the TF card to maintain optimal performance and prevent data corruption. Back up important files before formatting.
Troubleshooting
| Problem | Possible Cause / Solution |
|---|---|
| Camera does not power on. | Battery may be depleted. Charge the camera for 2-3 hours. |
| Cannot record video/take photos. |
|
| Poor video/image quality. |
|
| Camera freezes or becomes unresponsive. | Press and hold the ON/OFF button for an extended period (e.g., 10 seconds) to force a shutdown, then restart. If issues persist, try charging the camera. |
Specifications
- Model: SQ8
- Video Format: AVI
- Video Coding: M-JPEG
- Video Resolution: 1920 x 1080P (Full HD)
- Video Frame Rate: 30fps
- Image Format: JPG
- Image Resolution: 12MP (4032 x 3024)
- Image Proportion: 4:3
- Storage Support: TF Card, up to 32GB (not included)
- Interface Type: Mini 8 pin USB
- Charging Voltage: DC 5V
- Charging Time: Approximately 2-3 hours
- Working Time: About 100 minutes at 1080P 30fps
- Support System: Windows ME / 2000 / XP / 2003 / Vista, Mac OS, Linux
- Product Size: Approx. 22 x 22 x 20mm (0.86 x 0.86 x 0.78 inches)
- Net Weight: Approx. 27g (0.06 lb)
- Special Feature: IR Night Vision
Warranty and Support
For any questions, technical support, or warranty inquiries regarding your Phoncoo SQ8 Mini DV Camera, please refer to the retailer or contact Phoncoo customer service through their official channels. Please retain your proof of purchase for warranty validation.