PROFLO PF93024
PROFLO PF93024 Submersible Sewage Pump Kit User Manual
Model: PF93024 | Brand: PROFLO
Introduction
This manual provides essential information for the safe and efficient installation, operation, and maintenance of your PROFLO PF93024 1/2 Horsepower Submersible Sewage Pump Kit. Please read this manual thoroughly before attempting to install or operate the pump. Retain this manual for future reference.
Important Safety Information
Failure to follow these instructions may result in serious injury, death, or property damage. Always observe all local codes and ordinances.
- Electrical Hazard: Ensure power is disconnected before working on the pump or electrical connections.
- Explosion Hazard: Do not pump flammable liquids or operate in explosive atmospheres.
- Crushing Hazard: The pump is heavy. Use proper lifting techniques and equipment.
- Biohazard: Sewage contains harmful bacteria. Wear appropriate personal protective equipment (PPE) including gloves and eye protection.
- This pump is designed for sewage and effluent only. Do not use for other purposes.
- Ensure proper grounding of the pump and all electrical components.
Product Components
The PROFLO PF93024 Submersible Sewage Pump Kit includes the following main components:
- Submersible Sewage Pump: Constructed of cast iron for durability.
- Tethered Float Switch: Operates the pump automatically based on liquid levels.
- Pump Basin/Housing: Designed to contain the pump and sewage.
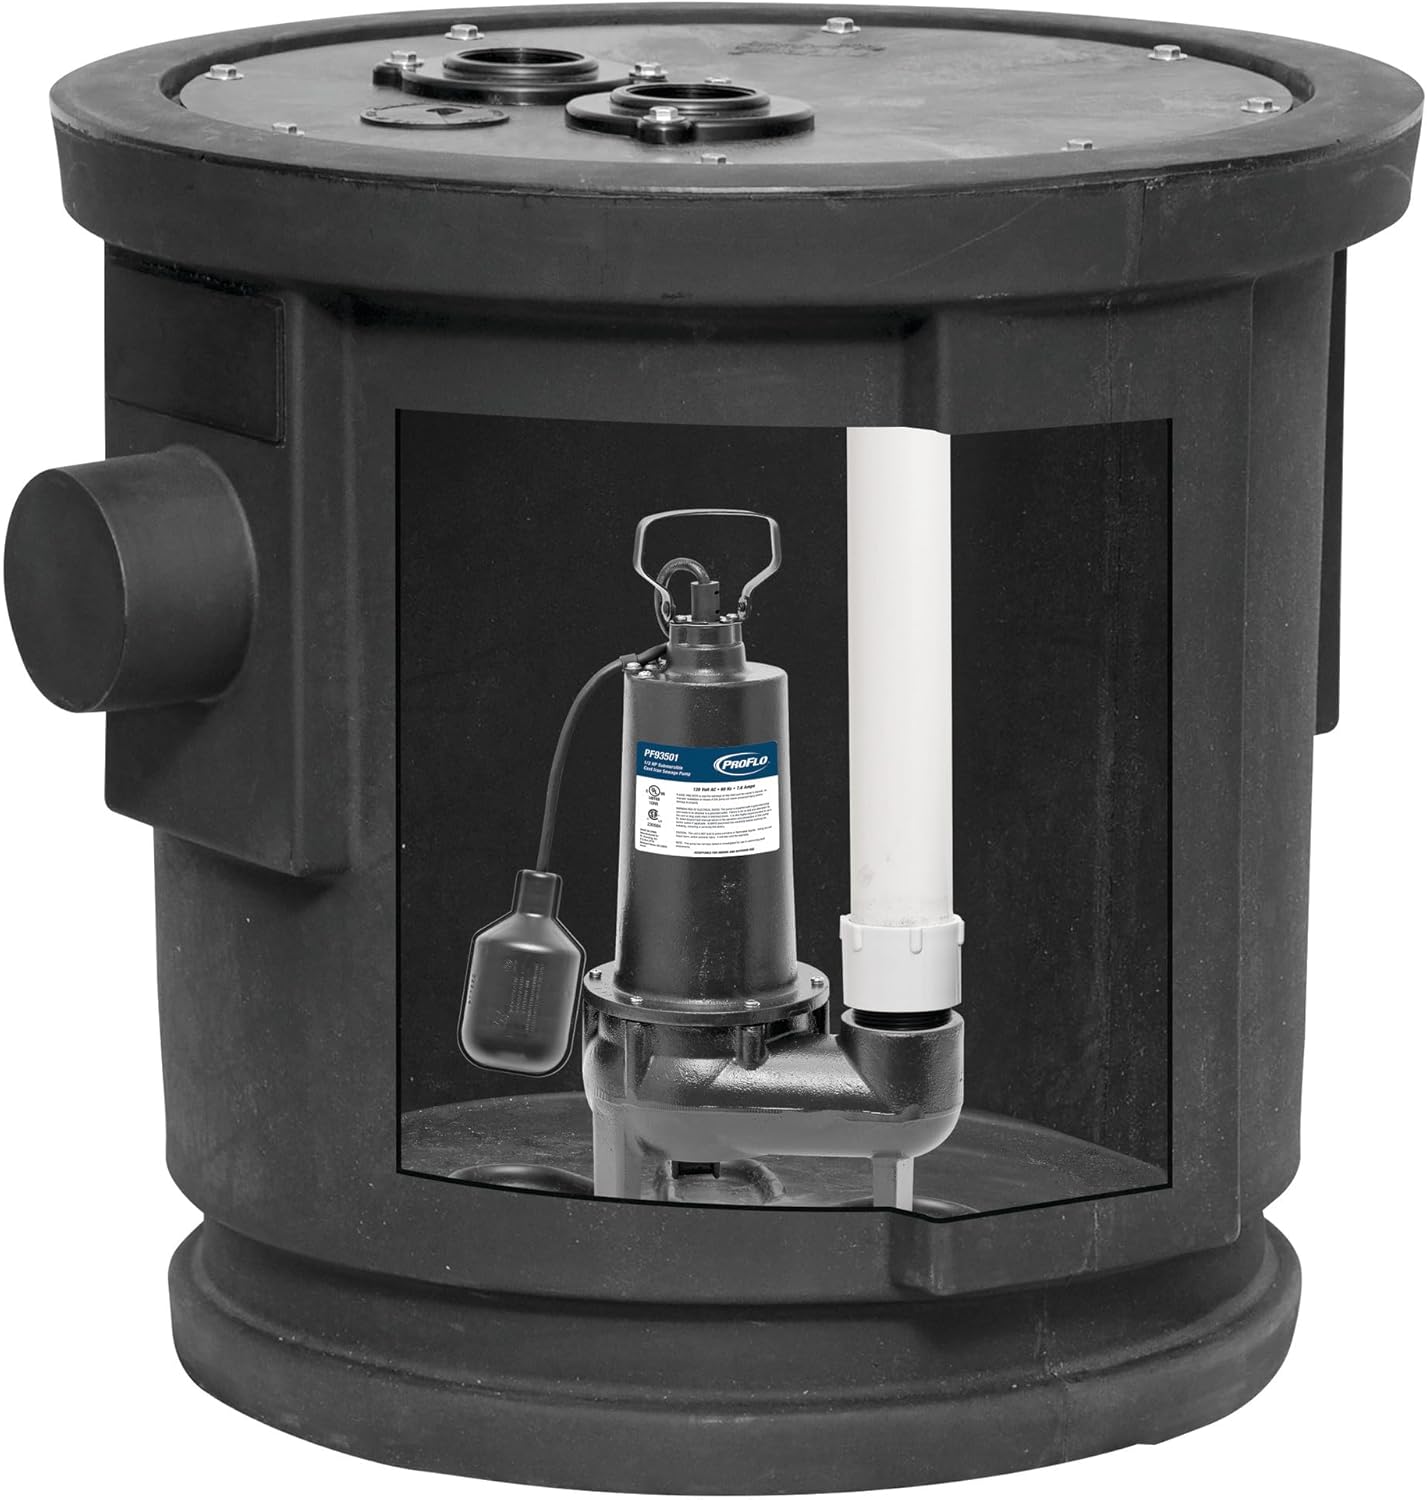
Image 1: PROFLO PF93024 Submersible Sewage Pump Kit. This image shows the main components: the cast iron pump, the tethered float switch, and the surrounding basin.

Image 2: Detailed view of the PROFLO PF93024 pump and float switch. This image provides a closer look at the pump's body, the tethered float switch mechanism, and the discharge pipe connection.
Technical Specifications
| Feature | Specification |
|---|---|
| Model Number | PF93024 |
| Brand | PROFLO |
| Horsepower | 1/2 HP |
| Voltage | 12 Volts (DC) |
| Material | Cast Iron |
| Style | Submersible |
| Maximum Flow Rate | 80 Gallons Per Minute (GPM) |
| Maximum Lifting Height (Head) | 25 Feet |
| Item Weight | 25 Pounds |
| Product Dimensions | 28 x 28 x 24.13 inches |
| Switch Type | Tethered Float Switch |
Setup and Installation
Proper installation is crucial for the safe and efficient operation of your sewage pump. If you are unsure about any step, consult a qualified professional.
1. Pre-Installation Checklist
- Verify all components are present and undamaged.
- Ensure the installation site meets local plumbing and electrical codes.
- Confirm power supply matches pump requirements (12 Volts DC).
- Gather necessary tools and materials (e.g., PVC pipe, fittings, sealant, electrical connectors).
2. Basin Preparation
- Ensure the pump basin is clean and free of debris.
- Position the basin in its final location, ensuring it is level and secure.
3. Pump Placement
- Carefully lower the pump into the basin. Ensure it rests on a solid, level surface at the bottom of the basin.
- Position the tethered float switch so it can move freely and is not obstructed by the pump, basin walls, or piping. The float switch determines the pump's on/off cycles.
4. Plumbing Connections
- Connect the discharge pipe to the pump's outlet. Use appropriate fittings and sealant to ensure a watertight connection.
- Install a check valve in the discharge line above the pump to prevent backflow.
- Route the discharge pipe to the main sewer line or septic system according to local codes.
5. Electrical Connections
- WARNING: Ensure power is OFF at the circuit breaker before making any electrical connections.
- Connect the pump's power cord to a dedicated 12 Volt DC power supply.
- Ensure all electrical connections are secure, waterproof, and comply with local electrical codes.
- Verify proper grounding of the pump and power supply.
6. Final Check
- Double-check all plumbing and electrical connections for tightness and security.
- Ensure the float switch has a full range of motion.
Operating Instructions
The PROFLO PF93024 pump operates automatically via its tethered float switch.
Automatic Operation
- Once properly installed and connected to power, the pump will remain off as long as the liquid level in the basin is below the "turn-on" point of the float switch.
- As the liquid level rises, the tethered float switch will float upwards.
- When the float switch reaches its horizontal or slightly upward position (depending on its tether length), it will activate the pump.
- The pump will then begin to discharge the sewage/effluent from the basin.
- As the liquid level drops, the float switch will lower.
- When the float switch reaches its "turn-off" point, the pump will automatically shut off.
- This cycle will repeat as needed to maintain appropriate liquid levels in the basin.
Initial Start-up and Testing
- After installation, restore power to the pump.
- Fill the basin with water to simulate sewage inflow. Observe the float switch.
- The pump should turn on when the water level reaches the float's activation point and pump out the water.
- The pump should turn off when the water level drops below the float's deactivation point.
- Check for any leaks in the plumbing connections during operation.
Maintenance
Regular maintenance ensures the longevity and reliable operation of your PROFLO sewage pump. Always disconnect power before performing any maintenance.
Monthly Checks
- Float Switch: Manually lift and lower the float switch to ensure it moves freely and activates/deactivates the pump correctly.
- Basin: Inspect the basin for excessive buildup of solids or debris that could obstruct the pump or float switch.
- Pump Operation: Listen for unusual noises during pump operation, which could indicate a problem.
Annual Inspection (Recommended by a Qualified Professional)
- Impeller: Inspect the pump impeller for wear or blockages.
- Check Valve: Verify the check valve is functioning correctly to prevent backflow.
- Electrical Connections: Inspect all electrical connections for corrosion or damage.
- Discharge Line: Ensure the discharge line is clear and free of obstructions.
Cleaning: If the pump or basin requires cleaning, disconnect power, remove the pump, and clean with appropriate tools and disinfectants. Wear proper PPE.
Troubleshooting
Before attempting any repairs, always disconnect power to the pump. Consult a qualified professional for complex issues.
| Problem | Possible Cause | Solution |
|---|---|---|
| Pump does not turn on. | No power; Float switch stuck or defective; Clogged impeller. | Check power supply/breaker; Inspect float switch for obstructions; Disconnect power and clear impeller. |
| Pump runs continuously. | Float switch stuck in "on" position; Check valve leaking; Constant inflow. | Inspect float switch; Check/replace check valve; Investigate source of constant inflow. |
| Pump runs but does not pump water. | Clogged discharge pipe; Air lock; Impeller damaged or clogged. | Clear discharge pipe; Bleed air from pump (if applicable); Disconnect power and inspect/clear impeller. |
| Pump is noisy. | Debris in pump; Worn bearings; Pump not seated properly. | Disconnect power and clear debris; Contact service for worn bearings; Re-seat pump. |
Warranty Information
The PROFLO PF93024 Submersible Sewage Pump Kit is covered under PROFLO's 3-year limited warranty. This warranty covers defects in materials and workmanship under normal use and service.
For full warranty terms and conditions, please refer to the official PROFLO warranty documentation provided with your purchase or visit the PROFLO website.
Proof of purchase is required for all warranty claims.
Customer Support
If you have any questions, require technical assistance, or need to report a problem with your PROFLO PF93024 pump, please contact PROFLO customer support.
For the most current contact information, please visit the official PROFLO website or refer to the packaging materials.
Online Resources: Visit the PROFLO Store on Amazon
Ask a question about this manual
Ask about setup, troubleshooting, compatibility, parts, safety, or missing instructions. Manuals+ will review the question and use this page’s manual context to help answer it.