1. Introduction
This instruction manual provides essential information for the proper use and maintenance of your USPEEDA Carburetor Repair Rebuild Kit. This kit is designed to restore optimal performance to compatible carburetors by replacing worn or damaged internal components. Please read this manual thoroughly before attempting any repairs to ensure safety and correct installation.
2. Compatibility
The USPEEDA Carburetor Repair Rebuild Kit is compatible with a wide range of Echo and Stihl chainsaw and trimmer models. Verify your specific model number against the lists below to ensure compatibility.
Compatible Echo Models:
- CS302, HC210, PB210, PB400, SRM4600, SRM4605
- 3100, 401 EVL, 452 VL, CS281, CS281 EVL, CS302S, CS304 VL, CS315, CS320T, CS340 EVL, CS351 VL, CS361, CS361 EVL, CSV361, CS362 EVL, CS370, CS400 EVL, CS-440, CS-440EVL, CS-4400, CS441, CS452 VL, CS350T, CS 3000, CS3050, CS3100, CS3400
Compatible Stihl Models:
- FS40, FS44, FS85, FS86, FS88, FS106 (K10-WAT carburetors)
- 009, 009AV, 010, 010AV, 011, 011AV, 020, 020AV, 020AVPS, 021, 023, 024, 024AV, 024S, 024SAV, 026, 028AV, 031AV, 032, 032AV, 1118, 1120, 1121
3. Kit Contents
Each USPEEDA Carburetor Repair Rebuild Kit includes the following components:
- 1x Carburetor Repair Kit (various gaskets, diaphragms, needles, springs, screens)
- 2x Primer Bulbs
- 1x Fuel Line
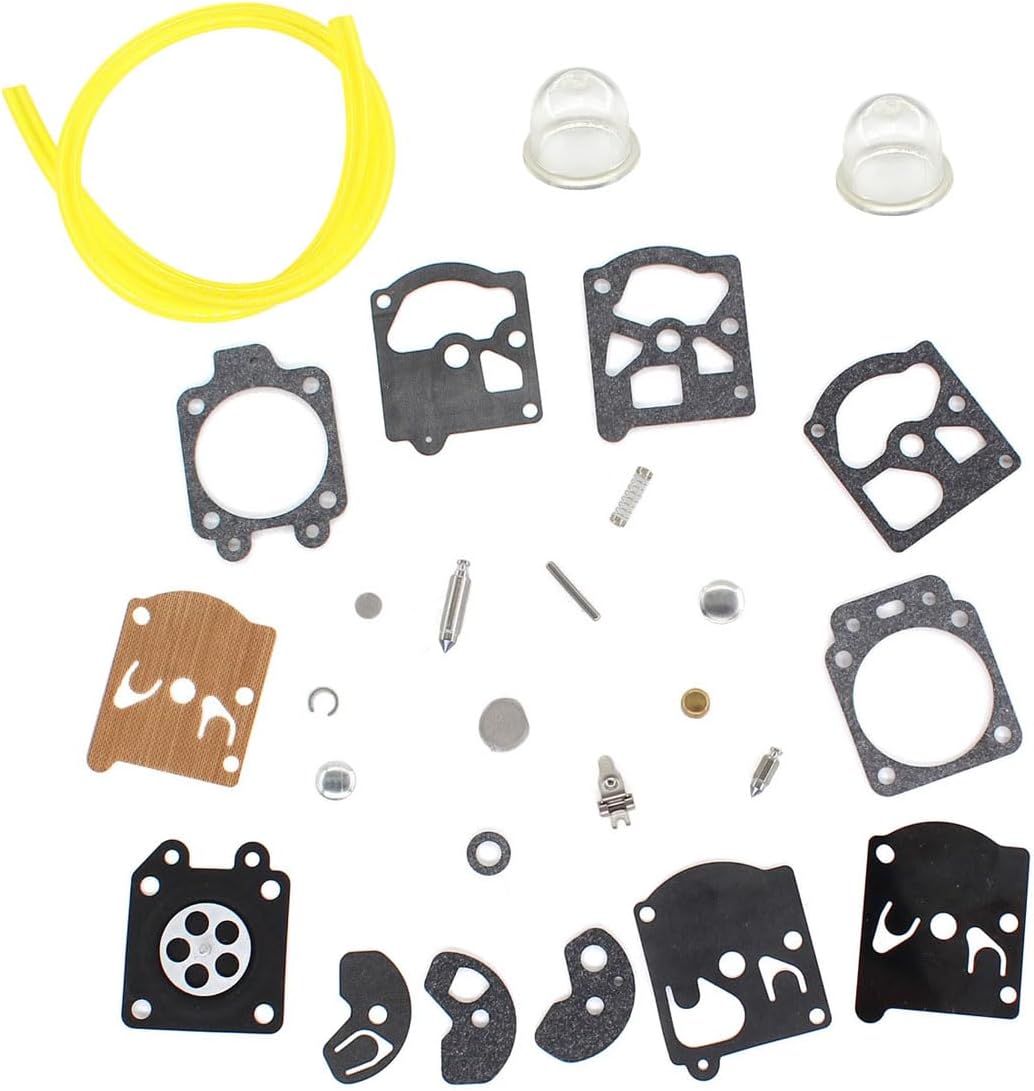
Figure 1: Overview of the complete USPEEDA Carburetor Repair Rebuild Kit, showing all included gaskets, diaphragms, needles, springs, screens, primer bulbs, and fuel line.
4. Installation Guide
Important Safety Note: Carburetor repair requires precision and familiarity with small engine mechanics. If you are unsure about any step, it is recommended to seek assistance from a qualified technician. Always disconnect the spark plug wire before beginning any work to prevent accidental starting.
General Carburetor Rebuild Steps:
- Preparation: Ensure the engine is cool. Clean the exterior of the carburetor thoroughly to prevent dirt from entering during disassembly.
- Disassembly: Carefully remove the carburetor from the engine. Take photos or make notes of the orientation of all parts, especially gaskets and diaphragms, before removal.
- Inspection: Inspect all removed parts for wear, cracks, or damage. Pay close attention to the fuel pump diaphragm, metering diaphragm, and inlet needle.
- Cleaning: Clean all metal parts of the carburetor using a carburetor cleaner. Ensure all passages are clear. Do not use wire or abrasive tools that could damage precision surfaces.
- Gasket and Diaphragm Replacement: Replace all old gaskets and diaphragms with the new ones from the kit. Ensure they are installed in the correct orientation. Refer to your specific carburetor's service manual for detailed diagrams if available.
- Inlet Needle and Lever: Replace the inlet needle and inspect the metering lever. Ensure the new needle seats properly.
- Primer Bulb and Fuel Line: Replace the old primer bulb(s) and fuel line with the new components provided in the kit. Ensure secure connections to prevent leaks.
- Reassembly: Reassemble the carburetor, ensuring all screws are tightened to the manufacturer's specifications. Do not overtighten.
- Reinstallation: Reinstall the carburetor onto the engine. Connect the fuel lines and throttle linkage.
- Testing and Adjustment: After reassembly, prime the carburetor and attempt to start the engine. Adjust the idle and mixture screws as necessary to achieve smooth operation. Refer to your engine's service manual for specific adjustment procedures.
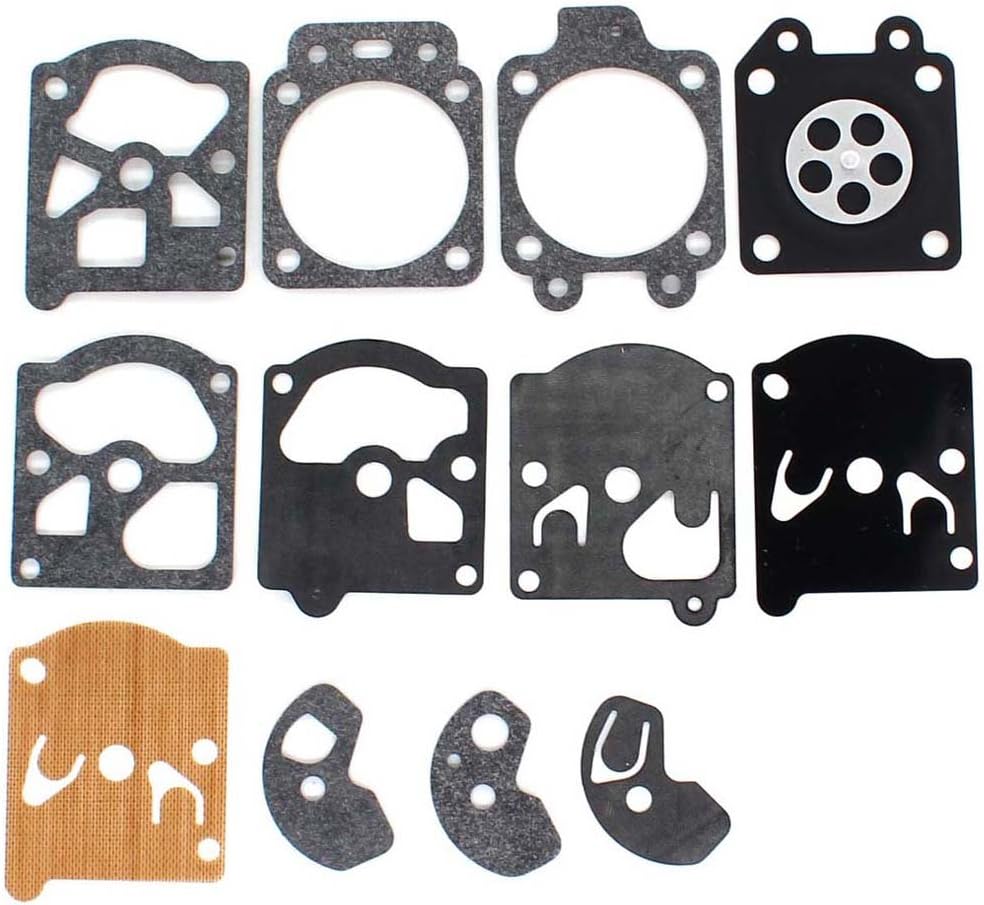
Figure 2: Close-up view of various gaskets and diaphragms included in the kit, essential for sealing and fuel regulation within the carburetor.
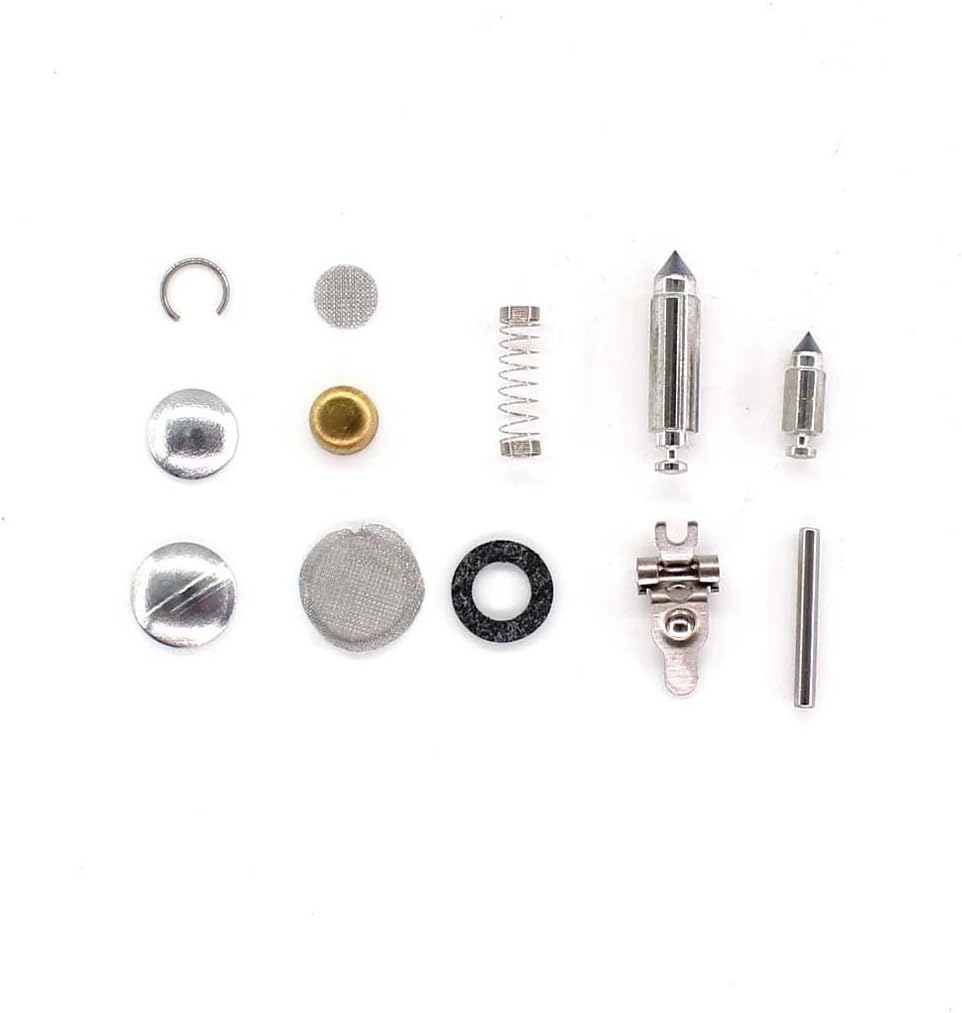
Figure 3: Detailed view of small components such as inlet needles, springs, and fuel screens, crucial for precise fuel delivery and filtration.
5. Maintenance
Regular maintenance helps extend the life of your carburetor and ensures reliable engine performance.
- Fuel Quality: Always use fresh, clean fuel mixed according to your engine manufacturer's specifications. Stale fuel can cause deposits and damage carburetor components.
- Fuel Filter: Regularly inspect and replace the fuel filter to prevent contaminants from reaching the carburetor.
- Air Filter: Keep the air filter clean to ensure proper air-fuel mixture and prevent dirt ingestion.
- Storage: Before long-term storage, run the engine until it runs out of fuel, or drain the fuel tank and carburetor to prevent gumming and corrosion.
- Primer Bulb Inspection: Periodically check primer bulbs for cracks or hardening, replacing them as needed to ensure proper priming.
6. Troubleshooting
Refer to the table below for common issues and potential solutions after installing the rebuild kit.
| Problem | Possible Cause | Solution |
|---|---|---|
| Engine not starting | No fuel reaching carburetor; incorrect primer bulb installation; clogged fuel line; incorrect carburetor assembly. | Check fuel level and quality. Ensure primer bulb is installed correctly and functioning. Inspect fuel line for kinks or clogs. Recheck carburetor assembly, especially diaphragms and inlet needle. |
| Engine runs poorly/stalls | Improper carburetor adjustment; air leak; clogged fuel filter; incorrect gasket installation. | Adjust idle and mixture screws. Check for air leaks around carburetor mounting. Replace fuel filter. Verify all gaskets are seated correctly. |
| Fuel leaks from carburetor | Damaged or improperly seated gasket/diaphragm; loose screws; faulty fuel line connection. | Inspect all gaskets and diaphragms for proper seating and damage. Tighten carburetor screws. Check fuel line connections for tightness. |
| Primer bulb not drawing fuel | Cracked primer bulb; clogged fuel line; air leak in fuel system. | Replace primer bulb if cracked. Clear fuel line. Check all fuel line connections for air leaks. |
7. Specifications
- Product Dimensions: 2.76 x 2.76 x 0.98 inches
- Item Weight: 0.8 ounces
- Manufacturer: USPEEDA
- Compatibility: Refer to Section 2 for a comprehensive list of compatible Echo and Stihl models.
8. Warranty and Support
For any questions regarding the USPEEDA Carburetor Repair Rebuild Kit, or for assistance with installation and troubleshooting, please contact USPEEDA customer support. While specific warranty details are not provided in this manual, USPEEDA is committed to customer satisfaction. Please retain your proof of purchase for any warranty claims.
For further support, please visit the official USPEEDA website or contact your retailer.