1. Introduction
This manual provides essential information for the installation, use, and maintenance of your JFG RACING Motorcycle Front Foot Pegs. Please read these instructions carefully before installation and retain them for future reference. These foot pegs are designed to offer a secure and comfortable foot placement for various motorcycle models.
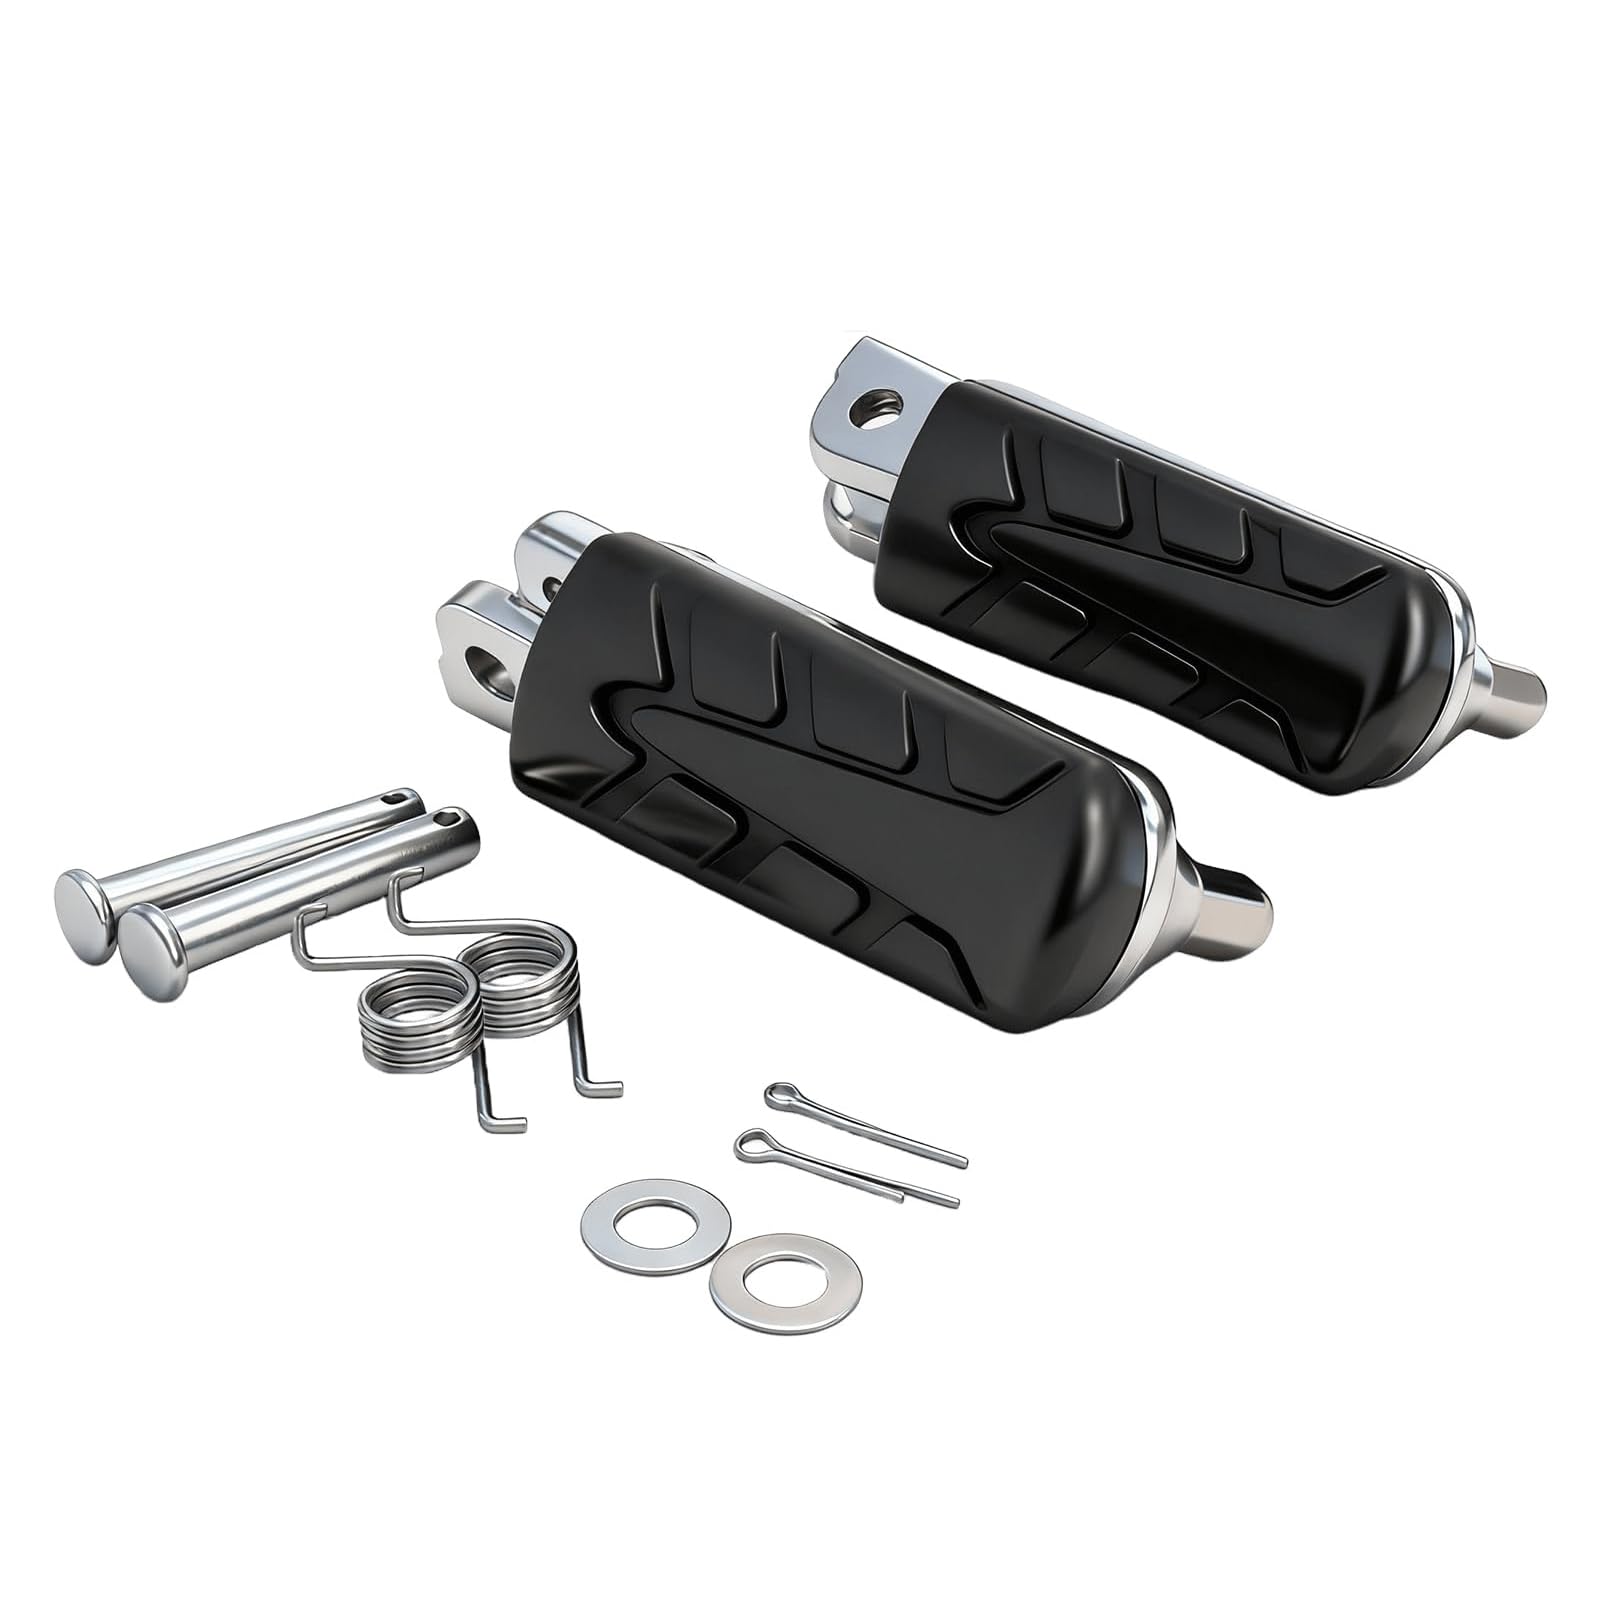
Figure 1.1: JFG RACING Motorcycle Front Foot Pegs.
2. Product Features
- Durable Construction: Manufactured from sturdy aluminum alloy and high-density rubber, ensuring excellent wear and corrosion resistance for extended product life.
- Enhanced Grip and Comfort: Features an anti-slip pattern and a rubber cushioning structure to improve foot stability, prevent slipping, and enhance overall riding comfort and safety.
- Easy Installation: Designed for direct mounting without requiring modifications, allowing for quick and effortless replacement of existing footrests.

Figure 2.1: Overview of JFG RACING Motorcycle Foot Pegs highlighting key features.

Figure 2.2: Detailed view of the foot peg materials and included hardware.
3. Compatible Models
These JFG RACING Front Foot Pegs are compatible with a wide range of motorcycle models. Please verify your motorcycle's model and year against the list below to ensure compatibility.

Figure 3.1: List of compatible motorcycle models.
- XL125 (2001-2005)
- CB250F (1996-2001)
- VT250F (1988-1990)
- VTR250 (1998-2003)
- CB400/CBR1100XX (1997-1998)
- CB400SF (1992-1996)
- NT400/650 NTV600 (1988-1992)
- CB500 (1993-2003)
- CBF500 (2004-2005)
- CBR500 (1987-1990)
- CB600F (1998-2002)
- CBR600F (1987-1998)
- NTV650 (1988-1997)
- CB750F (1992-2002)
- VFR800F (1998-2001)
- CB900F (2002-2005)
- CBR900RR (1992-1995)
- CB1000F (1993-1997)
- CBR1000F (1987-1999)
- VTR1000F (1997-2006)
- XL1000V (1999-2005)
- CB1100SF (2000-2003)
- CB1300 (1998-2008)
4. Installation Instructions
Installation of the JFG RACING Motorcycle Front Foot Pegs is designed to be straightforward. Follow these general steps for replacement:
- Preparation: Ensure your motorcycle is stable on a stand. Gather necessary tools (e.g., pliers, screwdriver, wrench).
- Remove Old Foot Pegs: Locate the pin that secures the existing foot peg to its bracket. Carefully remove the retaining clip (cotter pin) and then slide out the main pin. The old foot peg and spring should then come off.
- Install New Foot Pegs:
- Insert the new spring into the foot peg bracket, ensuring it is correctly oriented to provide tension.
- Align the new JFG RACING foot peg with the bracket and the spring.
- Insert the main pin through the bracket, spring, and foot peg.
- Secure the pin with the new retaining clip (cotter pin) provided. Ensure the clip is fully seated and secure.
- Check Functionality: Wiggle the foot peg to ensure it is securely attached and pivots correctly. Verify that the spring provides adequate tension to keep the foot peg in its upright position when not in use.
Note: Some users have reported that the included springs may not be perfectly compatible with all models. If the new springs do not fit correctly, it is recommended to reuse your original springs if they are in good condition.

Figure 4.1: Foot peg mounting point detail.
5. Maintenance
To ensure the longevity and optimal performance of your JFG RACING Motorcycle Front Foot Pegs, follow these maintenance guidelines:
- Regular Cleaning: Clean the foot pegs regularly with a mild soap and water solution to remove dirt, grime, and road debris. Avoid harsh chemicals that could damage the aluminum or rubber.
- Inspection: Periodically inspect the foot pegs for any signs of wear, damage, or looseness. Check the rubber for cracks or excessive wear, and the aluminum for bends or corrosion.
- Lubrication: Apply a small amount of grease or lubricant to the pivot points (pins) annually or as needed to ensure smooth movement and prevent corrosion.
- Tightness Check: Ensure all mounting hardware, including the pins and retaining clips, remains tight and secure. Re-tighten if necessary.
- Replacement: If any part of the foot peg assembly becomes significantly worn or damaged, replace it immediately to maintain safety.
6. Specifications
| Attribute | Detail |
|---|---|
| Brand | JFG RACING |
| Model Number | U11140028-D |
| Material | Aluminum Alloy, High-Density Rubber |
| Color | Black |
| Vehicle Service Type | Motorcycle |
| Fit Type | Vehicle Specific Fit |
| Orientation | Front |
| UPC | 730964769476, 730964769353 |
| ASIN | B07KXG5B8Q |

Figure 6.1: Foot peg dimensions.
7. Troubleshooting
This section addresses common issues you might encounter with your foot pegs.
- Foot Pegs Feel Loose:
- Check if the retaining clip (cotter pin) is fully inserted and bent to secure the main pin.
- Ensure the main pin is not bent or damaged.
- Verify that the spring is correctly installed and providing tension. If the provided spring is too small or incorrectly shaped, try using the original spring if it is still functional.
- Difficulty Installing Pin:
- Ensure the foot peg and spring are perfectly aligned with the bracket holes.
- Check for any burrs or obstructions in the pin holes on either the foot peg or the bracket.
- Foot Pegs Not Staying Upright:
- This is typically due to an incorrectly installed or weak spring. Re-install the spring, ensuring it provides sufficient tension. Consider using the original spring if it was stronger.
8. Warranty and Support
JFG RACING products are manufactured to high standards. While specific warranty details are not provided in this manual, for any issues, questions, or support needs regarding your foot pegs, please contact the retailer where you purchased the product or refer to the official JFG RACING website for customer service information.
When contacting support, please have your product model number (U11140028-D) and purchase details readily available.