1. Introduction
Thank you for choosing the VECTOR WELDING Tokyo 2300 Digital TIG/MMA Welder. This machine is designed for both TIG (Tungsten Inert Gas) and MMA (Manual Metal Arc) welding processes, offering robust performance for a variety of materials. With a powerful 200 Amp TIG welding capacity and 170 Amp electrode welding function, it is suitable for welding steel, stainless steel, titanium, magnesium, copper, and other metals. This manual provides essential information for safe and efficient operation, setup, maintenance, and troubleshooting.
2. Safety Instructions
Always prioritize safety when operating welding equipment. Failure to follow safety guidelines can result in serious injury or death. Read and understand all safety warnings before use.
- Personal Protective Equipment (PPE): Always wear a welding helmet with appropriate shade, flame-resistant clothing, welding gloves, and safety shoes.
- Ventilation: Ensure adequate ventilation to remove welding fumes, which can be hazardous to health.
- Fire Hazards: Keep flammable materials away from the welding area. Have a fire extinguisher readily available.
- Electrical Safety: Ensure the machine is properly grounded. Do not operate in wet conditions. Inspect cables for damage before each use.
- Eye and Skin Protection: Welding arcs emit intense UV and IR radiation that can cause severe burns to eyes and skin. Never look at the arc without proper eye protection.
- Children and Bystanders: Keep children and unauthorized personnel away from the welding area.
3. Product Overview
3.1. Main Unit and Components
The Tokyo 2300 Digital welder is a compact and portable unit designed for versatility. It comes with essential accessories to get you started.


Included Components:
- Tokyo 2300 Combined Welder
- WP-17 TIG Torch (4m hose, 10mm²)
- Ground Clamp (300A, 16mm², 2.5m cable)
- Electrode Holder (200A, 16mm², 2.5m cable)
- Gas Connection Hose (8 x 13.5, 2.5m)
- Nozzle Starter Kit
- Instruction Manual


3.2. Control Panel Introduction
Familiarize yourself with the control panel for effective operation.

- LED High-Definition Digital Display: Shows current welding parameters.
- Pulse Stop and Pulse Switching Button: Activates or deactivates the pulse function and switches between pulse modes.
- Welding Current and Conversion Parameter Adjustment: Knob for adjusting welding current and other parameters.
- "2T" and "4T" Selection Buttons: Toggles between 2-stroke and 4-stroke trigger modes for the TIG torch.
- Button to Read Data (JOB): Recalls saved welding settings.
- Save Button (SAVE): Stores current welding settings into memory.
- Welding Mode Selection Button: Switches between TIG and MMA welding modes.
- Positive Welding Connection: Connects the positive cable.
- Integrated Gas/Current Interface: Connection point for gas hose and TIG torch power.
- Negative Welding Connection: Connects the negative cable (ground clamp).
- 5-Pin Control Socket: For connecting external control devices or foot pedals (if compatible).
4. Setup
Proper setup is crucial for safe and effective welding.
4.1. Unpacking and Inspection
- Carefully remove all components from the packaging.
- Inspect the welder and all accessories for any signs of damage during transit. Do not operate if damaged.
- Ensure all listed components are present.
4.2. Connecting the TIG Torch
- Connect the TIG torch cable to the integrated gas/current interface (Item 9 on control panel).
- Secure the connection firmly.
4.3. Connecting the Ground Clamp
- Connect the ground clamp cable to the negative welding connection (Item 10 on control panel).
- Attach the ground clamp securely to the workpiece or welding table, ensuring good electrical contact.
4.4. Connecting the Electrode Holder (for MMA Welding)
- For MMA welding, connect the electrode holder cable to the positive welding connection (Item 8 on control panel).
4.5. Gas Cylinder Connection (for TIG Welding)
- Connect the gas connection hose to the gas inlet on the rear of the machine and to your inert gas cylinder (e.g., Argon).
- Ensure all gas connections are tight to prevent leaks. Use a gas regulator on the cylinder.
4.6. Power Connection
- Connect the power cord to a suitable 230 Volt mains power supply.
- Ensure the power supply can handle the machine's current requirements.
5. Operating Instructions
This section details the operation of the Tokyo 2300 Digital welder for both TIG and MMA processes.
5.1. General Operation
- Power On: Turn on the main power switch located on the rear of the machine. The digital display will illuminate.
- Mode Selection: Use the welding mode selection button (Item 7) to switch between TIG and MMA welding modes.
5.2. TIG Welding (DC)
The Tokyo 2300 offers advanced features for TIG welding up to 200 Amps.

- Current Setting: Use the adjustment knob (Item 3) to set the desired welding current, displayed on the LED screen (Item 1).
- Pulse Function: Activate the pulse function using the pulse button (Item 2). This feature helps reduce heat input on thin materials and improves weld bead appearance.
- Gas Pre-flow and Post-flow: The machine automatically manages gas pre-flow and post-flow times to protect the weld puddle and tungsten electrode.
- Up-slope and Down-slope Current: These functions control the gradual increase and decrease of welding current at the start and end of a weld, providing cleaner starts and finishes.
- 2T/4T Control: Select 2-stroke or 4-stroke trigger mode (Item 4) based on your preference. 2T requires holding the trigger, while 4T allows for continuous welding after a single press.
- High-Frequency (HF) Ignition: Provides non-contact arc starting, minimizing tungsten contamination.
- Memory Function: The machine features 9 memory slots. Use the SAVE button (Item 6) to store your preferred settings and the JOB button (Item 5) to recall them.
5.3. MMA (Electrode) Welding
The Tokyo 2300 supports MMA welding up to 170 Amps.
- Current Setting: Adjust the welding current using the knob (Item 3).
- Hotstart: This function provides an initial surge of current to ensure easy arc ignition, especially with difficult-to-start electrodes.
- Anti-Stick: Prevents the electrode from sticking to the workpiece by reducing the current if sticking occurs.
- ARC-Force: Automatically adjusts the welding current to maintain a stable arc, preventing the arc from extinguishing when the electrode gets too close to the workpiece.
5.4. Application Areas
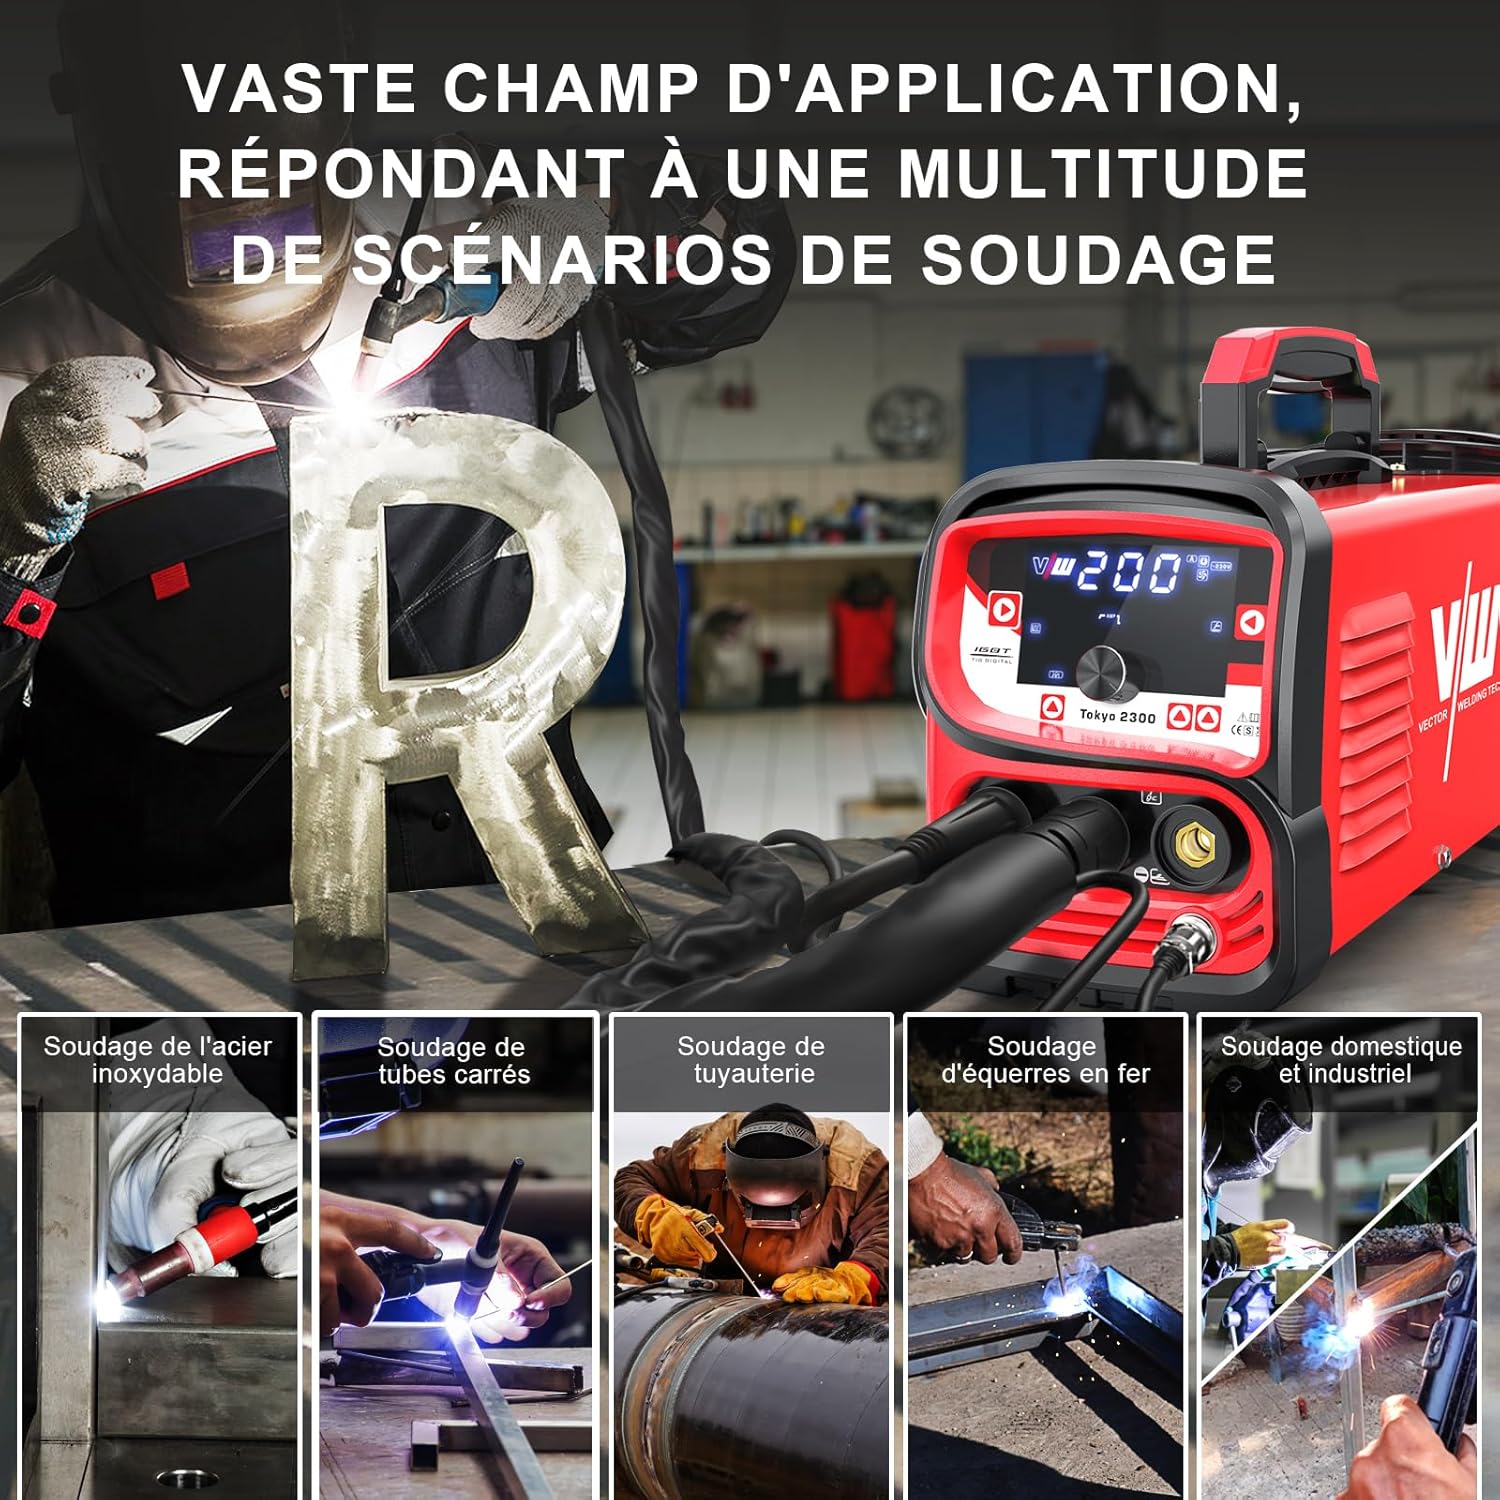
The Tokyo 2300 is versatile, capable of handling various welding scenarios:
- Welding of stainless steel
- Welding of square tubes
- Piping welding
- Iron welding
- Domestic and industrial welding tasks
6. Maintenance
Regular maintenance ensures the longevity and optimal performance of your welding machine.
- Cleaning: Periodically clean the machine's exterior and ventilation openings to prevent dust buildup, which can lead to overheating. Use compressed air to gently clear internal components if necessary, ensuring the machine is unplugged.
- Cable Inspection: Regularly inspect all welding cables, torch, ground clamp, and electrode holder for cuts, cracks, or loose connections. Replace damaged components immediately.
- Gas System Check: For TIG welding, check gas hoses and connections for leaks. Ensure the gas regulator is functioning correctly.
- Storage: Store the welder in a dry, clean environment, away from excessive dust and moisture.
7. Troubleshooting
This section addresses common issues you might encounter. For problems not listed here, contact customer support.
7.1. Common Issues and Solutions
| Problem | Possible Cause | Solution |
|---|---|---|
| No power/Machine does not turn on | Power cord unplugged, faulty power outlet, main switch off, internal fuse blown. | Check power connections, test outlet, ensure main switch is ON. Contact service if fuse is suspected. |
| No arc ignition (TIG) | Poor ground connection, incorrect gas flow, contaminated tungsten, wrong settings. | Ensure ground clamp is secure. Check gas supply and flow rate. Clean or replace tungsten. Verify TIG settings. |
| No arc ignition (MMA) | Poor ground connection, damp electrode, incorrect current setting. | Check ground connection. Use dry electrodes. Adjust current. |
| Poor weld quality | Incorrect current, improper technique, contaminated material, wrong gas/electrode. | Adjust current. Practice welding technique. Clean workpiece. Use correct consumables. |
| Overheating/Machine shuts down | Exceeded duty cycle, blocked ventilation, high ambient temperature. | Allow machine to cool down. Ensure clear ventilation. Operate in a cooler environment. |
7.2. Intelligent Protection Features

The Tokyo 2300 Digital is equipped with intelligent protection systems to ensure safety and durability:
- Overcurrent Protection: Automatically shuts down the machine if current exceeds safe limits.
- Overheat Protection: Activates if the internal temperature becomes too high, preventing damage to components.
- IGBT Technology: Utilizes advanced Insulated Gate Bipolar Transistor technology for stable and efficient performance.
- Efficient Heat Dissipation: Features a high-speed fan and optimized design for effective cooling.
8. Specifications
Technical specifications for the VECTOR WELDING Tokyo 2300 Digital TIG/MMA Welder.
| Feature | Specification |
|---|---|
| Manufacturer | VECTOR Welding |
| Model | Tokyo 2300 Digital |
| Product Dimensions (L x W x H) | 38 x 16 x 32 cm |
| Weight | 12.28 kg |
| Model Number (Reference) | T1050SIWM |
| Color | Red |
| Style | TIG Welder 200 A |
| Material | Metal |
| Power Type | Mains Power |
| Voltage | 230 Volts |
| TIG Welding Current | Up to 200 Amps |
| MMA Welding Current | Up to 170 Amps |
| Hose Length (General) | 3 Meters |
| Power Cord Length | 1 Meter |
| Plug Type | Surface-mounted |
| Special Features | Portable, Pulse Function, 2T/4T Control, Hotstart, Anti-Stick, ARC-Force, 9 Memory Slots |
| Batteries Included/Required | No |

9. Warranty and Support
VECTOR WELDING stands behind the quality of its products.
- Warranty: The VECTOR WELDING Tokyo 2300 Digital TIG/MMA Welder comes with a 5-year warranty. This warranty covers manufacturing defects and ensures reliable performance under normal operating conditions.
- Customer Support: For technical assistance, warranty claims, or any questions regarding your welder, please contact VECTOR WELDING customer service. Refer to the contact information provided on the product packaging or the official VECTOR WELDING website.