Introduction
This instruction manual provides essential information for the safe and effective installation, operation, and maintenance of your Aexit Rotary Changeover Switch, Model modle. Please read this manual thoroughly before using the product and retain it for future reference.
Product Overview
The Aexit Rotary Changeover Switch is designed for ON-OFF position control in various electrical circuits. It features a robust design with 10 screw terminals, making it suitable for applications such as circuit control, master control, testing equipment control, and as a change-over switch for electric welding machinery and other industrial equipment.
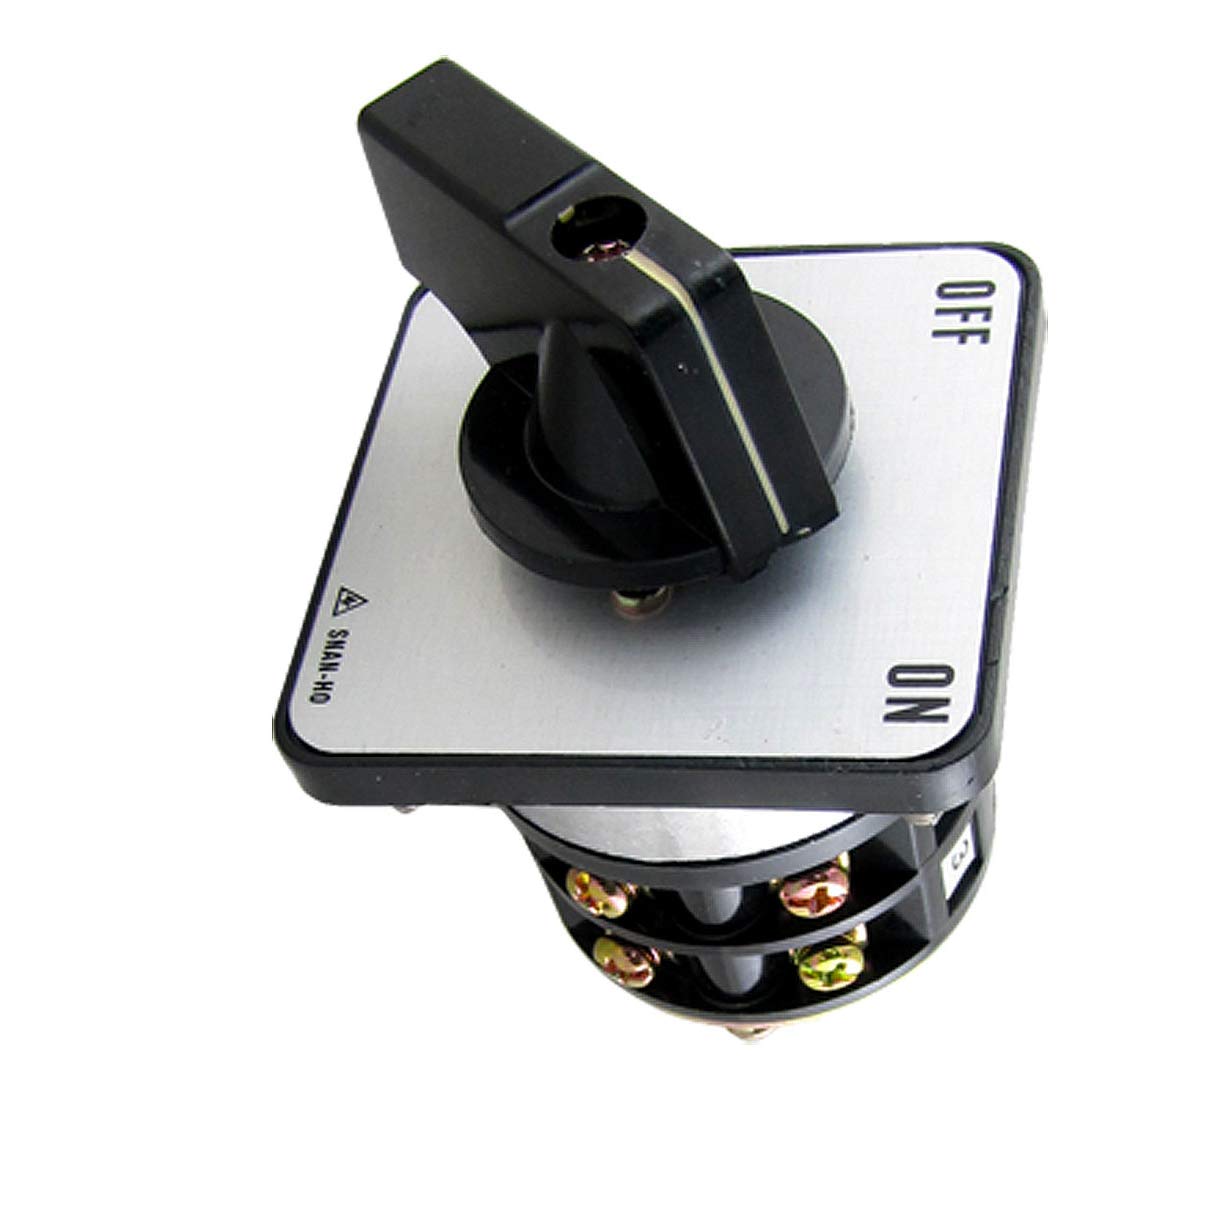
Image: Front view of the Aexit Rotary Changeover Switch, showing the main body, rotary handle, and terminal block area.
Specifications
| Feature | Detail |
|---|---|
| Product Name | Changeover Switch |
| Model Number | modle |
| Terminals Quantity | 10 |
| Contact Point | 2A |
| Operating Voltage (AC) | 250V, 600V |
| Current Rating (AC) | 10A (at 250V), 5A (at 600V) |
| Power Rating (AC) | 2.2kW (at 220V), 2.2kW (at 550V) |
| Operation Mode | ON-OFF |
| Switch Type | Rotary |
| Actuator Type | Rotary |
| Connector Type | Screw |
| Bottom Size (L x W) | 5 x 4.8 cm (2" x 1.89") |
| Plate Size (L x W x T) | 6.3 x 6.3 x 0.5 cm (2.5" x 2.5" x 0.2") |
| Handle Size (L x W x H) | 5 x 3.4 x 2.7 cm (2" x 1.3" x 1") |
| Screw Thread Diameter | 3.5 mm (0.137") |
| External Material | Plastic |
| Net Weight | 242g |
| Unit Count | 1.0 Count |
| Measurement System | Imperial, Metric |
Setup and Installation
Safety First: Always ensure that power to the circuit is disconnected before attempting any installation or wiring. Installation should only be performed by qualified personnel.
- Mounting: Secure the switch in the desired location using appropriate fasteners through the mounting holes on the switch plate. Ensure the switch is firmly attached to a stable surface.
- Wiring: Identify the 10 screw terminals. Refer to your specific circuit diagram for correct wiring connections. Each terminal is designed to accept standard electrical wires. Tighten screws securely to prevent loose connections.
- Verification: After wiring, double-check all connections for correctness and tightness. Ensure no bare wires are exposed.
- Power Restoration: Once installation is complete and verified, restore power to the circuit.
Operating Instructions
The Aexit Rotary Changeover Switch operates with a simple ON-OFF mechanism. The switch handle allows for manual selection between the two states.
- Switching ON: Rotate the handle to the 'ON' position. This will establish the electrical connection as per your circuit configuration.
- Switching OFF: Rotate the handle to the 'OFF' position. This will break the electrical connection, turning off the connected circuit or device.
- Indicator: The position of the handle clearly indicates the current state (ON or OFF) of the switch.
Ensure the switch is operated smoothly and without excessive force. Avoid rapid or forceful switching that could damage the internal mechanism.
Maintenance
The Aexit Rotary Changeover Switch is designed for durability and requires minimal maintenance. Regular inspection can help ensure its longevity and reliable operation.
- Cleaning: Periodically clean the external plastic surfaces with a soft, dry cloth. Do not use abrasive cleaners or solvents, as these may damage the plastic.
- Connection Check: Annually, or as required by your application, inspect the screw terminals to ensure all wire connections remain tight and free from corrosion. Always disconnect power before performing this check.
- Environmental Conditions: Ensure the switch is operated within its specified environmental conditions to prevent premature wear or failure.
Troubleshooting
This section addresses common issues you might encounter with the rotary changeover switch.
| Problem | Possible Cause | Solution |
|---|---|---|
| Switch does not operate (no power to circuit) | No power supply to the switch; Loose or incorrect wiring; Internal damage to switch. | Check main power supply; Verify all wiring connections are secure and correct (power off first!); If wiring is correct and power is present, the switch may be faulty and require replacement. |
| Handle is stiff or difficult to turn | Accumulation of dirt or debris; Internal mechanical issue. | Clean the exterior of the switch; Do not force the handle. If stiffness persists, the switch may need replacement. |
| Overheating or burning smell | Overload; Loose connections; Incorrect voltage/current. | Immediately disconnect power. Check the load against the switch's specifications; Inspect wiring for loose connections; Ensure operating voltage and current are within specified limits. Replace switch if damaged. |
For issues not listed here or if troubleshooting steps do not resolve the problem, please contact Aexit customer support.
Warranty and Support
Aexit products are manufactured to high-quality standards. For information regarding warranty coverage, please refer to the warranty card included with your purchase or visit the official Aexit website. For technical support or further assistance, please contact Aexit customer service through their official channels.