Introduction
Thank you for choosing the FISHTEC Weather Station S2576. This device provides essential information such as time, date, day of the week, indoor temperature, humidity, and weather trend forecasts. It also includes an alarm clock with a snooze function and a sound control feature for display activation. Please read this manual carefully to ensure proper use and maintenance of your weather station.

Figure 1: Front view of the FISHTEC Weather Station S2576, displaying time, temperature, humidity, and weather forecast icons.
Package Contents
- FISHTEC Weather Station S2576
- USB Power Cable
- Instruction Manual (this document)
Setup
Power Supply
The weather station can be powered by two methods:
- USB Cable: Connect the provided USB cable to the DC 5V port on the back of the unit and plug the other end into a compatible USB power adapter (not included) or a USB port.
- Batteries: Insert 2 AAA batteries (not included) into the battery compartment on the back of the unit. Ensure correct polarity.
When powered by batteries, the display will activate for a short period with sound control (clapping or tapping) to conserve power. For continuous display illumination, use the USB power cable.

Figure 2: Rear view of the weather station illustrating the battery compartment and USB power connection points.
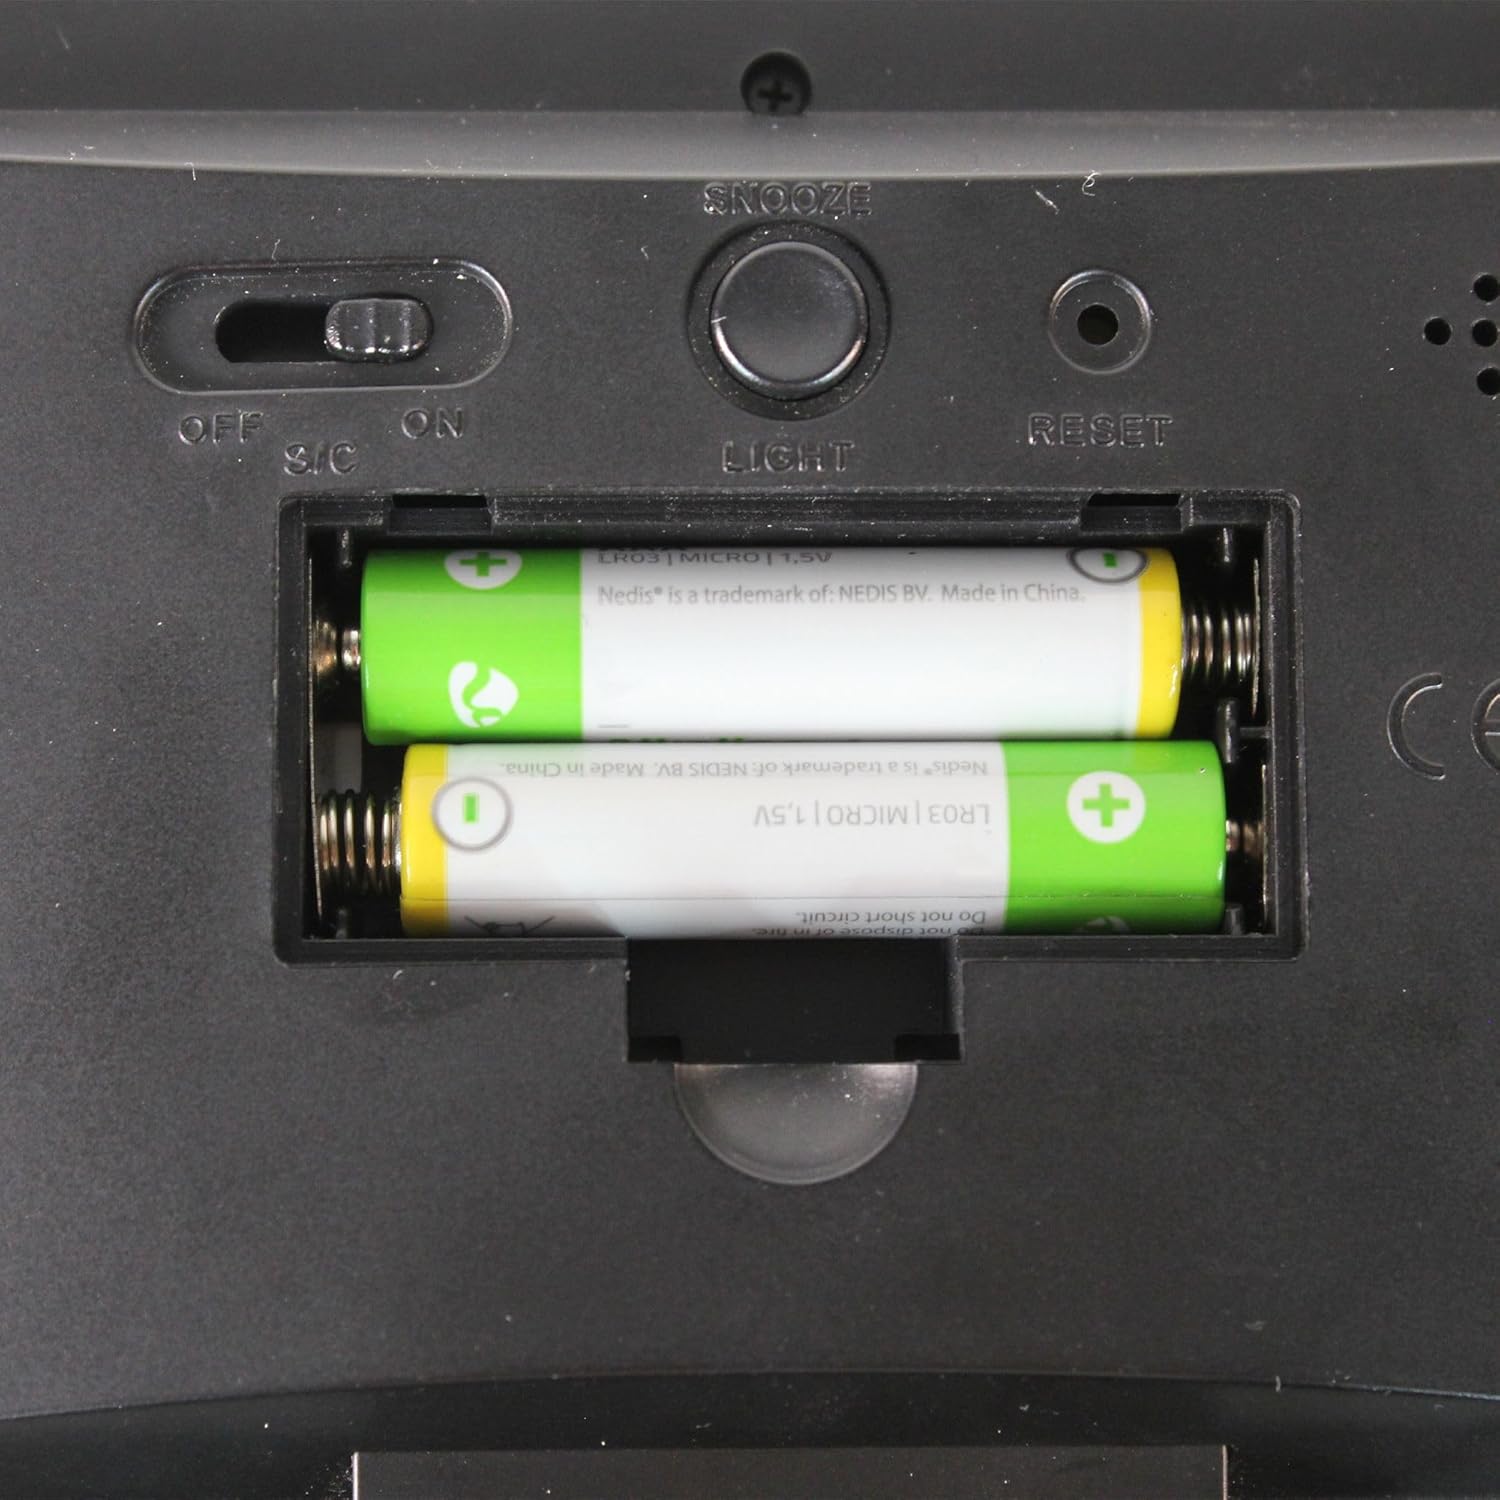
Figure 3: Detailed view of the battery compartment with AAA batteries correctly installed.
Initial Power On
After connecting power, the display will light up, and the device will be ready for initial settings.
Operating Instructions
The weather station features several buttons on the front panel for easy operation:
- MODE: Used to switch between display modes and enter setting modes.
- A12/24: Toggles between 12-hour and 24-hour time format.
- °C/°F: Switches between Celsius and Fahrenheit temperature units.
- MAX/MIN: Displays maximum and minimum temperature/humidity records.
- SNZ (Snooze): Activates the snooze function when the alarm sounds.

Figure 4: The weather station positioned on a windowsill, highlighting the clear LCD display and accessible control buttons.
Setting Time and Date
- Press and hold the MODE button to enter time setting mode.
- Use the A12/24 and °C/°F buttons to adjust the values (e.g., hours, minutes).
- Press MODE again to confirm and move to the next setting (e.g., date, year).
- Repeat until all settings are complete.
Alarm and Snooze Function
- Press the MODE button repeatedly until the alarm setting icon appears.
- Press and hold MODE to enter alarm time setting.
- Use A12/24 and °C/°F to set the desired alarm time.
- Press MODE to confirm.
- When the alarm sounds, press the SNZ button to activate snooze. The alarm will sound again after a few minutes.
- To turn off the alarm, press any other button or let it ring for its full duration.
Temperature and Humidity Display
The display shows current indoor temperature and humidity. It also tracks minimum and maximum values over a period.
- Press the °C/°F button to switch between Celsius and Fahrenheit.
- Press the MAX/MIN button to view the recorded maximum and minimum temperature and humidity values. Press again to cycle through or clear records.
Weather Trend Forecast
The weather station uses animated pictograms to indicate weather trends. These are based on internal atmospheric pressure changes over the last 12 hours and are for informational purposes only, not a professional forecast.
Sound Control (S/C) Feature
The sound control feature allows the display to light up temporarily when a sound (like a clap or tap) is detected. This feature is primarily active when the device is battery-powered to conserve energy. It can be enabled or disabled via a switch on the back of the unit.

Figure 5: Rear view of the weather station, indicating the location of the Sound Control (S/C) switch.
Maintenance
- Clean the device with a soft, dry cloth. Do not use abrasive cleaners or solvents.
- Avoid exposing the device to extreme temperatures, direct sunlight, or high humidity.
- If using batteries, remove them if the device will not be used for an extended period to prevent leakage.
Troubleshooting
| Problem | Possible Cause | Solution |
|---|---|---|
| Display is blank or dim. | No power, low batteries, or S/C switch is OFF (if battery powered). | Check USB cable connection. Replace batteries. Ensure S/C switch is ON for sound control activation. |
| Incorrect time/date. | Time/date not set correctly. | Refer to "Setting Time and Date" section to adjust. |
| Alarm not sounding. | Alarm not set or volume too low. | Ensure alarm is set and activated. Check for any volume controls (if applicable, though not specified for this model). |
| Weather forecast seems inaccurate. | Weather forecast is based on internal pressure changes and is an indication of trends, not a precise prediction. | This is normal operation. The device provides trends, not real-time external forecasts. |
Specifications
| Model Number | S2576 |
| Material | Acrylonitrile Butadiene Styrene (ABS) |
| Color | Black |
| Dimensions | 14.5 cm (L) x 11 cm (H) x 2 cm (D) |
| Weight | 165 grams |
| Power Source | Battery-powered (2x AAA, not included), Wired (USB cable included) |
| Display Type | LCD |
| Special Features | Large display, Sound control, Alarm, Snooze, Temperature/Humidity display, Weather trend forecast |
| Included Components | USB cable |
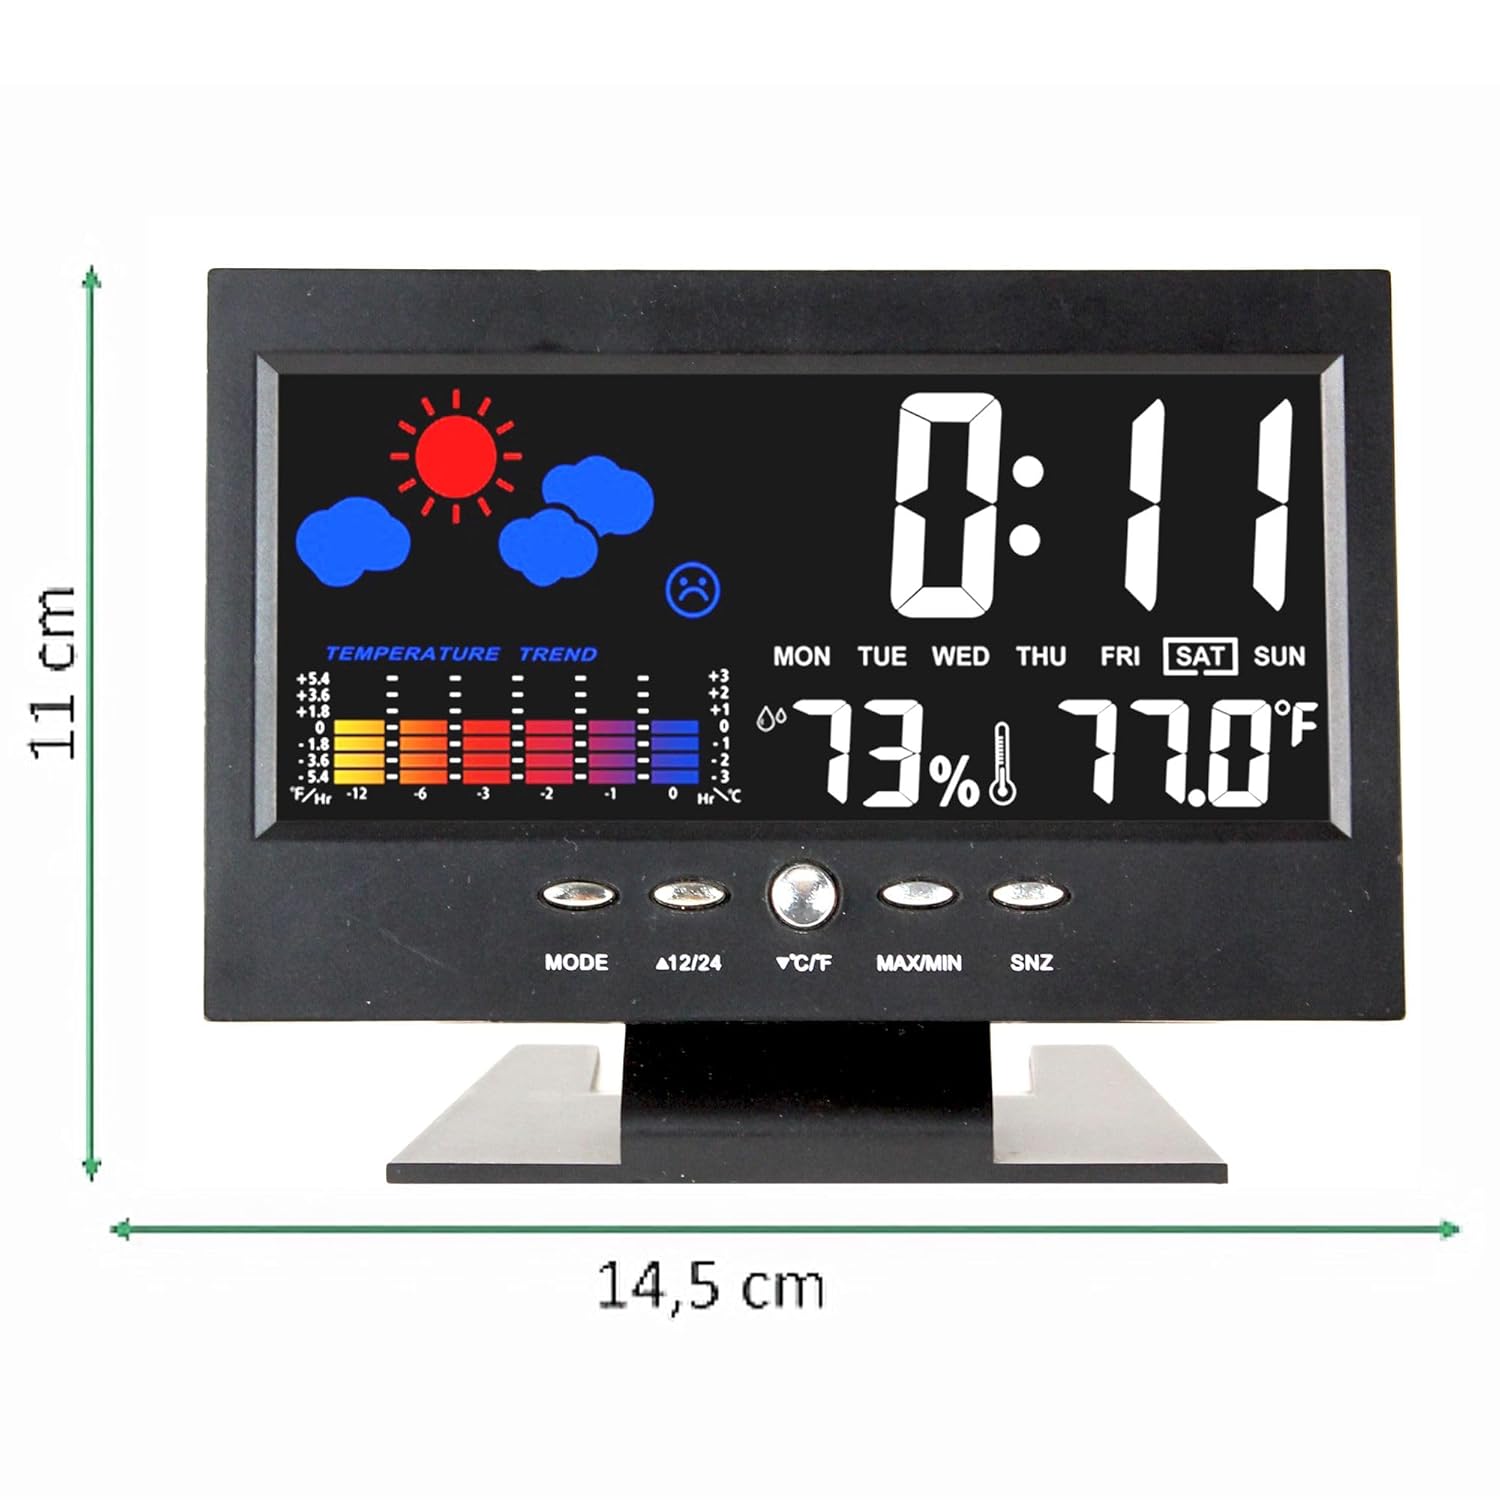
Figure 6: Dimensions of the FISHTEC Weather Station S2576.
Warranty and Support
This FISHTEC product comes with a 2-year warranty from the date of purchase. Please retain your proof of purchase for warranty claims.
For technical support or warranty inquiries, please contact your retailer or visit the official Fishtec website for contact information.
