1. Introduction
The CKL 4K KVM Switch Dual Monitor is designed to allow control of up to two computers or laptops using a single set of USB keyboard, mouse, and two monitors. This device supports extended or duplicated display configurations with dual HDMI inputs, providing a streamlined workspace solution. It is compatible with various operating systems and offers multiple switching methods for user convenience.

Image 1.1: The CKL 4K KVM Switch Dual Monitor, showcasing the main unit and the various cables included in the package.
2. Package Contents
Please verify that all items are present in your package:
- 1 x CKL 4K KVM Switch Dual Monitor (Model CKL-922HUA)
- 1 x DC 5V Power Adapter
- 2 x KVM Cables (Cable Labeled as A - HDMI + USB + Audio/Mic)
- 2 x HDMI Cables (Cable Labeled as B - for second monitor connection)
- 1 x Wired Remote Switch
- 1 x User Manual (this document)

Image 2.1: Visual representation of the KVM switch and its accompanying accessories, including the power adapter, wired remote, and connection cables.
3. Product Features
- Dual Monitor KVM Switch: Controls two computers with one set of keyboard, mouse, and two monitors, supporting extended or duplicated displays.
- Wide Compatibility: Supports Windows 10/7/2000/XP, Mac, and other HDMI devices such as webcams, hard disk players, game consoles, DVRs, and NVRs.
- Multiple Switching Modes: Includes hotkey switching, mouse click switching, front panel toggle selection, auto scan switch with adjustable interval (8-999 seconds), and wired remote switch.
- Driver-Free & USB 2.0 Hub: Plug and play functionality with no drivers required. Features an extra USB 2.0 port for sharing peripherals like printers, scanners, and jump drives.
- 4K HDMI Support with Audio & EDID: Delivers high-definition visuals up to 4K@30Hz with built-in Auto EDID. Supports separate audio and microphone output.
- Durable Design: Constructed with a heavy-weight, high-end anti-interference metal casing for enhanced sturdiness.
4. Product Diagram and Overview
Familiarize yourself with the ports and indicators on the KVM switch.

Image 4.1: Detailed view of the KVM switch's front and rear panels, labeling all input/output ports, control buttons, and LED indicators.
Front Panel:
- PC 1 Selector / PC 2 Selector: Buttons to manually switch between connected computers.
- LED for Selected Port: Indicates which computer is currently active.
- Hotkey On/Off: Switch to enable or disable hotkey functionality.
- Hotkey Indicator: LED to show hotkey status.
- Micro USB port for wired remoter: Connection for the included wired remote switch.
- USB 2.0 HUB: Ports for connecting USB peripherals.
- Speaker Output: 3.5mm audio jack for speakers.
- Microphone Input: 3.5mm audio jack for a microphone.
Rear Panel:
- DC5V Power Input: For connecting the power adapter.
- ON/OFF Switch: Power toggle for the KVM unit.
- Mouse Port: Dedicated USB port for mouse connection.
- Keyboard Port: Dedicated USB port for keyboard connection.
- Monitor A Out / Monitor B Out: HDMI outputs for connecting your two monitors.
- PC 1 IN (A) / PC 2 IN (A): HDMI and USB inputs for Computer 1 and Computer 2 (using Cable A).
- PC 1 IN (B) / PC 2 IN (B): HDMI inputs for the second monitor connection for Computer 1 and Computer 2 (using Cable B).
5. Setup and Connection
Follow these steps to correctly set up your CKL KVM Switch:
- Power Off Devices: Ensure all computers and monitors are powered off before making any connections.
- Connect Monitors to KVM: Connect your two monitors to the KVM switch's Monitor A Out and Monitor B Out HDMI ports using standard HDMI cables.
- Connect Computers to KVM (Cable A): For each computer (PC 1 and PC 2), use one of the provided KVM cables (labeled 'A').
- Plug the HDMI end of Cable A into the corresponding PC IN (A) port on the KVM (e.g., PC 1 IN (A) for Computer 1).
- Plug the other end of Cable A (HDMI, USB, Audio, Mic) into your computer's HDMI output, a USB 2.0 port, and its audio/microphone jacks. Note: Ensure the USB connection is made to a USB 2.0 port on your computer for proper keyboard/mouse functionality. USB 3.0 ports may not work reliably for this connection.
- Connect Computers to KVM (Cable B): For each computer (PC 1 and PC 2), use one of the provided HDMI cables (labeled 'B').
- Plug one end of Cable B into the computer's second HDMI output.
- Plug the other end of Cable B into the corresponding PC IN (B) port on the KVM (e.g., PC 1 IN (B) for Computer 1).
- Connect Keyboard and Mouse: Connect your USB keyboard to the Keyboard Port and your USB mouse to the Mouse Port on the rear panel of the KVM switch.
- Connect Peripherals (Optional): Connect any additional USB peripherals (e.g., printer, scanner, USB drive) to the USB 2.0 HUB ports on the front panel.
- Connect Audio (Optional): Connect your speakers to the Speaker Output and your microphone to the Microphone Input on the front panel.
- Power On KVM: Connect the DC 5V power adapter to the KVM switch and plug it into a power outlet. Turn the KVM switch ON using the rear panel switch.
- Power On Computers and Monitors: Power on your computers and monitors. The KVM switch should automatically detect the active computer.

Image 5.1: A comprehensive diagram illustrating the correct cabling for connecting two computers, two monitors, and shared peripherals to the KVM switch.

Image 5.2: Visual guide detailing how to achieve dual monitor display and ensure keyboard and mouse functionality by correctly connecting Cable A and Cable B.
6. Operating Instructions
The CKL KVM Switch offers several methods for switching between connected computers:
- Front Panel Button Switching: Press the 'SELECT' buttons (1 or 2) on the front panel to switch to the desired computer. The corresponding LED will illuminate.
- Hotkey Switching: Use keyboard hotkeys to switch between computers. Refer to the specific hotkey combinations in the detailed manual (usually Scroll Lock + Scroll Lock + 1/2 or similar). Ensure the 'Hotkey On/Off' switch on the front panel is enabled.
- Mouse Click Switching: This KVM switch supports switching via mouse clicks. Consult the detailed manual for specific mouse gestures or button combinations.
- Wired Remote Switch: Use the included wired remote control for one-touch switching between computers. Connect the remote to the 'Micro USB port for wired remoter' on the front panel.
- Auto Scan Switch: The KVM can be configured to automatically cycle through connected computers at a set interval (8-999 seconds). Refer to the detailed manual for instructions on enabling and configuring auto scan.
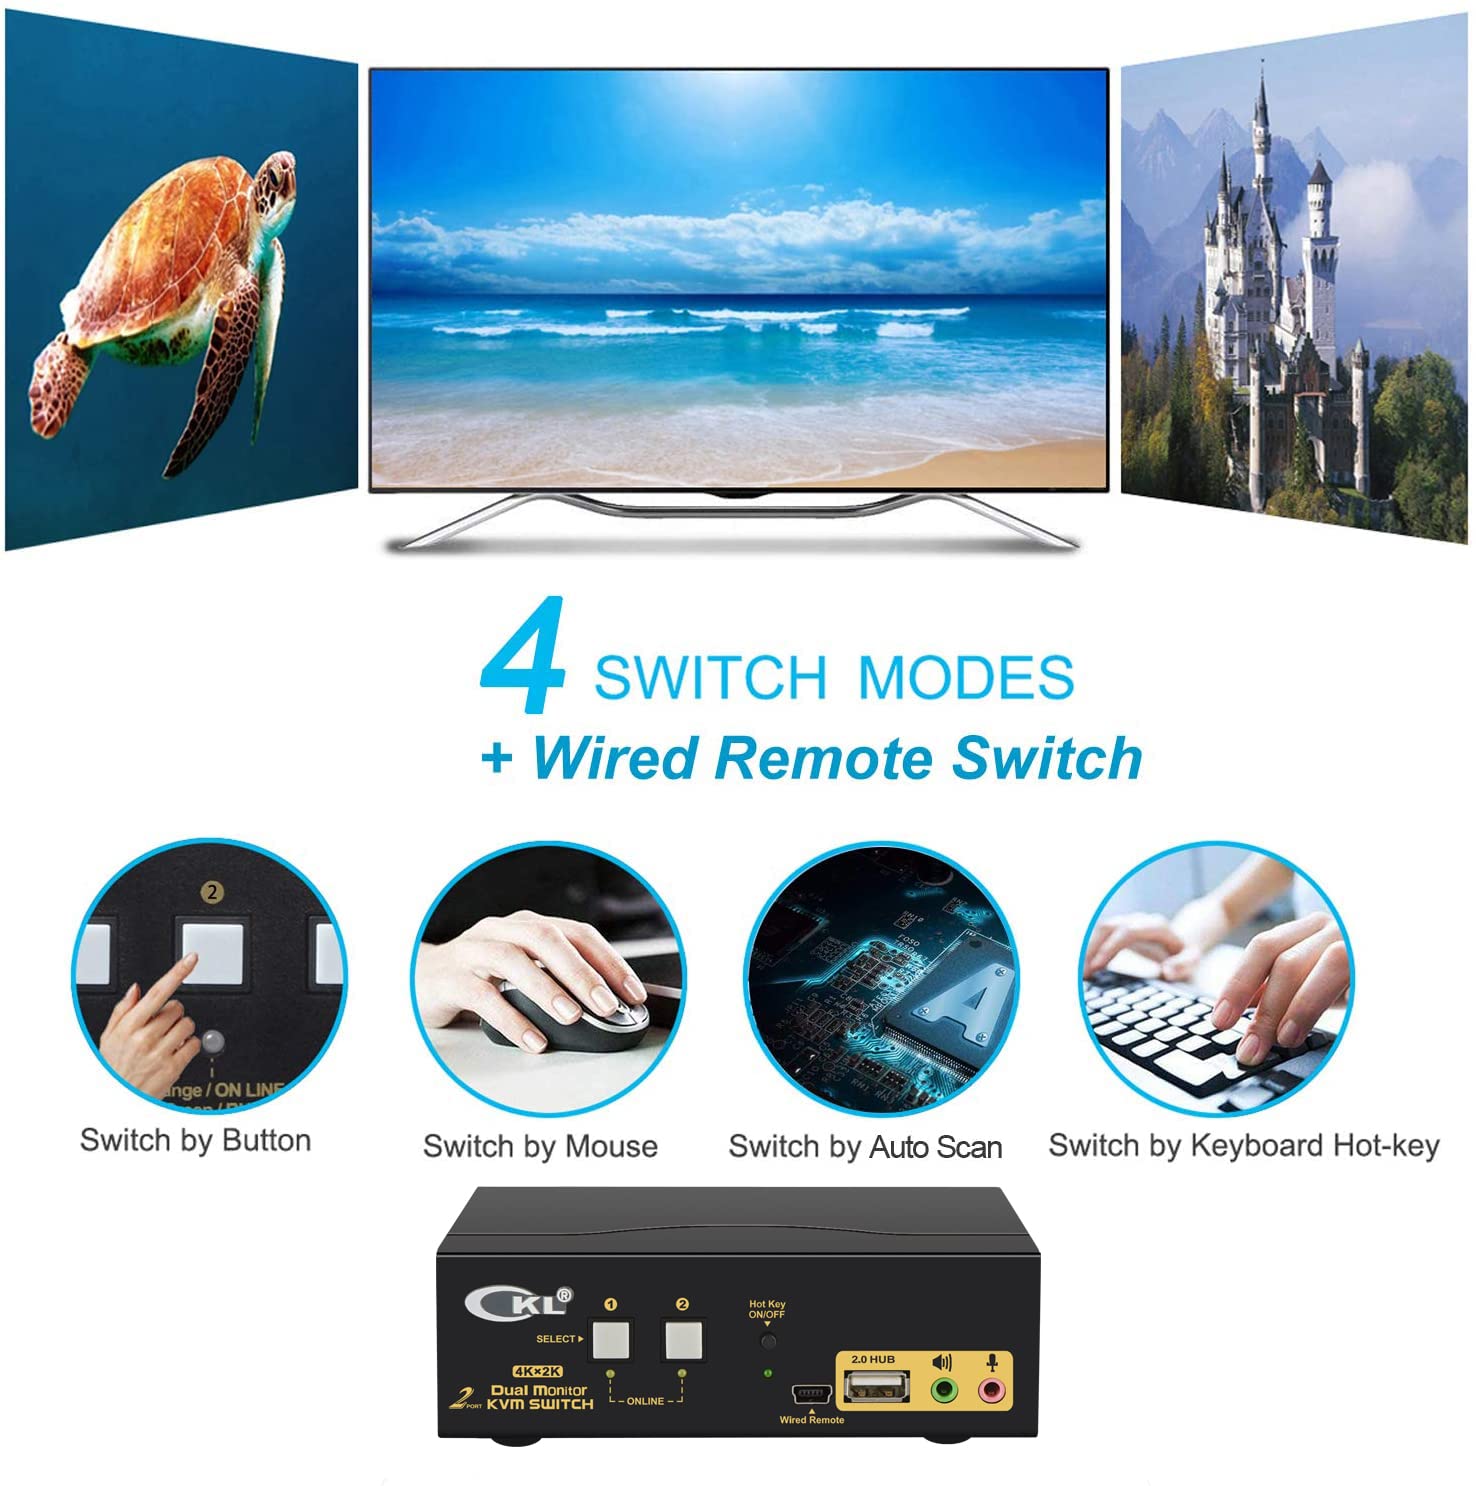
Image 6.1: An overview of the five available methods for switching between connected computers, including front panel buttons, mouse, auto scan, keyboard hotkeys, and the wired remote.
7. Compatibility
The CKL KVM Switch is designed for broad compatibility with various operating systems and devices:
- Operating Systems: Fully compatible with Windows 10, Windows 7, Windows 2000, Windows XP, Windows NT, DOS, UNIX, Linux, Ubuntu, Mac OS, and Raspberry Pi.
- HDMI Devices: Supports a wide range of HDMI-enabled devices including webcams, hard disk players, game consoles, DVRs, and NVRs.
- Plug and Play: No drivers are required for installation. The device functions immediately upon connection.

Image 7.1: Visual representation of the KVM switch's compatibility with various operating systems, highlighting its plug-and-play nature.
8. Specifications
| Feature | Detail |
|---|---|
| Model Number | CKL-922HUA |
| Product Dimensions | 5.12 x 2.95 x 1.65 inches |
| Weight | 2.51 Pounds |
| Video Resolution | Up to 4K@30Hz |
| Operation Mode | Toggle |
| Current Rating | 2 Amps |
| Operating Voltage | 5 Volts |
| Connector Type | HDMI, USB |
| Mounting Type | Plug In Mount |
9. Troubleshooting
If you encounter issues with your CKL KVM Switch, refer to the following common troubleshooting steps:
- No Display on Monitors:
- Ensure all HDMI cables (Cable A and Cable B for each PC, and monitor outputs) are securely connected.
- Verify that the KVM switch is powered on and the correct PC input is selected.
- Check monitor input sources to ensure they are set to the correct HDMI input.
- Try restarting the KVM switch by powering it off and then on again.
- Ensure your computer's display settings are configured for extended or duplicated displays.
- Keyboard/Mouse Not Responding:
- Confirm that the USB ends of Cable A for each computer are plugged into a USB 2.0 port on the respective computer. USB 3.0 ports may cause compatibility issues.
- Ensure your keyboard and mouse are connected to the dedicated Keyboard Port and Mouse Port on the KVM's rear panel.
- If using a wireless keyboard/mouse, try connecting its receiver to one of the USB 2.0 HUB ports on the front panel if the dedicated ports do not work.
- Restart the KVM switch and the computers.
- Test the keyboard and mouse directly connected to the computer to rule out device issues.
- Audio/Microphone Not Working:
- Ensure the audio/microphone jacks of Cable A are connected to the corresponding ports on your computer.
- Verify that speakers/microphone are connected to the correct ports on the KVM's front panel.
- Check your computer's sound settings to ensure the KVM's audio device is selected as the default.
- Intermittent Issues or Glitches:
- A simple power cycle (turning the KVM off and on) can often resolve temporary glitches.
- Ensure all cables are of good quality and securely connected.
- Avoid frequently switching back and forth rapidly, as this can sometimes lead to temporary display issues.
10. Maintenance
To ensure the longevity and optimal performance of your CKL KVM Switch, follow these maintenance guidelines:
- Cleaning: Use a soft, dry cloth to clean the exterior of the KVM switch. Avoid using liquid cleaners or aerosols, which can damage the device.
- Ventilation: Ensure the KVM switch is placed in a well-ventilated area to prevent overheating. Do not block any ventilation openings.
- Cable Management: Keep cables organized and free from kinks or excessive bending to prevent damage.
- Power Supply: Use only the provided DC 5V power adapter. Using an incompatible power supply can damage the device.
- Storage: When not in use for extended periods, store the KVM switch in a cool, dry place away from direct sunlight and extreme temperatures.
11. Warranty and Support
For warranty information and technical support, please refer to the official CKL website or contact CKL customer service directly. Details regarding product registration, warranty periods, and support channels are typically available through these official resources.
You can also find additional support and resources on the CKL Store on Amazon.