1. Introduction
This manual provides detailed instructions for the installation, usage, and maintenance of The Original Granite Bracket Heavy Duty Alloy Steel T Shelf Bracket, 30 Inch. This bracket is designed to provide concealed support for various applications, including floating shelves, mantels, desks, and more. Please read all instructions carefully before beginning installation to ensure proper and safe use of the product.
2. Product Overview
The Original Granite Bracket T Shelf Bracket is a robust support solution crafted from alloy steel, finished in matte black paint. Its design allows for a seamless, concealed installation, creating a floating appearance for your chosen surface. Each bracket is sold individually, allowing you to purchase the exact quantity required for your project.
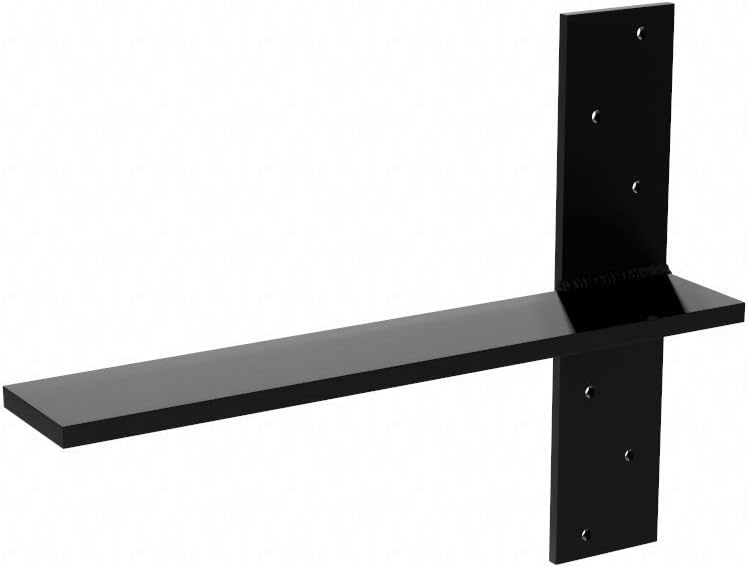
Image 2.1: A single 30-inch Alloy Steel T Shelf Bracket in matte black finish.

Image 2.2: Diagram illustrating the dimensions of the T Shelf Bracket, showing horizontal length, vertical mounting plate height, and material thickness.
Key Features:
- Material: Heavy-duty Alloy Steel for strength and durability.
- Finish: Matte Black Paint for a sleek appearance and corrosion resistance.
- Design: T-shaped for concealed support, creating a floating aesthetic.
- Versatility: Suitable for floating shelves, mantels, hearths, desks, shower benches, and floating vanities.
- Individual Sale: Brackets are sold per unit; ensure you order the correct quantity for your project.
3. Safety Information
Adherence to safety guidelines is crucial during installation and use. Failure to do so may result in injury or damage to property.
- Always wear appropriate personal protective equipment (PPE), including safety glasses and gloves, during installation.
- Ensure the mounting surface (wall studs, concrete, etc.) is structurally sound and capable of supporting the combined weight of the brackets, the shelf/surface, and any items placed upon it.
- Use appropriate fasteners for your specific wall type. The included screws are suitable for wood studs. Consult a professional if unsure about your wall structure or fastener requirements.
- Do not overload the installed shelf or surface beyond its rated capacity.
- Keep children and pets away from the work area during installation.
4. Setup and Installation
Proper installation is key to the stability and safety of your floating surface. These brackets are designed to be mounted directly to wall studs for maximum support. It is often easiest to install these brackets before drywall is applied, but they can also be installed into existing walls with careful planning.
Tools and Materials Required (Not Included):
- Stud finder
- Level
- Measuring tape
- Pencil
- Drill with appropriate drill bits (for pilot holes)
- Socket wrench or impact driver (for lag screws)
- Safety glasses and gloves
- The surface material (shelf, countertop, mantel) you intend to support
Installation Steps:
- Determine Bracket Placement: Identify the desired location for your floating surface. Use a stud finder to locate and mark the center of the wall studs where each bracket will be mounted. Ensure the spacing between brackets is appropriate for the length and weight of your surface material. For optimal support, brackets should be spaced no more than 16-24 inches apart, depending on the load.
- Mark Mounting Holes: Hold the vertical mounting plate of the bracket against the wall, aligning it with the marked stud centers. Use a level to ensure the bracket is perfectly vertical. Mark the locations for the mounting screws through the pre-drilled holes on the bracket's vertical plate.
- Drill Pilot Holes: Using a drill bit slightly smaller than the diameter of your lag screws, drill pilot holes at the marked locations. Ensure the pilot holes are deep enough to accommodate the full length of the lag screws.
- Mount the Brackets: Position the bracket against the wall, aligning the holes with the pilot holes. Insert the lag screws (included) and tighten them securely using a socket wrench or impact driver. Do not overtighten. Repeat for all brackets, ensuring they are level and aligned with each other.

Image 4.1: Two T Shelf Brackets securely mounted to wall studs, demonstrating proper vertical alignment.

Image 4.2: Side view of two T Shelf Brackets mounted to wall studs, showing the horizontal support arm extending outwards.
- Install Drywall (if applicable): If installing before drywall, proceed with drywall installation, cutting openings for the horizontal arms of the brackets to pass through.
- Attach Surface Material: Place your chosen surface material (shelf, countertop, etc.) onto the horizontal arms of the brackets. The brackets do not have pre-drilled holes on the horizontal arm for securing the surface. You may choose to secure the surface to the brackets using construction adhesive, silicone, or by drilling pilot holes through your surface material and into the bracket arms, then using appropriate screws (not included). Ensure the surface is level and securely attached to prevent movement.

Image 4.3: Multiple T Shelf Brackets providing concealed support for a floating countertop, illustrating the final aesthetic.

Image 4.4: View from below a countertop, showing two T Shelf Brackets providing robust, hidden support.
5. Usage
Once properly installed, The Original Granite Bracket T Shelf Bracket provides strong, concealed support for a variety of applications. It is ideal for creating a modern, minimalist look where visible supports are undesirable.
Applications:
- Floating shelves in kitchens, living rooms, or bathrooms.
- Mantels above fireplaces.
- Floating desks or workstations.
- Shower benches or floating vanity tops (ensure appropriate material choice for humid environments).
Always distribute weight evenly across the supported surface and avoid placing excessively heavy items on the edges or unsupported areas.
6. Maintenance
The Alloy Steel T Shelf Bracket requires minimal maintenance to ensure its longevity and appearance.
- Cleaning: Wipe the visible parts of the bracket with a soft, damp cloth. Avoid abrasive cleaners or harsh chemicals that could damage the matte black paint finish.
- Inspection: Periodically check the mounting screws for tightness. Over time, vibrations or heavy loads may cause screws to loosen. Retighten as necessary.
- Corrosion: While the matte black paint provides some protection, prolonged exposure to moisture or harsh conditions can lead to corrosion. If used in humid environments (e.g., bathrooms), ensure proper ventilation and promptly address any signs of rust.
7. Troubleshooting
Issue: Shelf/Surface feels unstable or sags.
- Check Mounting: Ensure brackets are securely fastened to wall studs. Loose screws or improper stud attachment can cause instability.
- Weight Distribution: Verify that the weight on the shelf is evenly distributed and not exceeding the bracket's capacity.
- Number of Brackets: For longer or heavier surfaces, ensure an adequate number of brackets are used and properly spaced.
- Wall Structure: Confirm that the wall structure itself is robust enough to handle the load. If the wall studs or framing are flexing, additional reinforcement may be required.
Issue: Difficulty securing the surface material to the bracket.
- The horizontal arms of these brackets do not come with pre-drilled holes for attaching the surface material. Consider using a strong construction adhesive or drilling pilot holes into your surface material and then into the bracket arms for screw attachment. Ensure appropriate drill bits for metal are used if drilling into the bracket.
8. Specifications
| Brand | The Original Granite Bracket |
| Model Number | FH-30-U |
| Material | Alloy Steel |
| Size | 30 Inches |
| Finish | Matte Black Paint |
| Product Dimensions (L x W x H) | 30 x 2.5 x 0.5 inches |
| Item Weight | 16 pounds |
| Mounting Type | Wall Mount |
| Unit Count | 1.0 Count |
| Included Components | Screwdriver Bits (for mounting screws) |
9. Warranty and Support
For warranty information or technical support regarding your Original Granite Bracket product, please contact the manufacturer directly through their official website or the retailer where the product was purchased. Keep your purchase receipt as proof of purchase.