
FCXJTU 8541987335
FCXJTU Digital Dual Kitchen Timer User Manual
Model: 8541987335 | Brand: FCXJTU
Product Overview
The FCXJTU Digital Dual Kitchen Timer is designed to meet various timekeeping needs, from kitchen cooking and baking to exercise, gym workouts, sports, games, and classroom teaching. It features dual timers, a memory function, adjustable volume, and multiple placement options for convenience.
Key Features:
- DUAL COUNT UP/DOWN TIMER: Two events can be counted up & down simultaneously. It can also act as a stopwatch and time up to 99 Hours, 59 minutes and 59 Seconds. Perfect timer for cooking, barbecue, baking, exercise, gym workout, sports, homework, games, kids’ activities and meetings.
- LARGE DISPLAY: With Screen protector, High contrast large display and clearer bold numbers, Digital Kitchen Timer is Easy to read in the kitchen or anywhere.
- MEMORY FUNCTION: ON/OFF Switch to save battery, Set a re-use time as memory time. Just Press M button to bring up the memory time.
- ADJUSTABLE VOLUME: Easy to adjust alarm Volume by Switching (HIGH/ LOW/ MUTE) basing on your requirement.
- MAGNETIC BACK, RETRACTABLE STAND and HANGING HOOK: The Kitchen Timers Magnetic is convenient to place in three ways especially its STRONG MAGNET working fine on the refrigerator.

Figure 1: Front view of the FCXJTU Digital Dual Kitchen Timer.
Setup
1. Battery Installation
The timer requires two AAA batteries (included). To install:
- Locate the battery compartment on the back of the timer.
- Slide open the battery cover.
- Insert two AAA batteries, ensuring correct polarity (+/-).
- Close the battery cover securely.

Figure 2: Back view of the timer with battery compartment and mounting options.
2. Placement Options
The timer offers versatile placement options:
- Magnetic Back: Strong magnets on the back allow the timer to be securely attached to metal surfaces like refrigerators or oven doors.
- Retractable Stand: A built-in stand allows the timer to be placed upright on a countertop or table for easy viewing.
- Hanging Hook: A small hook is integrated for hanging the timer on a wall hook or peg.
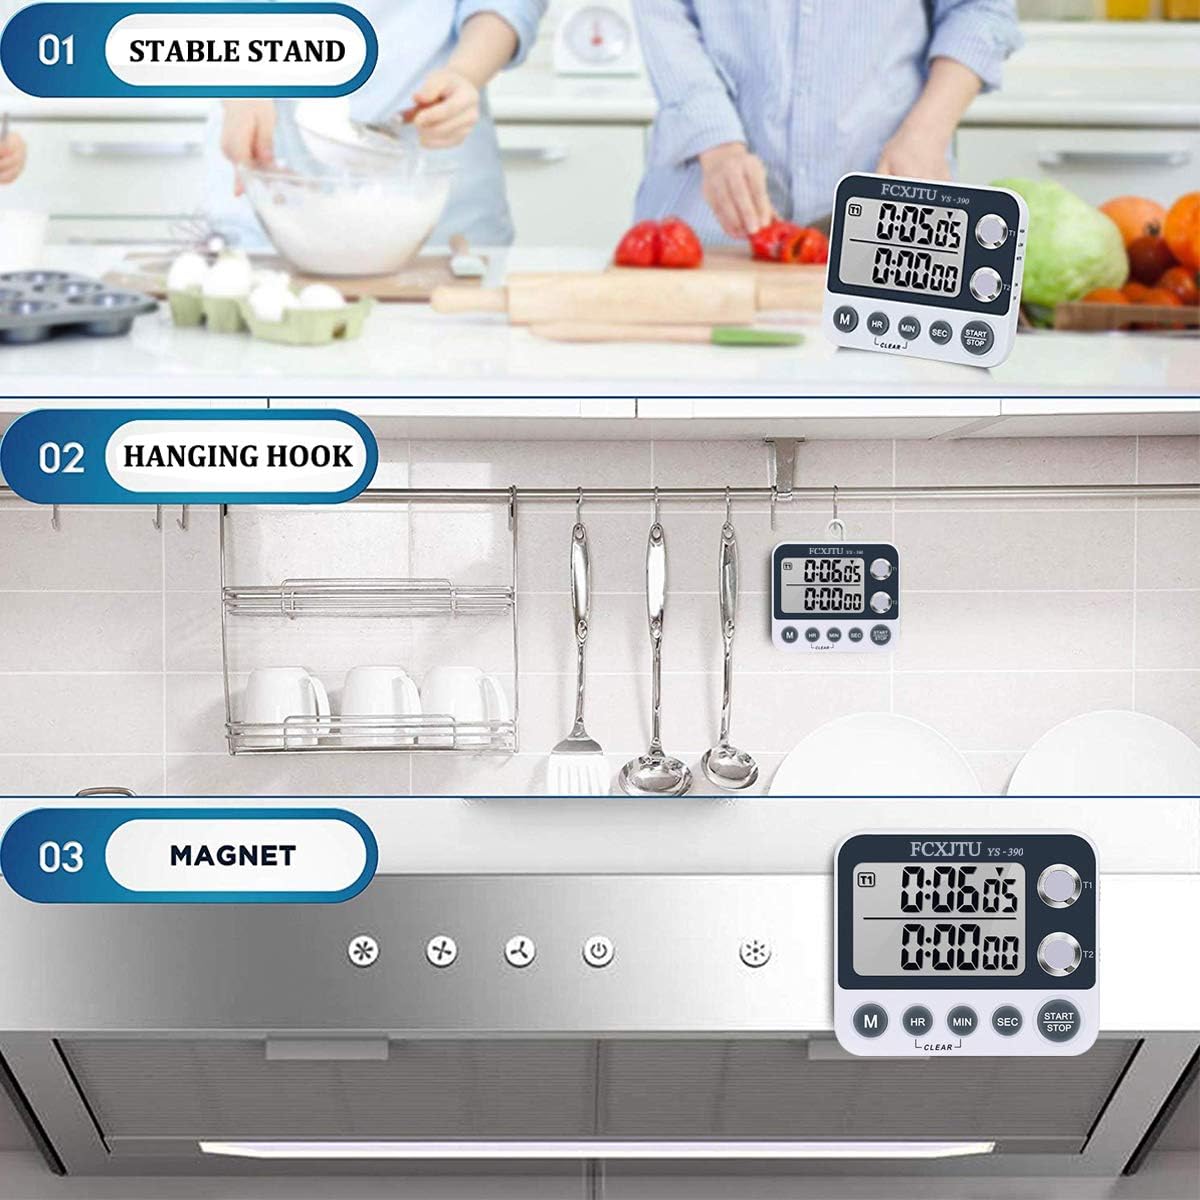
Figure 3: Various placement methods for the timer.
Operating Instructions
1. Power On/Off
To turn the timer on or off, use the dedicated ON/OFF switch located on the side of the device. Turning it off helps conserve battery life.
Figure 4: Location of the ON/OFF switch.
2. Setting the Timer (Countdown/Count-up)
The timer features two independent timers (T1 and T2) that can operate simultaneously. It supports both countdown and count-up functions, up to 99 hours, 59 minutes, and 59 seconds.
- Select Timer: Press the T1 or T2 button on the right side of the display to select which timer you wish to set or activate.
- Set Time: Use the HR (Hour), MIN (Minute), and SEC (Second) buttons to set the desired time. Press and hold these buttons for rapid adjustment.
- Start/Stop: Press the START/STOP button to begin or pause the selected timer.
- Clear: To clear a set time, press the HR and MIN buttons simultaneously while the timer is paused.
Figure 5: Timer display and control buttons.
3. Memory Function
The memory function allows you to quickly recall a previously set time.
- Save Memory: After setting a desired time, ensure the timer is paused. The timer will automatically remember the last set time.
- Recall Memory: When the timer is paused, press the M (Memory) button to instantly recall the saved time.
4. Adjustable Volume and LED Alert
The timer features an adjustable alarm volume and a visual LED alert.
- Volume Adjustment: Use the switch on the side of the timer to select between HIGH, LOW, or MUTE alarm volumes.
- LED Alert: When a countdown finishes, the timer will sound an alarm and flash a red LED light to provide a clear visual alert.
Figure 6: Volume adjustment switch.
5. Official Product Videos
Video 1: YS390 Grey Dual digital kitchen timer highlight feature. This video demonstrates the ON/OFF switch, volume adjustment, alarm with red light flash, and memory function.
Maintenance
1. Cleaning
To clean your timer, wipe it with a soft, damp cloth. Do not use abrasive cleaners or immerse the device in water.
2. Battery Replacement
When the display dims or the timer functions become erratic, it's time to replace the batteries. Follow the battery installation steps in the "Setup" section.
Troubleshooting
| Problem | Possible Cause | Solution |
|---|---|---|
| Timer not turning on or display is dim. | Low or dead batteries. | Replace with new AAA batteries. Ensure correct polarity. |
| Alarm is too quiet or too loud. | Volume setting is incorrect. | Adjust the volume switch on the side of the timer to HIGH, LOW, or MUTE as desired. |
| Timer does not respond to button presses. | Temporary software glitch or low battery. | Remove and reinsert batteries to reset the device. If issue persists, replace batteries. |
| Magnetic back does not hold securely. | Surface is not sufficiently magnetic or too smooth. | Ensure the surface is flat and metallic. Consider using the retractable stand or hanging hook if magnetic attachment is insufficient. |
Specifications
- Color: White Grey
- Brand: FCXJTU
- Material: Plastic
- Product Dimensions: 0.9"D x 3.6"W x 3.1"H
- Item Weight: 2.76 Ounces
- Number of settings: 2
- UPC: 676422220199
- Screen Size: 2.3 Inches
- Manufacturer: TIMYI
- Item model number: 8541987335
- Batteries: 2 AAA batteries required (included)
- Country of Origin: China
- Date First Available: November 15, 2018
Warranty and Support
For any questions, technical support, or warranty inquiries, please contact FCXJTU customer service through the retailer where the product was purchased. Please retain your proof of purchase for warranty claims.
Ask a question about this manual
Ask about setup, troubleshooting, compatibility, parts, safety, or missing instructions. Manuals+ will review the question and use this page’s manual context to help answer it.