1. Introduction
This manual provides instructions for the setup, operation, maintenance, and troubleshooting of your HP LaserJet Pro 400 M425DN All-in-One Printer. Please read this manual thoroughly before using the device to ensure proper and safe operation.
2. Product Overview
The HP LaserJet Pro 400 M425DN is a monochrome laser multifunction printer designed for printing, copying, scanning, and faxing. It features automatic duplex printing, network connectivity via Ethernet, and a USB interface. The device is equipped with a touchscreen for easy navigation and control.
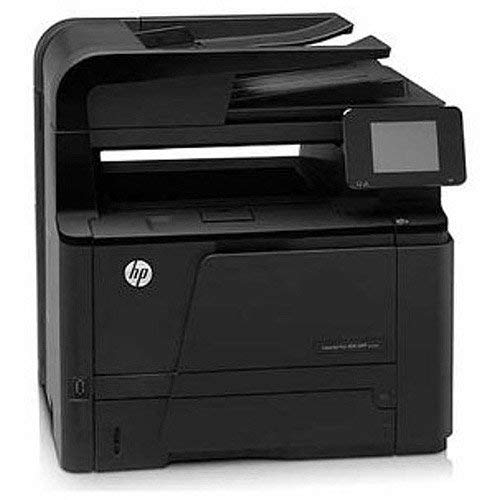
Figure 2.1: Front view of the HP LaserJet Pro 400 M425DN All-in-One Printer.
Key Features:
- Monochrome Laser Printing, Copying, Scanning, and Faxing
- Automatic Duplex Printing
- Ethernet and USB Connectivity
- Intuitive Touchscreen Control Panel
- High-Quality Output: 1200 x 1200 dpi print resolution
3. Setup
3.1 Unpacking the Printer
- Carefully remove the printer from its packaging.
- Remove all packing materials, tapes, and protective films from the exterior of the printer.
- Ensure all accessories, such as the power cord and any included toner cartridge, are present.
3.2 Connecting the Printer

Figure 3.1: Rear view displaying USB and Ethernet ports.
- Power Connection: Connect the power cord to the printer and then to a grounded electrical outlet.
- USB Connection: For direct connection to a computer, use a USB cable (not included) to connect the printer's USB port to your computer's USB port.
- Ethernet Connection: For network printing, connect an Ethernet cable (not included) from the printer's Ethernet port to your network router or switch.
3.3 Installing the Toner Cartridge
- Open the front access door of the printer.
- Remove the toner cartridge from its packaging and gently shake it to distribute the toner.
- Insert the cartridge into the designated slot until it clicks into place.
- Close the front access door.
3.4 Loading Paper

Figure 3.2: Front view showing the paper input tray.
- Pull out the paper input tray.
- Adjust the paper guides to fit the size of your paper.
- Load the paper stack into the tray, ensuring it is flat and within the guides.
- Push the paper tray back into the printer.
3.5 Software Installation
After connecting the printer, power it on. For optimal functionality, install the latest drivers and software from the HP support website. Follow the on-screen instructions provided by the installer.
4. Operating the Printer
4.1 Printing Documents
- From your computer, open the document you wish to print.
- Select "Print" from the application's menu (e.g., File > Print).
- Choose the HP LaserJet Pro 400 M425DN from the list of available printers.
- Adjust print settings (e.g., number of copies, duplex printing) as needed.
- Click "Print".
4.2 Copying Documents
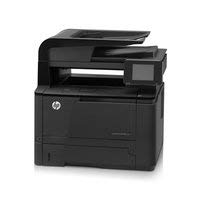
Figure 4.1: Control panel with touchscreen for operation.
- Place the document face-down on the scanner glass or face-up in the Automatic Document Feeder (ADF).
- On the printer's touchscreen, select the "Copy" function.
- Adjust settings such as number of copies, lightness/darkness, or paper size.
- Press the "Start Copy" button.
4.3 Scanning Documents
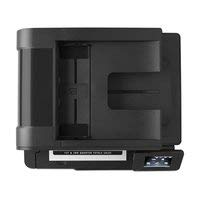
Figure 4.2: Top view showing the Automatic Document Feeder (ADF).
- Place the document on the scanner glass or in the ADF.
- On the printer's touchscreen, select the "Scan" function.
- Choose your desired scan destination (e.g., Scan to Computer, Scan to Network Folder, Scan to Email).
- Adjust scan settings as required.
- Press the "Start Scan" button.
4.4 Faxing Documents
- Ensure the printer is connected to a phone line (if applicable for fax functionality).
- Place the document on the scanner glass or in the ADF.
- On the printer's touchscreen, select the "Fax" function.
- Enter the recipient's fax number.
- Adjust any necessary fax settings.
- Press the "Start Fax" button.
5. Maintenance
5.1 Replacing the Toner Cartridge
- When the printer indicates low toner, open the front access door.
- Grasp the handle of the old toner cartridge and pull it straight out.
- Unpack the new HP toner cartridge and gently shake it.
- Insert the new cartridge into the slot until it locks into place.
- Close the front access door.
5.2 Cleaning the Printer
- Exterior: Wipe the exterior surfaces with a soft, lint-free cloth dampened with water.
- Scanner Glass: Use a soft cloth and a non-abrasive glass cleaner to clean the scanner glass.
- ADF Rollers: Refer to the printer's on-screen prompts or HP support documentation for specific instructions on cleaning ADF rollers if paper feed issues occur.
6. Troubleshooting
6.1 Common Issues and Solutions
- Printer Not Responding:
- Check power connections.
- Verify USB or Ethernet cable connections.
- Restart the printer and computer.
- Ensure printer drivers are correctly installed.
- Paper Jams:
- Follow on-screen instructions to locate and clear jammed paper.
- Ensure paper is loaded correctly and not overfilled.
- Poor Print Quality:
- Check toner cartridge level and replace if low.
- Perform a print quality diagnostic from the printer's control panel.
- Clean the printer's internal components as per maintenance instructions.
- Connectivity Problems:
- For Ethernet, check network cable and router status.
- Verify IP address settings on the printer.
7. Specifications
| Feature | Detail |
|---|---|
| Model Name | M425DN |
| Functions | Print, Copy, Scan, Fax |
| Printing Technology | Monochrome Laser |
| Print Speed (Monochrome) | Up to 33 ppm |
| Print Resolution | Up to 1200 x 1200 dpi |
| Duplex Printing | Automatic |
| Scan Resolution (Optical) | Up to 1200 dpi |
| Copy Speed (Monochrome) | Up to 33 cpm |
| Connectivity | USB, Ethernet |
| Input Sheet Capacity | Up to 300 sheets |
| Compatible Media Types | Envelopes, Glossy photo paper, Labels, Transparencies |
| Control Panel | Touchscreen |
| Product Dimensions | 23.5 x 19.5 x 18.87 inches |
| Item Weight | 3.09 pounds (approx. 1.4 kg) |
| Manufacturer | HP |
8. Warranty and Support
8.1 Warranty Information
This renewed HP LaserJet Pro 400 M425DN printer comes with a 90-day limited warranty. Please retain your proof of purchase for warranty claims. The warranty covers defects in materials and workmanship under normal use.
8.2 Technical Support
For technical assistance, driver downloads, or further support documentation, please visit the official HP support website. You may also contact your reseller for support related to this renewed product.