
1. Product Overview
This manual provides instructions for the installation and maintenance of the USonline911 Fuel Pump, model 22011. This fuel pump is designed as a replacement part for various Kohler KT and Magnum Series Engines, specifically models KT17, KT19, M18, M20, MV16, MV18, and MV20. It serves as a direct replacement for Kohler OEM part numbers 52 559 03-S, 52-559-03-S, and 5255903-S, as well as Ariens OEM # 20578900.
The pump features a 1 5/8 inch arm length and includes adapters to fit 1/4 inch, 5/16 inch, and 3/8 inch ID fuel lines. It is constructed from durable alloy steel and operates mechanically. Please note that this fuel pump is not compatible with fuel containing greater than 10% ethanol.
2. Safety Information
Always adhere to safety precautions when working with fuel systems. Failure to do so can result in serious injury or property damage.
- Always disconnect the battery before working on the fuel system to prevent accidental engine starting or electrical shorts.
- Work in a well-ventilated area. Fuel vapors are flammable and hazardous.
- Wear appropriate personal protective equipment, including safety glasses and gloves.
- Ensure no open flames, sparks, or other ignition sources are present when handling fuel.
- Properly dispose of old fuel and fuel system components according to local regulations.
- Refer to your engine's service manual for specific safety procedures related to your equipment.
3. Package Contents
Verify that all items are present in the package before beginning installation.
- 1 x USonline911 Fuel Pump
- Assorted adapters for 1/4 inch, 5/16 inch, and 3/8 inch ID fuel lines
- Mounting hardware (e.g., C-clip, washers)
- Gasket

Figure 1: Complete USonline911 Fuel Pump kit with all included components.
4. Setup and Installation
Follow these steps carefully to ensure proper installation of the fuel pump.
- Preparation: Ensure the engine is cool and the battery is disconnected. Place a drip pan under the fuel pump area to catch any spilled fuel.
- Remove Old Fuel Pump: Disconnect the fuel lines from the old pump. Note the orientation of the inlet and outlet lines. Remove any mounting bolts or clips securing the old pump.
- Install New Fuel Pump: Position the new USonline911 fuel pump in the same location and orientation as the old pump. Secure it with the provided mounting hardware. Ensure the gasket is properly seated between the pump and the engine block.
- Connect Fuel Lines: Attach the fuel lines to the new pump. Use the appropriate adapters for your fuel line size (1/4 inch, 5/16 inch, or 3/8 inch ID). Ensure all connections are tight and secure to prevent leaks.
- Reconnect Battery: Once all connections are secure, reconnect the battery.
- Check for Leaks: Before starting the engine, prime the fuel system if necessary (refer to your engine manual). Start the engine and carefully inspect all fuel line connections for any signs of leakage. Address any leaks immediately.
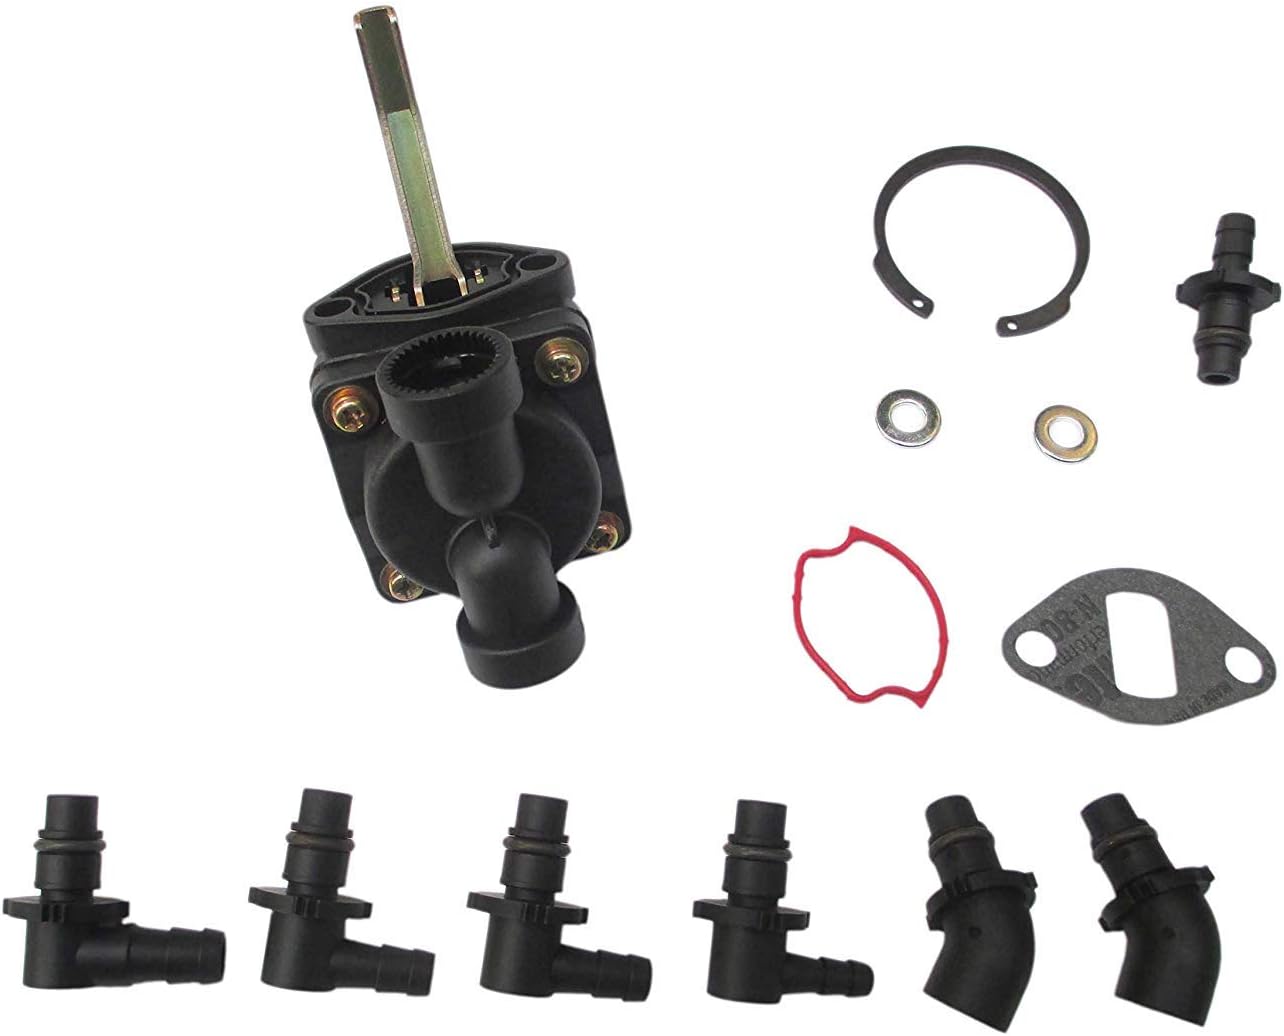
Figure 2: USonline911 Fuel Pump, illustrating the mechanical arm and connection points.
5. Operating Instructions
The USonline911 fuel pump operates mechanically, drawing fuel from the tank and delivering it to the carburetor as the engine runs. No manual operation is required after proper installation.
- Ensure the fuel tank contains fresh, clean fuel.
- This pump is not compatible with fuel containing more than 10% ethanol. Using incompatible fuel may damage the pump and engine components.
6. Maintenance
Regular maintenance helps ensure the longevity and reliable performance of your fuel pump and engine.
- Regularly inspect fuel lines for cracks, wear, or leaks. Replace damaged lines promptly.
- Check fuel filters periodically and replace them as recommended by your engine manufacturer to ensure clean fuel delivery to the pump and carburetor.
- Keep the area around the fuel pump clean and free of debris.
7. Troubleshooting
If you encounter issues, refer to the following troubleshooting guide:
Engine Cranks but Does Not Start (No Fuel)
- Check fuel tank level. Ensure there is sufficient fuel.
- Inspect fuel lines for kinks, blockages, or leaks.
- Verify fuel filter is not clogged. Replace if necessary.
- Check for proper installation of the fuel pump, including gasket and secure connections.
- If the pump arm is not moving, there might be an issue with the engine's camshaft lobe or the pump's internal mechanism. Consult a qualified technician.
Engine Runs Poorly or Stalls
- Could indicate inconsistent fuel delivery. Check fuel lines and filter.
- Ensure the fuel pump is securely mounted and not vibrating excessively.
- Verify that the correct fuel type (less than 10% ethanol) is being used.
8. Specifications
| Brand | USonline911 |
| Model Number | 22011 |
| Replaces OEM Part Numbers | Kohler 52 559 03-S, Ariens 20578900 |
| Fit Type | Universal Fit (for specified Kohler engines) |
| Vehicle Service Type | Outdoor Power Equipment |
| Auto Part Position | Front |
| Outlet Connection Size | 0.25 Inches (with adapters for 1/4", 5/16", 3/8" ID fuel line) |
| Outlet Connection Type | Barb |
| Inlet Connection Type | Hose Barb |
| Connector Type | Barbed connectors |
| Gas Type Compatibility | Ethanol (Not compatible with greater than 10% ethanol fuel) |
| Mounting Type | Front Mount |
| Operation Mode | Mechanical |
| Material | Alloy Steel |
9. Warranty and Support
For warranty information and technical support regarding your USonline911 Fuel Pump, please contact your point of purchase or the manufacturer directly. It is recommended to keep your purchase receipt for any warranty claims.


