1. Important Safety Instructions
Please read all instructions carefully before operating the MXBAOHENG Electric Grain Grinder Mill. Retain this manual for future reference. Failure to follow these safety guidelines may result in electric shock, fire, or serious injury.
- Electrical Safety: Ensure the power supply voltage matches the 220V rating of the grinder. Do not operate with wet hands or in damp environments. Always unplug the grinder before cleaning, maintenance, or if not in use.
- Blade Safety: The grinding blades are extremely sharp. Exercise extreme caution when handling or cleaning the grinding chamber. Never insert fingers or other objects into the grinding chamber while the machine is connected to power.
- Overheating Protection: The grinder is equipped with an overload protector. If the motor stops due to overheating or overload, allow it to cool down for at least 10-15 minutes before attempting to restart.
- Proper Use: This appliance is designed for grinding dry grains, spices, herbs, and similar materials. Do not use it for wet, oily, or excessively hard materials that may damage the blades or motor.
- Children and Pets: Keep the grinder out of reach of children and pets. Do not allow them to operate or play with the appliance.
- Ventilation: Ensure adequate ventilation around the motor during operation to prevent overheating. Do not block the thermovent.
2. Product Overview and Components
Familiarize yourself with the various parts of your MXBAOHENG Electric Grain Grinder Mill for optimal operation.

Image 1: Labeled diagram of the MXBAOHENG Electric Grain Grinder Mill, showing components such as the handle, uncapping switch, upper cover, grinding groove, grinding blade, bearing pedestal, motor, thermovent, carbon brush, overload protector, switch, and base with shockproof foot pads.

Image 2: Detailed view of key features including the clip-on switch design for the lid, the sharp grinding blade, the external carbon brush for easy replacement, the built-in bulge design within the grinding chamber, and the timing switch for precise grinding control.
Key Components:
- Handle: For easy carrying and positioning.
- Uncapping Switch: Safety mechanism to prevent operation when the lid is open.
- Upper Cover: Secures the grinding chamber.
- Grinding Groove: The chamber where materials are placed for grinding.
- Grinding Blade: High-speed rotating blades for pulverizing materials.
- Bearing Pedestal: Supports the grinding mechanism.
- Motor: The power unit for the grinding action.
- Thermovent: Vents for heat dissipation from the motor.
- Carbon Brush: Electrical contact for the motor, replaceable.
- Overload Protector: Safety feature to prevent motor damage from excessive load or heat.
- Switch: Main power control.
- Timing Switch: Allows setting a specific grinding duration.
- Base: Provides stability for the unit.
- Shockproof Foot Pads: Reduces vibration and protects surfaces.
3. Setup
- Unpacking: Carefully remove the grinder from its packaging. Inspect for any damage during transit. Retain packaging for potential future transport or storage.
- Placement: Place the grinder on a stable, flat, and dry surface. Ensure there is sufficient space around the unit for ventilation, especially near the thermovent.
- Initial Cleaning: Before first use, wipe down the exterior with a damp cloth. Clean the grinding chamber and blades with a dry brush or cloth to remove any manufacturing residues. Do not wash the main unit with water.
- Power Connection: Confirm your electrical outlet provides 220V. Plug the power cord into a grounded 220V outlet.
4. Operating Instructions
Preparation:
- Ensure the grinder is unplugged and the grinding chamber is clean and dry.
- Open the upper cover by releasing the uncapping switch.
- Place the dry material to be ground into the grinding chamber. Do not overfill; the maximum capacity is 500g. For best results, fill to approximately 2/3 of the chamber volume.
- Close the upper cover securely until the uncapping switch locks into place. The grinder will not operate if the cover is not properly secured.
Grinding Process:
- Plug the grinder into the 220V power outlet.
- Set the desired grinding time using the timing switch. The grinding time will vary depending on the material and desired fineness. Start with short intervals (e.g., 30 seconds) and check the consistency.
- Press the main switch to start the grinding process. The blades will rotate at high speed.
- Monitor the grinding process. For very fine powder, multiple short grinding cycles with brief pauses may be more effective than one long cycle, allowing the motor to cool and preventing overheating.
- Once the set time expires or the desired fineness is achieved, the grinder will stop.
- Unplug the grinder from the power outlet.
- Carefully open the upper cover and remove the ground material. Use a brush to help clear the chamber.

Image 3: Visual examples demonstrating the grinding capability of the machine, showing various materials like roots and spices before and after being processed into a fine powder.
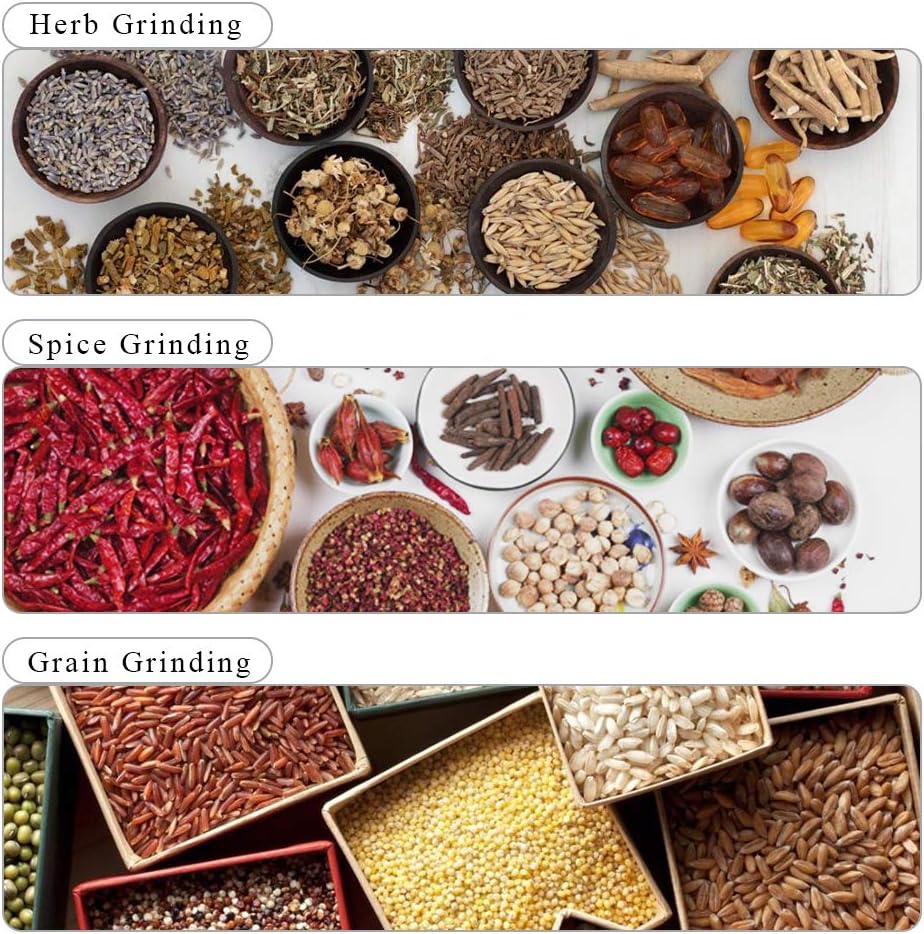
Image 4: Illustrates the versatility of the grinder for different applications, including grinding various herbs, spices, and grains, showcasing the types of materials suitable for processing.
5. Maintenance
Cleaning:
- Always unplug the grinder before cleaning.
- Use a dry brush or cloth to clean the grinding chamber and blades. Do not use water directly on the blades or inside the motor housing.
- Wipe the exterior of the machine with a damp cloth, then dry thoroughly.
- Ensure all parts are completely dry before storing or next use.
Carbon Brush Replacement:
- The carbon brushes are consumable parts and may need replacement after extended use.
- Refer to Image 1 for the location of the external carbon brush.
- To replace, ensure the unit is unplugged. Unscrew the carbon brush caps on the side of the motor housing, remove the old brushes, and insert new ones. Secure the caps tightly.
6. Troubleshooting
| Problem | Possible Cause | Solution |
|---|---|---|
| Grinder does not start | Not plugged in; Power outage; Upper cover not secured; Overload protector activated; Faulty switch. | Check power connection; Verify power supply; Ensure cover is locked; Allow unit to cool and reset overload protector; Contact support if switch is faulty. |
| Poor grinding performance | Overfilling the chamber; Material too hard/wet; Worn blades; Insufficient grinding time. | Reduce material quantity; Ensure materials are dry and suitable; Inspect and replace blades if necessary; Increase grinding time or perform multiple cycles. |
| Unit overheats and stops | Continuous operation for too long; Overload; Blocked thermovent. | Allow unit to cool down for 10-15 minutes; Reduce load; Ensure thermovent is clear. |
| Excessive noise or vibration | Unstable surface; Loose components; Damaged motor bearings. | Place on a stable surface; Check for loose parts and tighten; Contact support for bearing issues. |
7. Specifications

Image 5: Diagram illustrating the dimensions of the MXBAOHENG Electric Grain Grinder Mill. The grinding chamber has a diameter of 15cm and a height of 12cm. The overall height of the unit is 38cm, and the base width is 16cm.
- Brand: MXBAOHENG
- Model: 500g Electric Grain Grinder Mill
- Capacity: 0.5 Kilograms (500g)
- Voltage: 220 Volts
- Recommended Uses: Grinding dry grains, spices, herbs
- ASIN: B07KG6ZFPL
- Manufacturer: MXBAOHENG
- Dimensions (Approximate): Grinding Chamber Diameter: 15cm, Grinding Chamber Height: 12cm, Overall Height: 38cm, Base Width: 16cm.
8. Warranty and Support
For warranty information or technical support, please refer to the purchase documentation or contact your retailer. Specific warranty terms may vary by region and seller.
No official product videos were provided for this model in the available data.