1. Introduction
This manual provides essential information for the safe and efficient installation, operation, and maintenance of your YELLORE LED Parking Lot Light, Model NG-SB. Please read this manual thoroughly before installation and retain it for future reference. This fixture is designed for outdoor area lighting applications such as parking lots, roadways, and public spaces.
2. Safety Instructions
WARNING: Risk of electric shock. Installation must be performed by a qualified electrician in accordance with all national and local electrical codes.
- Disconnect power at the circuit breaker before installation or servicing.
- Ensure the supply voltage is compatible with the fixture's requirements (AC100-277V).
- Proper grounding is required to ensure personal safety.
- Do not handle live wires.
- Wear appropriate personal protective equipment (PPE), including safety glasses and gloves.
- Do not modify the fixture or use it for purposes other than its intended use.
- Ensure the mounting structure can support the weight of the fixture.
3. Package Contents
Verify that all components are present and undamaged upon opening the package. If any parts are missing or damaged, contact customer support immediately.
- YELLORE LED Parking Lot Light Fixture (Model NG-SB)
- Slip Fitter Mounting Bracket
- Instruction Manual
4. Product Overview and Features
The YELLORE LED Parking Lot Light is a high-performance outdoor lighting solution designed for durability and efficiency.
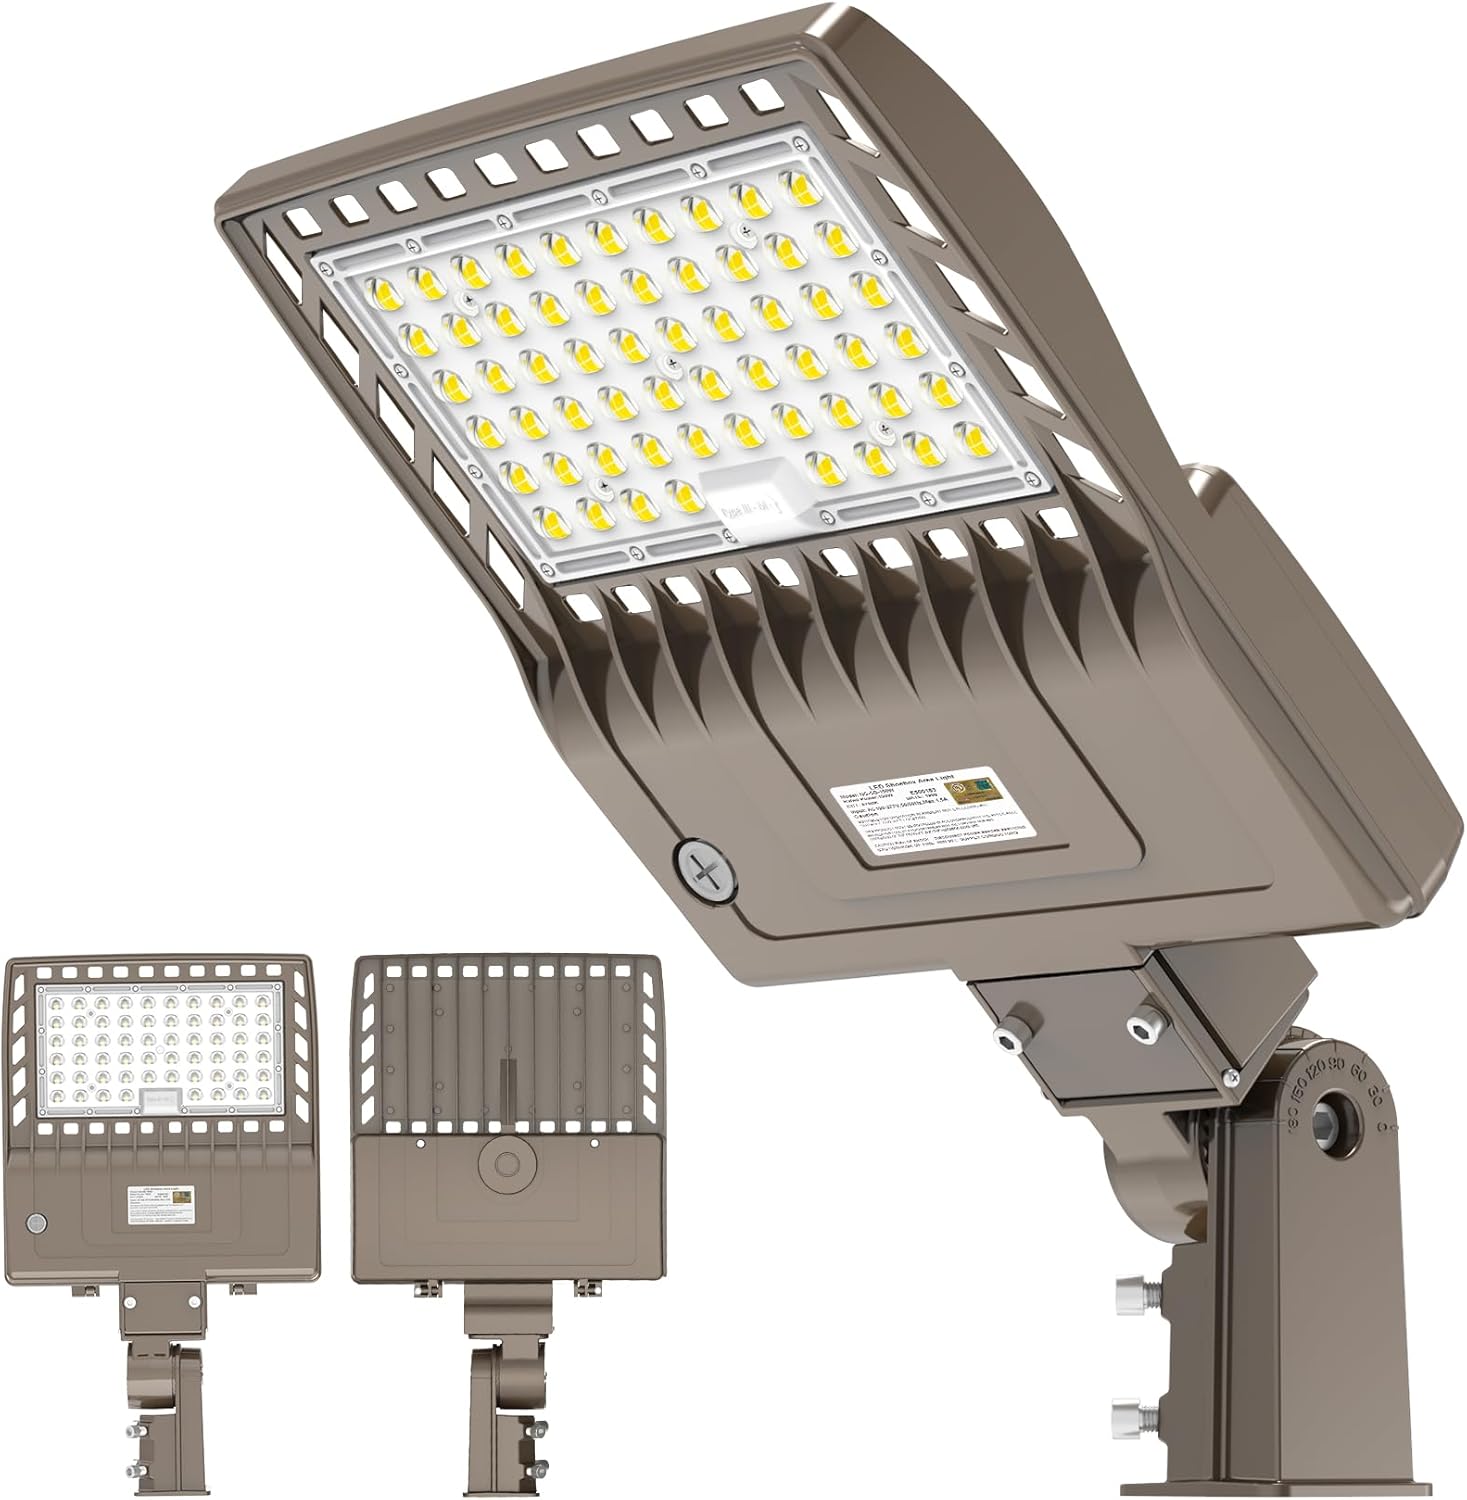
Figure 4.1: YELLORE LED Parking Lot Light with Slip Fitter Mount.
Key Features:
- High Efficiency: 240W, 33600LM with 140lm/watt efficacy, 5000K daylight color temperature.
- Durable Construction: Heavy-duty die-cast aluminum housing for impact resistance and excellent heat dissipation.
- Weatherproof: IP65 waterproof rating and 6K high voltage surge protection for harsh weather conditions.
- Adjustable Mounting: Slip-fitter mount bracket with an adjustable angle range of -90 to +90 degrees.
- Certifications: UL/DLC Listed for quality and safety assurance.
- Long Lifespan: Rated for 50,000 hours of operation.

Figure 4.2: Overview of key product features and certifications.
Component Breakdown:

Figure 4.3: Exploded view illustrating the die-casting aluminum housing, LED driver, LED chips, and PC lens.
- Die-casting Aluminum Housing: Provides structural integrity and efficient heat dissipation.
- Reliable LED Driver: Ensures stable power supply and protection.
- High Efficiency LED Chips: SMD3030 chips deliver bright, consistent illumination.
- High Transparency PC Lens: Optimizes light distribution (Type III).
- Adjustable Slip Fit Mount: Allows for flexible positioning on a pole.

Figure 4.4: Detail of the high-efficiency LED chips.

Figure 4.5: Detail of the heat dissipation fins for optimal thermal management.
5. Technical Specifications
| Specification | Value |
|---|---|
| Brand | YELLORE |
| Model Name | NG-SB |
| Wattage | 240 watts |
| Brightness | 33600 Lumen |
| Efficiency | 140 lm/w |
| Color Temperature | 5000 Kelvin (Cool White) |
| Voltage | AC100-277V |
| Material | Die-cast Aluminum |
| IP Rating | IP65 (Waterproof) |
| Surge Protection | 6K High Voltage |
| Lifespan | 50,000 hours |
| Mounting Type | Slip Fitter (fits 2 3/8-inch OD tenon) |
| Product Dimensions | 30.7"L x 15.94"W x 6.49"H |
| Item Weight | 14.7 pounds |
| Certifications | UL, cUL, DLC Approved |
| Working Temperature Range | -40°F to 122°F (-40°C to 50°C) |
6. Installation Guide
Follow these steps for safe and proper installation of your YELLORE LED Parking Lot Light. Ensure power is disconnected before beginning.
6.1 Pre-Installation Check
- Verify that the mounting pole has a 2 3/8-inch (60mm) outer diameter tenon.
- Ensure the electrical wiring meets local codes and the fixture's voltage requirements.
- Confirm the mounting location is stable and can support the fixture's weight.
6.2 Mounting the Fixture

Figure 6.1: Product dimensions and slip fitter mount details.

Figure 6.2: Step-by-step installation guide for the slip fitter mount.
- Connect Power Wires: Connect the fixture's wires to the main power supply. The black wire is for Live (L), the green wire for Ground (G), and the white wire for Neutral (N). Ensure all connections are secure and insulated.
- Fix the Slip Fit Mount to Pole: Slide the slip fitter mount onto the pole's tenon (2 3/8-inch OD). Secure it firmly using the provided screws.
- Fix the Light with Screws: Attach the light fixture to the slip fitter mount using the designated screws. Ensure it is securely fastened.
- Adjust to Best Angle: Adjust the angle of the fixture (-90 to +90 degrees) to achieve the desired light distribution. Tighten all adjustment bolts to lock the position.
6.3 Light Distribution and Coverage

Figure 6.3: Recommended pole height (18-30ft) and lighting area range (Type III distribution).
The fixture provides a Type III light distribution, ideal for illuminating wide areas. The recommended mounting height is between 18 to 30 feet for optimal coverage.
6.4 Multi-Lamp Installation (Optional)

Figure 6.4: Examples of single, dual, and quad lamp installations on a single pole.
For larger areas requiring more extensive illumination, multiple fixtures can be installed on a single pole using appropriate mounting accessories (sold separately). Ensure the pole structure can safely support the additional weight and wind load.
7. Operation
Once properly installed and wired, the YELLORE LED Parking Lot Light operates automatically when power is supplied. There are no user-adjustable controls on the fixture itself.
- Power On: Restore power at the circuit breaker. The light will illuminate.
- Photocell (if applicable): If a photocell is integrated or added, the light will automatically turn on at dusk and off at dawn.
8. Maintenance
The YELLORE LED Parking Lot Light is designed for minimal maintenance. Regular inspection and cleaning will help ensure optimal performance and longevity.
- Cleaning: Periodically clean the lens and housing with a soft, damp cloth to remove dirt, dust, and debris. Do not use abrasive cleaners or solvents. Ensure power is off before cleaning.
- Inspection: Annually inspect the fixture for any signs of physical damage, loose connections, or corrosion. Address any issues promptly.
- Weather Resistance: The IP65 rating ensures protection against dust and water jets. The fixture is designed to withstand a working temperature range of -40°F to 122°F.

Figure 8.1: The fixture's robust design ensures performance in various weather conditions.
9. Troubleshooting
If you encounter issues with your YELLORE LED Parking Lot Light, refer to the following common problems and solutions:
| Problem | Possible Cause | Solution |
|---|---|---|
| Light does not turn on | No power supply Loose wiring connection Faulty fixture | Check circuit breaker and power source Inspect and secure all wiring connections (ensure power is off) Contact customer support if power and wiring are confirmed functional |
| Light flickers | Unstable power supply Loose wiring Driver issue | Verify stable power input Check and tighten all wiring connections Contact customer support |
| Reduced brightness | Dirt/debris on lens Aging components | Clean the lens (ensure power is off) Contact customer support if cleaning does not resolve the issue |
| Light stays on during daytime (with photocell) | Photocell obstructed or faulty | Ensure photocell is not obstructed by debris or shadows Contact customer support if issue persists |
For issues not listed above or if troubleshooting steps do not resolve the problem, please contact YELLORE customer support.
10. Warranty and Support
YELLORE stands behind the quality of its products.
- Warranty: This product comes with a 5-year warranty from the date of purchase, covering defects in materials and workmanship. Please retain your proof of purchase for warranty claims.
- Customer Support: For technical assistance, warranty inquiries, or any other questions, please contact YELLORE customer service.
Figure 10.1: YELLORE offers a 5-year warranty and dedicated customer support.
YELLORE is committed to providing high-quality, durable, and safe products. Our professional after-sales team is available for 24-hour online service. If you have specific lighting layout requirements, please contact us for professional engineering assistance.