1. Introduction
The Ebung Electric Rodent Zapper is designed to humanely and effectively eliminate rodents such as mice, rats, chipmunks, and voles. This device utilizes a high-voltage electrical shock to dispatch pests quickly upon contact. It is intended for indoor use only.

Image 1.1: The Ebung Electric Rodent Zapper in operation, showing a rodent inside the trap chamber.

Image 1.2: Illustration of rodents targeted by the zapper, including rats, mice, chipmunks, and voles. Highlights the clean, non-toxic operation.
2. Safety Information
Please read and understand all safety instructions before operating this device. Failure to follow these instructions may result in electric shock, fire, or injury.
- High Voltage: This device generates a high voltage electrical shock. Exercise extreme caution.
- Keep Away from Children and Pets: Position the trap in areas inaccessible to children and household pets to prevent accidental contact.
- Indoor Use Only: This product is designed for indoor use in dry locations. Do not use outdoors or in wet environments.
- Avoid Water: Do not immerse the device in water or allow liquids to enter the internal components.
- Unplug Before Cleaning: Always disconnect the power source (AC adapter or batteries) before handling or cleaning the trap.
- Proper Handling: Do not touch the metal plates inside the trap when it is powered on.
- Flammable Materials: Do not place the trap near flammable materials or gases.
3. Package Contents
Verify that all items are present in your package:
- Ebung Electric Rodent Zapper Unit
- AC Power Adapter
- Instruction Manual (this document)

Image 3.1: Overview of the device components, including the main unit, AC adapter, and internal baiting area.
4. Setup Instructions
Follow these steps to prepare your Ebung Electric Rodent Zapper for use:
- Separate the Unit: Gently separate the upper and lower parts of the trap. This action automatically disengages the circuit for safety.
- Apply Bait: Place a small amount of bait (e.g., peanut butter, seeds, cereals) into the designated bait cup located at the back of the trap. Use a cotton swab or toothpick to avoid leaving human scent.
- Reassemble the Unit: Carefully reattach the upper part to the lower part, ensuring it clicks securely into place.
- Choose Power Source:
- AC Power: Connect the provided AC adapter to the trap's adapter interface and plug it into a standard electrical outlet.
- Battery Power: Insert 4 'D' type batteries (not included) into the battery compartment located on the underside of the trap. Ensure correct polarity.
- Position the Trap: Place the trap on a flat surface in an area where rodent activity has been observed. For best results, position it along a wall with the entrance hole facing the wall.

Image 4.1: Visual instructions for setting up the trap, from separating the halves to connecting the power.
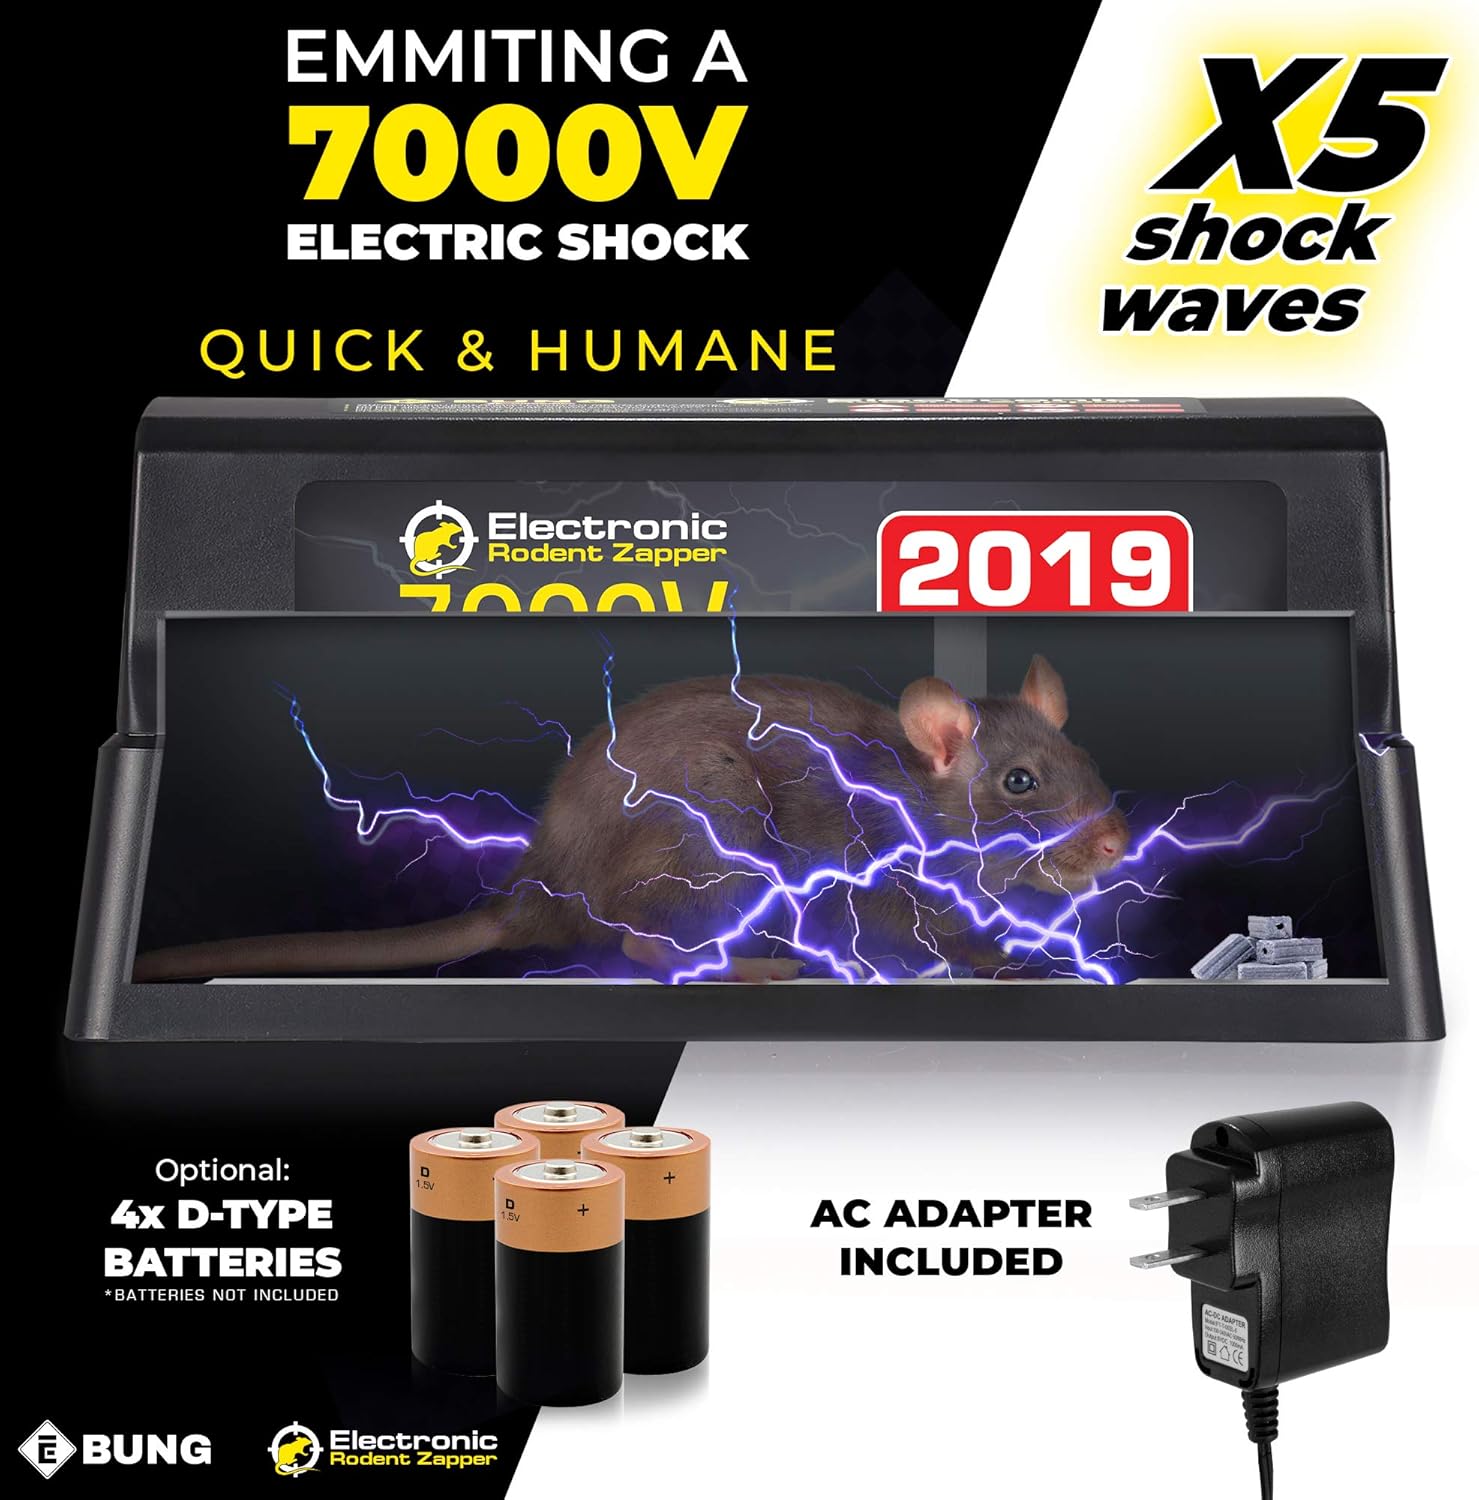
Image 4.2: Depiction of the 7000V electric shock and the two power options: AC adapter and D-type batteries.
5. Operating Instructions
Once the trap is set up and powered, it is ready to operate.
- Activate the Trap: Locate the ON/OFF switch on the side of the unit. Slide the switch to the 'ON' position. A green indicator light on the top of the trap will illuminate briefly, indicating it is active.
- Placement: Place the trap in areas of known rodent activity, such as basements, attics, kitchens, or garages. Ensure it is placed away from areas accessible to children and pets. The trap is suitable for various indoor environments including homes, restaurants, food factories, and storage facilities.
- Rodent Detection: The intelligent wireless circuit sensor detects when a rodent enters the trap and makes contact with the metal plates, delivering a 7000V electrical shock.
- Kill Indicator: After a successful kill, the green indicator light on the top of the trap will blink, signaling that a rodent has been caught and needs to be disposed of. Some models may also feature an external LED on an extension cable for easier notification in hard-to-reach areas.

Image 5.1: Recommended indoor placement areas for the rodent zapper.

Image 5.2: Illustration of the LED notification system, including the main trap LED and an external LED for convenience.
6. Maintenance and Cleaning
Regular maintenance ensures optimal performance and hygiene.
- Disposal: When the kill indicator light blinks, indicating a catch, turn off the device and disconnect the power source. To dispose of the rodent, simply lift the lid of the trap and empty the remains into a dustbin. This design allows for no-touch disposal.
- Cleaning: After disposal, the trap can be cleaned. Ensure the device is OFF and unplugged. Use a damp cloth or paper towel to wipe down the interior and exterior surfaces. Avoid using excessive water or harsh chemicals. Allow the trap to dry completely before re-baiting and reactivating.
- Re-baiting: Re-apply fresh bait as needed for continued effectiveness.

Image 6.1: Demonstration of the no-touch disposal method for captured rodents.
7. Troubleshooting
If you encounter issues with your Ebung Electric Rodent Zapper, refer to the following common problems and solutions:
- Trap Not Activating/No Indicator Light:
- Ensure the ON/OFF switch is in the 'ON' position.
- If using AC power, check that the adapter is securely plugged into both the trap and a working electrical outlet.
- If using battery power, ensure batteries are inserted correctly with proper polarity and are not depleted. Replace old batteries with new ones.
- Rodents Taking Bait But Not Zapped:
- Verify that the trap is powered on and the indicator light is active.
- Ensure the bait is placed deep enough within the bait cup so the rodent must fully enter the trap and contact the metal plates.
- Check for any obstructions preventing the rodent from reaching the metal plates.
- Rodents Avoiding the Trap:
- Relocate the trap to a different area where rodent activity is high, preferably along walls.
- Ensure no human scent is left on the trap by handling it with gloves during setup and baiting.
- Try different types of bait to determine what is most attractive to the rodents in your area.
8. Specifications
| Feature | Detail |
|---|---|
| Brand | Ebung |
| Model Number | 1 |
| Product Dimensions | 27.43 x 11.94 x 10.16 cm (10.8 x 4.7 x 4.0 inches) |
| Weight | 816 g |
| Power Source | AC Adapter (included) or 4 x 'D' Batteries (not included) |
| Output Voltage | 7000 V |
| Target Species | Mouse, Rat, Chipmunk, Vole |
| Color | Black |
| ASIN | B07KFP7Q1T |
| UPC | 796856326097 |

Image 8.1: Detailed dimensions of the Ebung Electric Rodent Zapper.
9. Warranty and Support
Specific warranty information for the Ebung Electric Rodent Zapper Model 1 is not provided in this manual. For warranty details, product support, or further assistance, please refer to the product packaging or contact Ebung customer service directly through their official channels.