1. Introduction
This manual provides comprehensive instructions for the installation, operation, and maintenance of your Keenso USB AUX Car Switch. This product is designed to integrate USB and auxiliary audio input capabilities into compatible BMW vehicles, enhancing your in-car entertainment and connectivity options. Please read this manual thoroughly before installation and use to ensure proper function and safety.
2. Product Overview
The Keenso USB AUX Car Switch is a replacement or upgrade unit that provides both a USB port for data transfer and device charging, and an AUX-in port for audio input. It comes with a wire harness for connection to your vehicle's existing system.

Image 2.1: Keenso USB AUX Car Switch with included wire harness and cables.

Image 2.2: Detailed view of the USB and AUX input ports.
3. Compatibility
This USB AUX Car Switch is designed for specific BMW models. Please verify your vehicle's compatibility before installation.
- E87LCI / E88 / E90 / E90LCI / E91 / E91LCI / E92 / E92LCI / E93 / E93LCI
- F07GT / F10 / F11 / F18 / E12 / F13 / F01 / F02 / F03 / F04HYB
- F25 / X5E70LCI / X6E71 / X6E72 / HYB Z4 E89
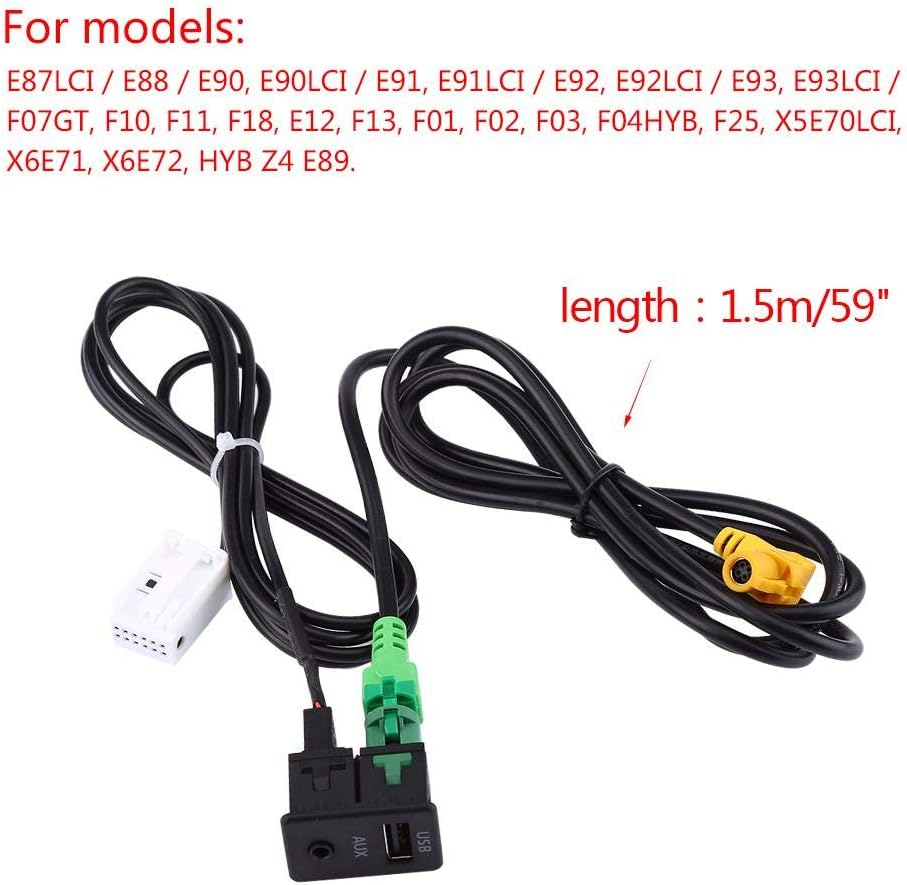
Image 3.1: List of compatible BMW models.
4. Setup and Installation
The installation of this USB AUX switch involves connecting the provided wire harness to your vehicle's audio system. While designed for ease of installation, professional installation is recommended if you are unfamiliar with car audio wiring or dashboard disassembly.
General Installation Steps:
- Preparation: Ensure your vehicle's ignition is off and the battery is disconnected to prevent electrical shorts.
- Access: Carefully remove the trim panels and existing switch unit from your vehicle's center console or designated installation area to access the wiring.
- Connection: Connect the provided wire harness to the corresponding ports on your vehicle's head unit or existing wiring. The harness is designed for a direct fit.
- Mounting: Insert the new Keenso USB AUX switch into the designated slot in your vehicle's console. Ensure it sits flush.
- Testing: Reconnect the battery and test the functionality of both the USB and AUX ports before reassembling all trim panels.
- Reassembly: Securely reattach all removed trim panels.
Note: Incorrect installation can lead to damage to the product or your vehicle's electrical system. If you encounter any difficulties, consult a qualified automotive technician.

Image 4.1: Example of the USB AUX switch installed in a vehicle's console.

Image 4.2: Detailed view of the switch and its cable connections.
5. Operating Instructions
Using the USB Port:
- Data Transfer: Connect a USB storage device (e.g., flash drive) to the USB port. Your vehicle's infotainment system should recognize the device, allowing you to play media files. Refer to your vehicle's manual for specific media playback instructions.
- Device Charging: Connect your smartphone or other USB-powered device to the USB port using a compatible cable. The port provides power for charging.
Using the AUX-in Port:
- Audio Input: Connect an audio device (e.g., smartphone, MP3 player) to the AUX-in port using a 3.5mm audio cable. Select the AUX input source on your vehicle's infotainment system to play audio from the connected device.
6. Maintenance
The Keenso USB AUX Car Switch requires minimal maintenance. Follow these guidelines to ensure longevity:
- Keep the USB and AUX ports free from dust and debris. Use a soft, dry cloth to clean the surface of the switch.
- Avoid spilling liquids on the unit.
- Do not use harsh chemicals or abrasive cleaners, as these can damage the plastic finish.
- Ensure cables are connected and disconnected gently to prevent damage to the ports.
7. Troubleshooting
If you experience issues with your Keenso USB AUX Car Switch, refer to the following common problems and solutions:
| Problem | Possible Cause | Solution |
|---|---|---|
| USB device not recognized / No charging |
|
|
| No audio from AUX-in |
|
|
| Switch does not fit flush in console |
|
|
| Cables do not connect to head unit |
|
|
8. Specifications
| Feature | Detail |
|---|---|
| Model Number | KS-USB-AUX-01 |
| Brand | Keenso |
| Connector Type | Auxiliary, USB |
| Number of Ports | 2 (1x USB, 1x AUX-in) |
| Cable Length | 1.5 meters (59 inches) |
| Material | PVC Plastic, ABS Finish |
| Color | Black |
| Item Weight | 0.09 Kilograms |
| Specific Uses | Cell Phone, GPS, Audio Playback |
| Data Transfer | High speed data transfer supported |
| Power Output | Device charge power supported via USB |
9. Warranty Information
Keenso is committed to customer satisfaction. While a formal warranty period is not specified, if you encounter any issues with your Keenso USB AUX Car Switch, please contact customer support. We aim to provide assistance and resolve concerns within 24 hours.
10. Customer Support
For technical assistance, troubleshooting, or any product-related inquiries, please contact Keenso customer support via email. Refer to your purchase documentation or the retailer's website for specific contact details.
We strive to provide the best customer care and will respond to your inquiries promptly.